
Erli Integration — Setup Guide
This tutorial takes you from nothing to a working Erli marketplace connection in OpenLinker: adding the connection, installing webhooks, creating your first offer, syncing stock, and receiving orders. It covers both what to configure on the Erli side and the OpenLinker click-through, with the equivalent API calls noted as asides for developers.
For the architecture and design rationale behind the adapter, see ADR-025 and the product spec #978. For day-2 operations — scheduler env flags, known Erli quirks, and troubleshooting — see the Erli runbook.
What you get
Section titled “What you get”Erli is a Polish marketplace. The OpenLinker Erli adapter (erli.shopapi.v1)
delivers two capabilities:
- OfferManager — create/update offers (listings), push stock, reconcile offer status, restore stock on cancellation.
- OrderSource — ingest Erli orders into OpenLinker (webhook trigger + inbox-poll backstop).
Prerequisites
Section titled “Prerequisites”1. A configured PrestaShop connection (do this first)
Section titled “1. A configured PrestaShop connection (do this first)”OpenLinker lists your own catalog onto Erli — Erli does not hold the master product data. Before connecting Erli you need a working PrestaShop connection that acts as:
- the master catalog Erli offers source their product data, images, and stock from, and
- the order destination that Erli orders are fulfilled to.
If you don’t have one yet, set it up first — see Connecting a Platform → PrestaShop walkthrough.
For Erli orders to be fulfilled on PrestaShop, the destination shop must also:
- have the buyer’s country active (PrestaShop → International → Locations → Countries). Erli sells in Poland, so Poland must be enabled — an order to an inactive country fails at order-create with “Country … not found / not active”.
- have the OpenLinker PrestaShop module installed and its webhooks configured
on the connection (Connection detail → Install webhooks). OpenLinker creates
the PrestaShop order through the module’s
validateOrderendpoint, which is HMAC-signed with the secret provisioned during webhook install — without it, order-create fails with “Webhook secret not found”.
Images must be public
https. Erli rejects offers that have no publichttpsimage, and OpenLinker drops any non-https/non-public image URL when building the offer. Make sure your master products carry publichttpsimages (a PrestaShop dev store onhttp://localhostwill not work). See Create an offer.
2. An Erli Shop API key
Section titled “2. An Erli Shop API key”You generate this in your Erli seller panel — it is the only credential
OpenLinker needs, sent as a Bearer token on every request.
| What | Where / how |
|---|---|
| Shop API key | Erli seller panel → moje Erli (top-right) → Ustawienia sklepu → Metoda integracji → Własna integracja po API → Wygeneruj nowy klucz. The key is shown once — copy it straight into OpenLinker. |
| Sandbox account (for testing) | Request sandbox access from Erli and log in to the sandbox seller panel. Sandbox base URL: https://sandbox.erli.dev/svc/shop-api. Production: https://erli.pl/svc/shop-api. |
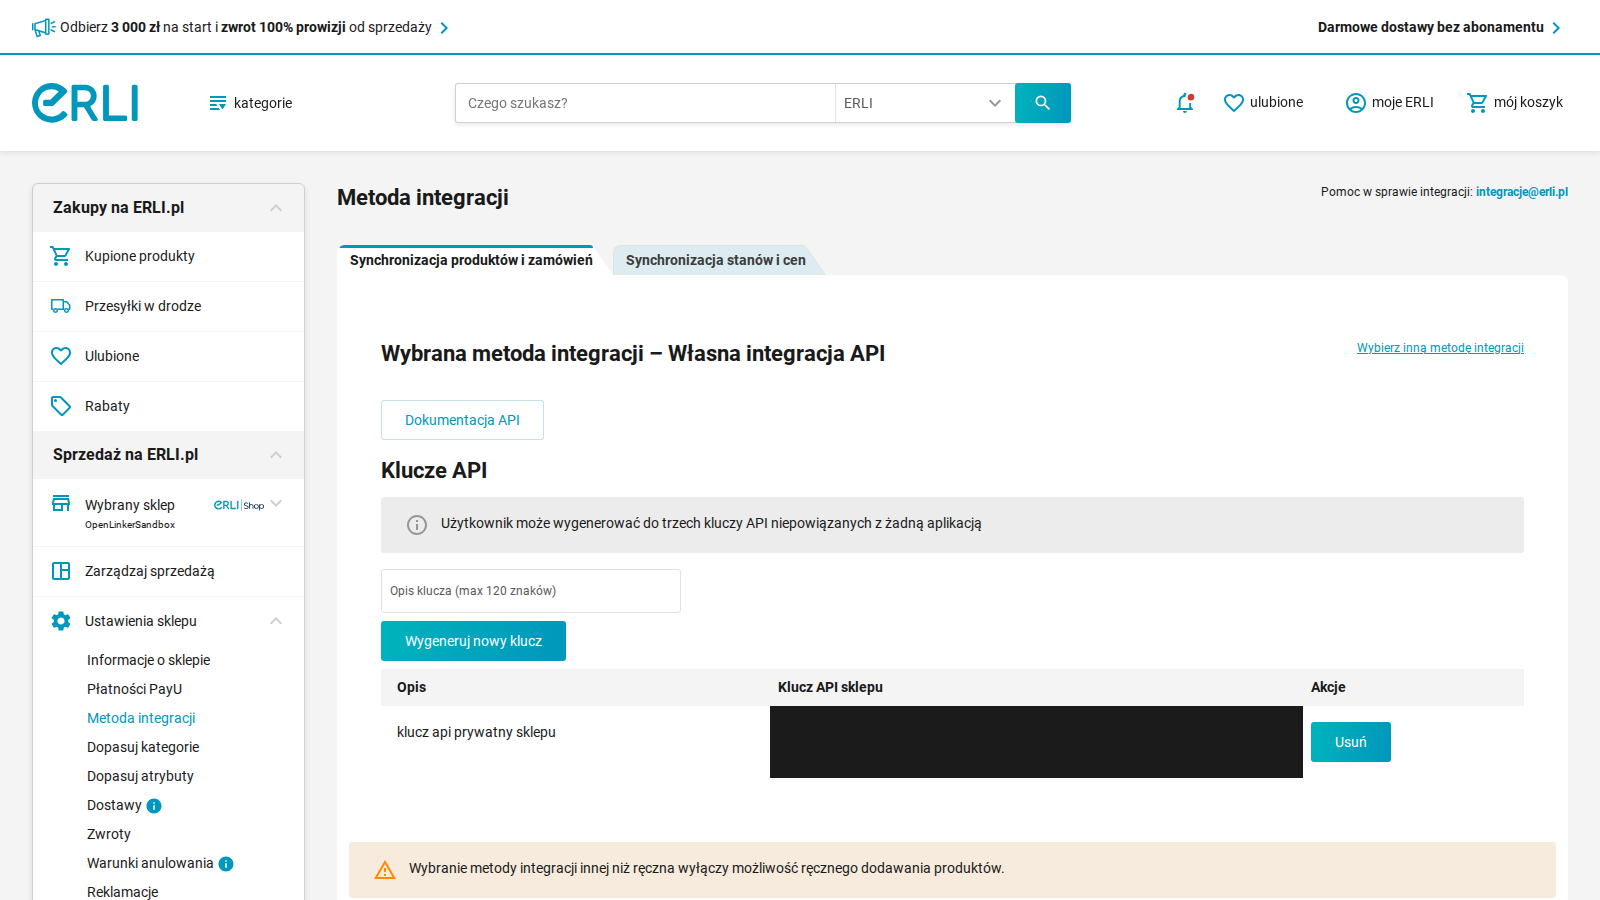
The Erli “Metoda integracji” screen. Pick Własna integracja API, then under Klucze API click Wygeneruj nowy klucz to mint the Shop API key. (Key value redacted.)
Heads-up. Choosing an API integration method disables manual product adding in the Erli panel — products and offers are then managed via the API (i.e. by OpenLinker).
3. Add the connection in OpenLinker
Section titled “3. Add the connection in OpenLinker”From the OpenLinker dashboard:
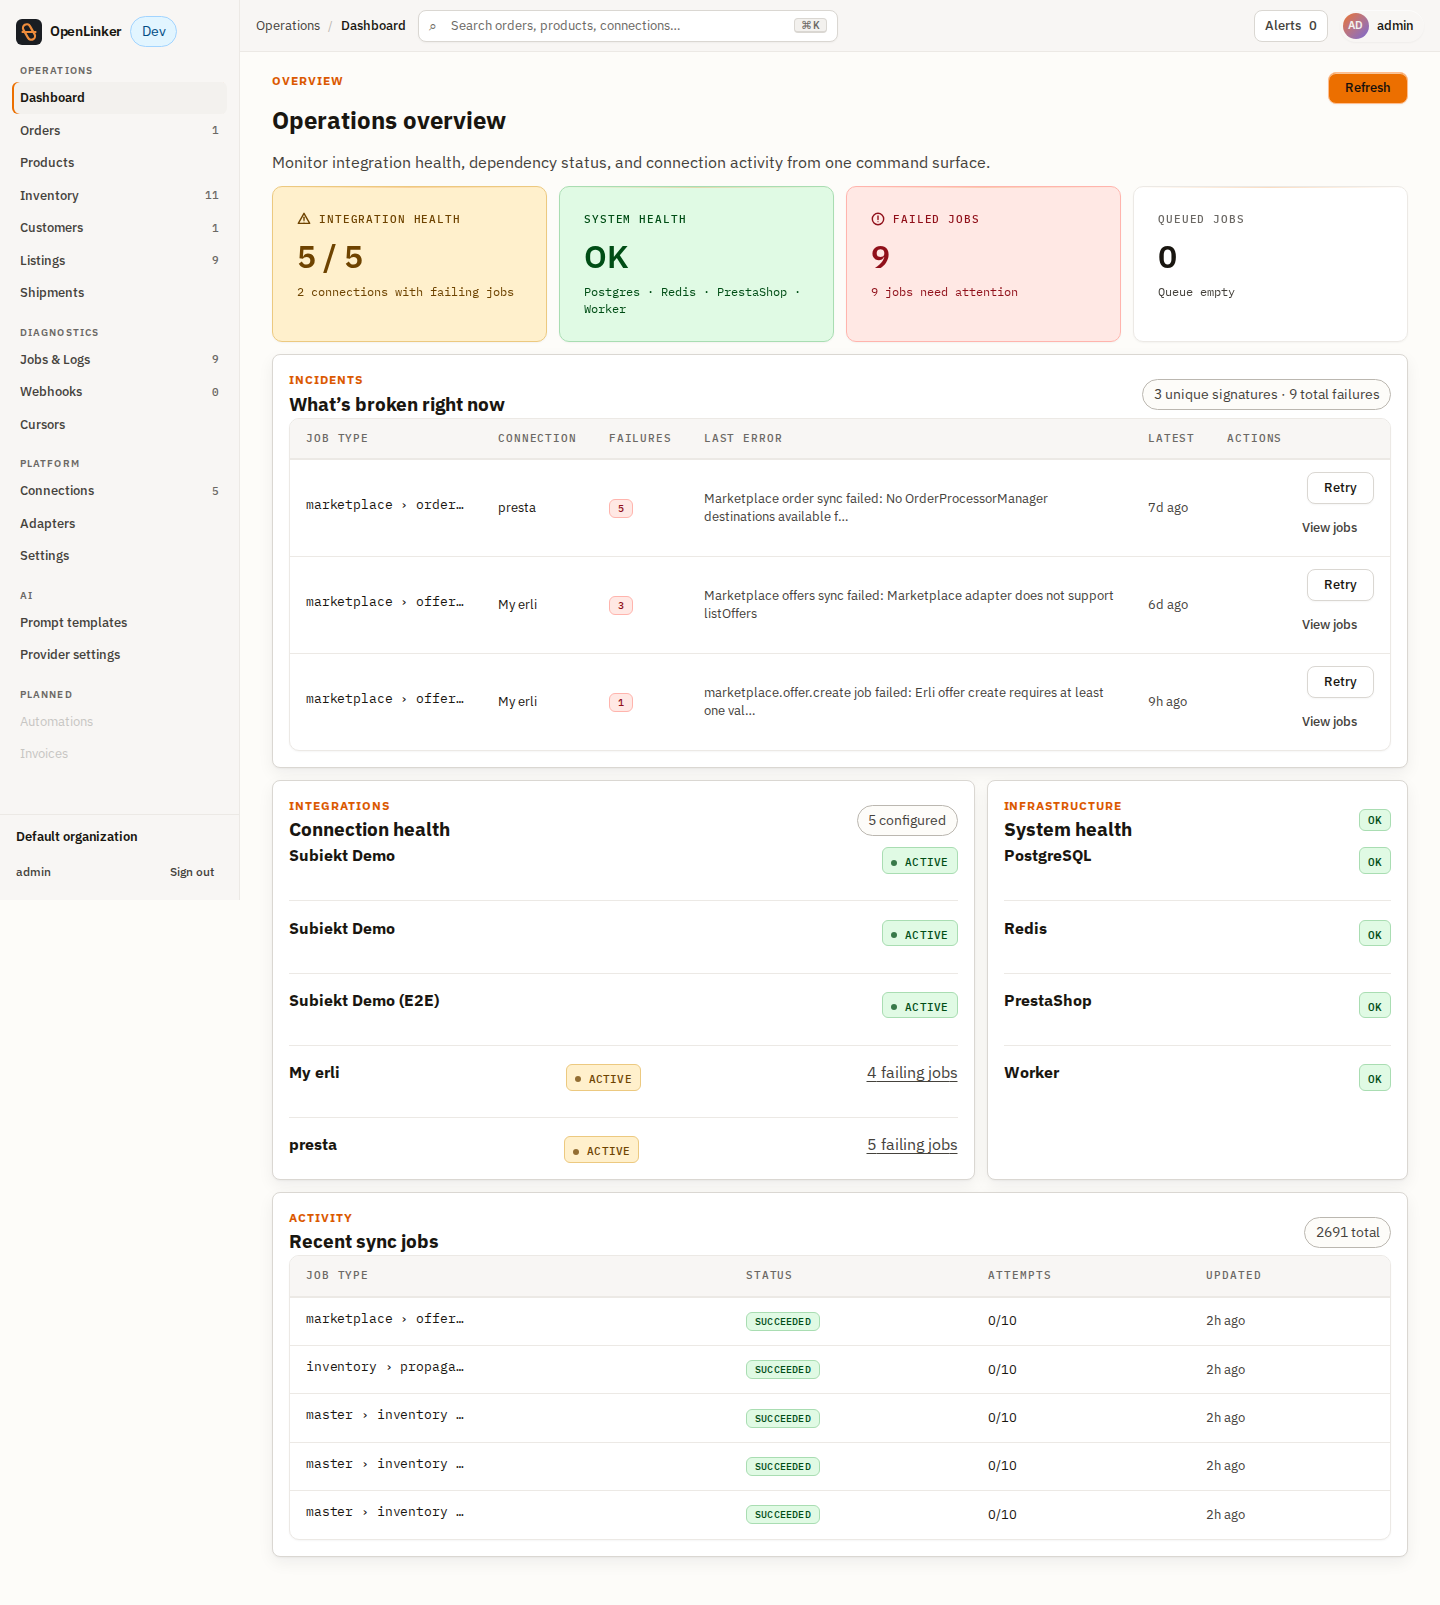
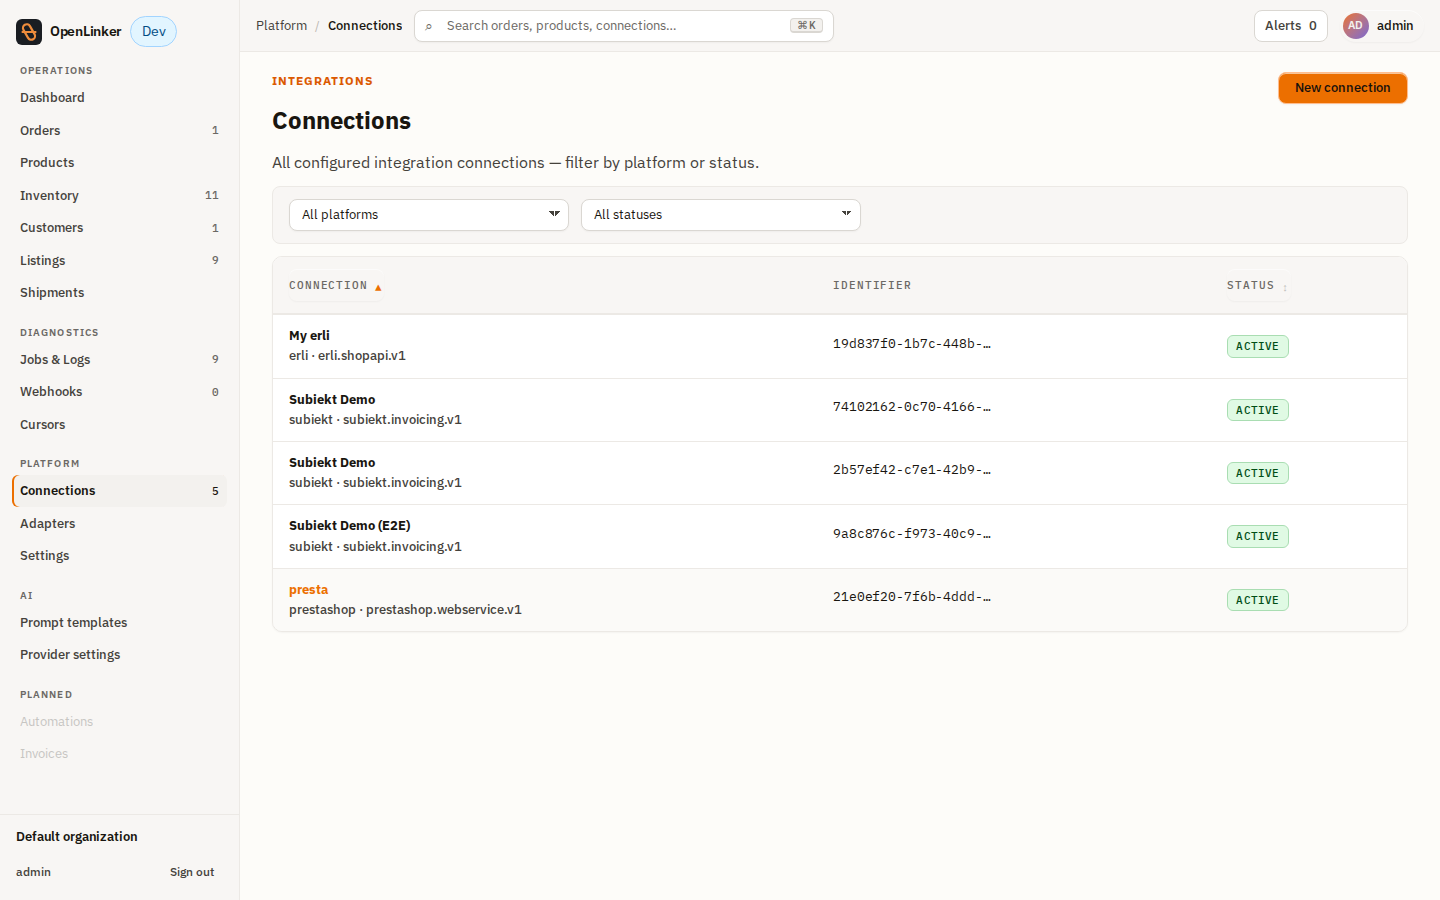
Open Connections to see your configured integrations:
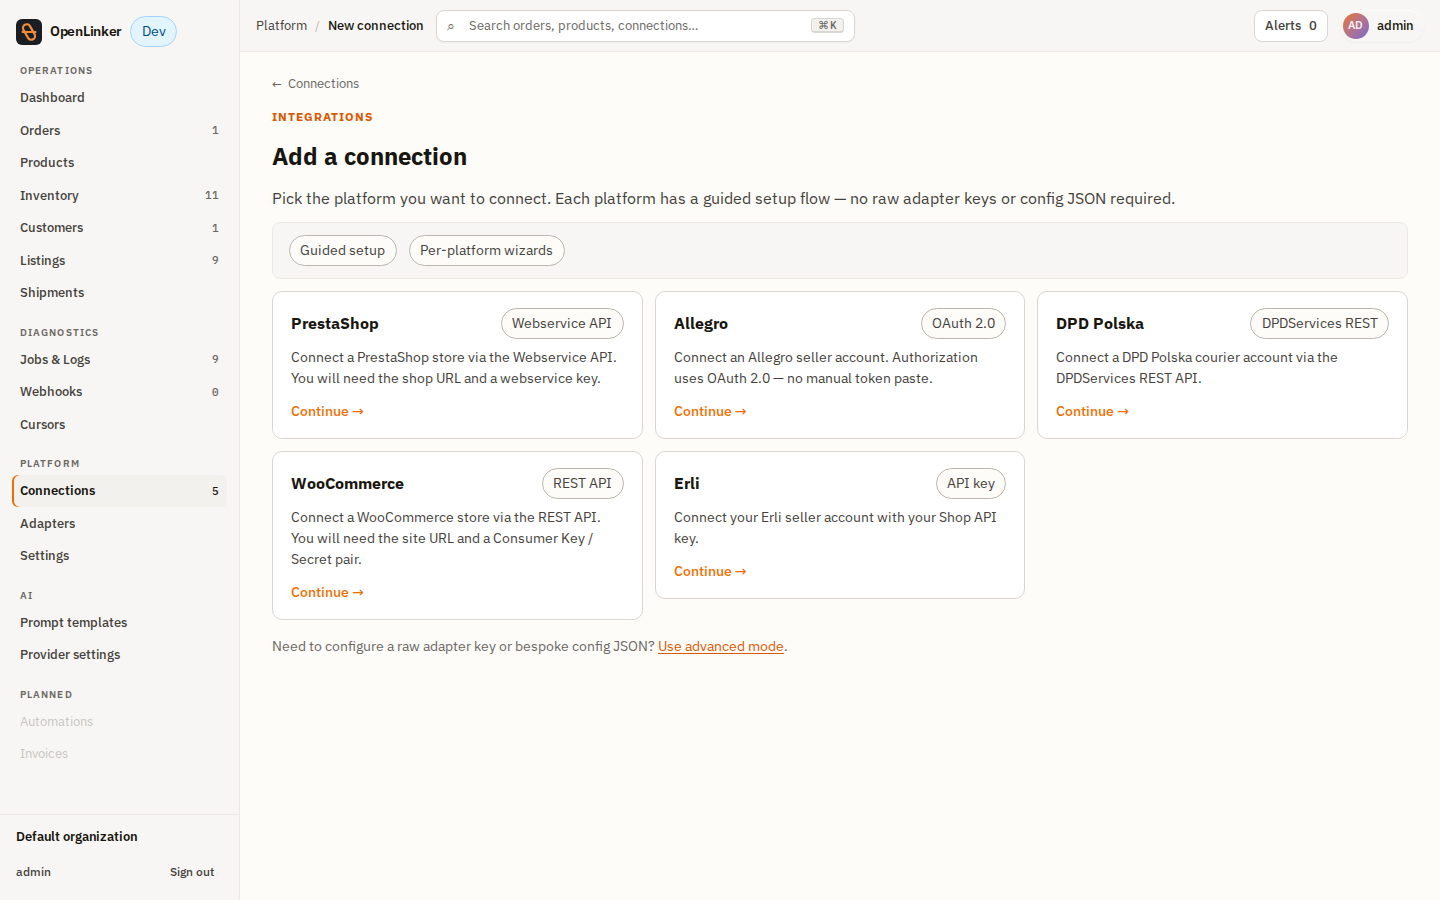
Click Add connection (/connections/new) and pick the Erli card.
Fill the guided Erli setup form (/connections/new/erli):
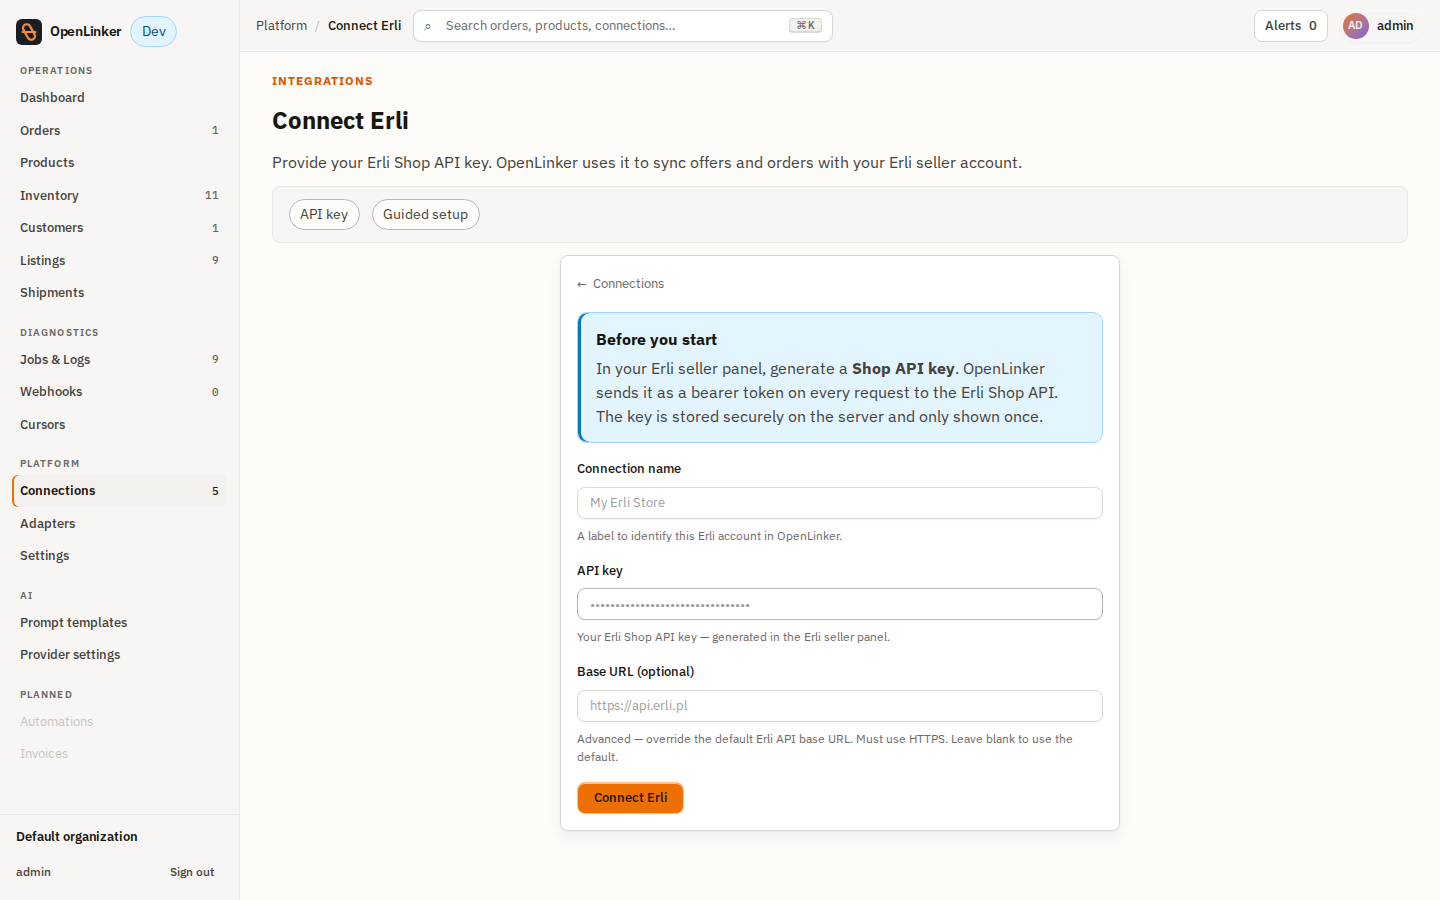
| Field | Value |
|---|---|
| Connection name | A label, e.g. My Erli Store |
| API key | The Shop API key from your Erli seller panel |
| Base URL (optional, advanced) | Leave blank for production. For the sandbox, set https://sandbox.erli.dev/svc/shop-api. Must be https and an Erli-owned host. |
Click Connect Erli. The connection is created with the adapter’s default capabilities (OfferManager + OrderSource) and an ACTIVE status.
Two extra config values are needed for the full flow but aren’t on the guided form — set them afterwards via Edit connection:
callbackBaseUrl— the public OpenLinker URL Erli posts webhooks to (required to install webhooks — see step 5).defaultDispatchTime— e.g.{ "unit": "day", "period": 2 }, a shop-wide default handling time applied when an offer doesn’t specify its own (Erli requires a dispatch time).Developer aside. The same operations are available over the API:
POST /connectionsto create,PATCH /connections/:idwith a mergedconfigto setcallbackBaseUrl/defaultDispatchTime.
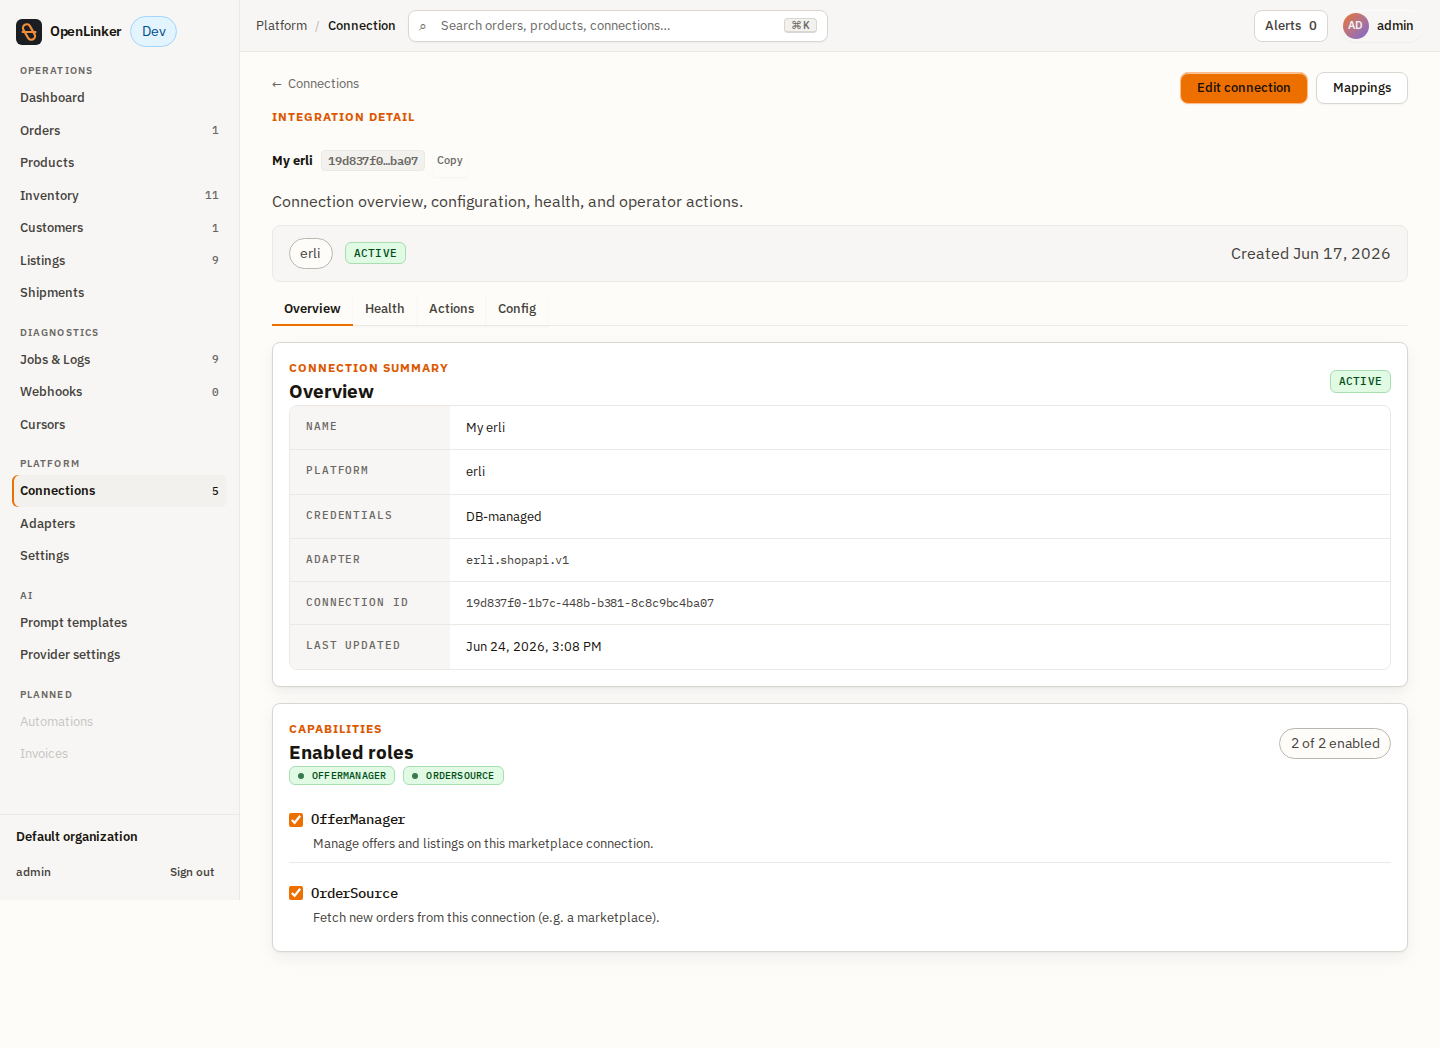
After creation you can review the connection on its detail page — platform, adapter, status, and enabled capabilities:
4. Test the connection
Section titled “4. Test the connection”On the connection (setup form or Connection detail → Actions), click
Test connection. OpenLinker calls Erli’s GET /me with your API key. A green
result confirms the key is valid and Erli is reachable.
5. Install webhooks
Section titled “5. Install webhooks”Webhooks are the low-latency trigger for order events. They are optional for correctness — a scheduled inbox poll backstops them (see Orders) — but recommended.
- Set
config.callbackBaseUrlon the connection to a URL Erli can reach:- Production: your public OpenLinker URL (e.g.
https://ol.example.com). - Local dev: Erli is a cloud service and cannot reach
localhost. Use a tunnel that exposes your local API (:3000) on a publichttpsURL — e.g.cloudflared tunnel --url http://localhost:3000— and setcallbackBaseUrlto the tunnel URL.
- Production: your public OpenLinker URL (e.g.
- On Connection detail → Actions, click Configure webhooks.
OpenLinker rotates a per-connection webhook secret and registers two hooks with
Erli (orderCreated, orderStatusChanged). The callback URL is
{callbackBaseUrl}/webhooks/erli/{connectionId}; Erli echoes the secret as a
bearer token on each delivery for verification. A successful install returns
{ "webhooksConfigured": true }.
Developer aside.
POST /connections/:id/webhooks/install.
6. Create an offer
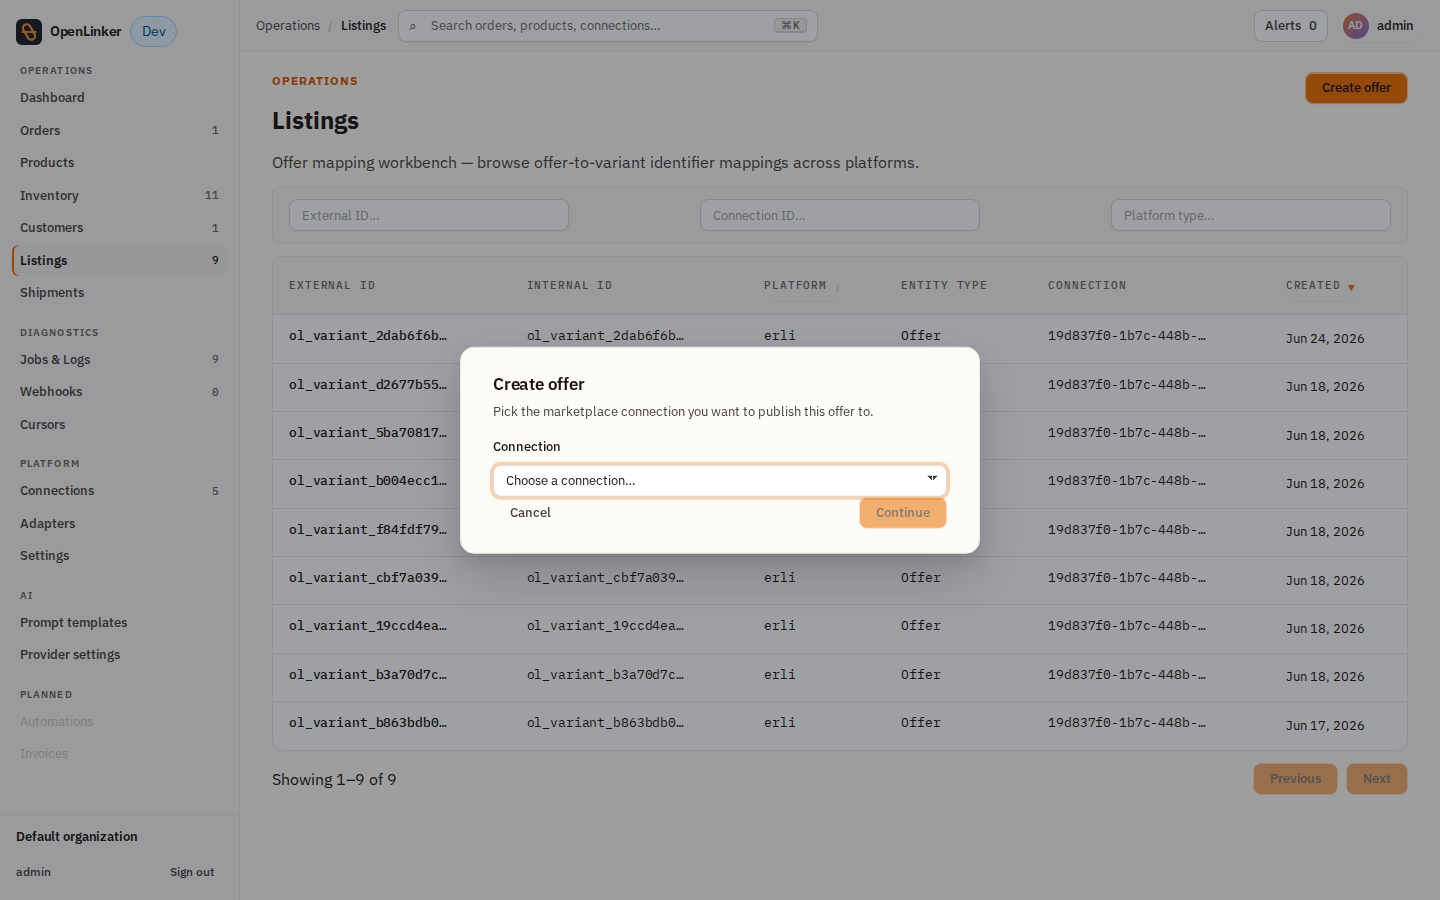
Section titled “6. Create an offer”From Listings, click Create offer:
Pick the Erli connection in the dialog and click Continue:
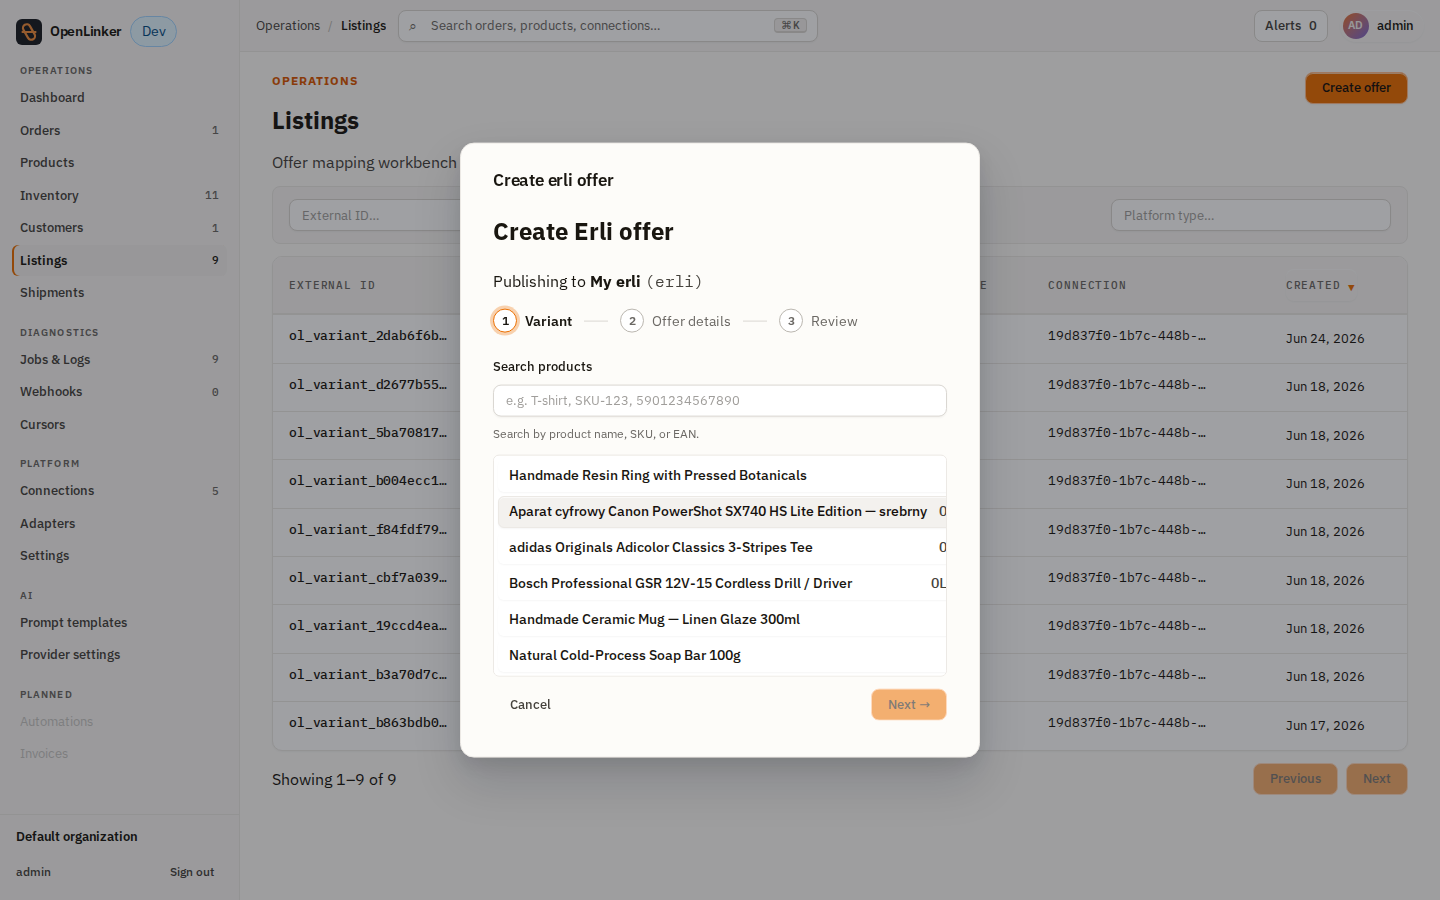
The wizard has three steps — Variant → Offer details → Review.
Step 1 — Variant. Browse or search your catalog for the product to list:
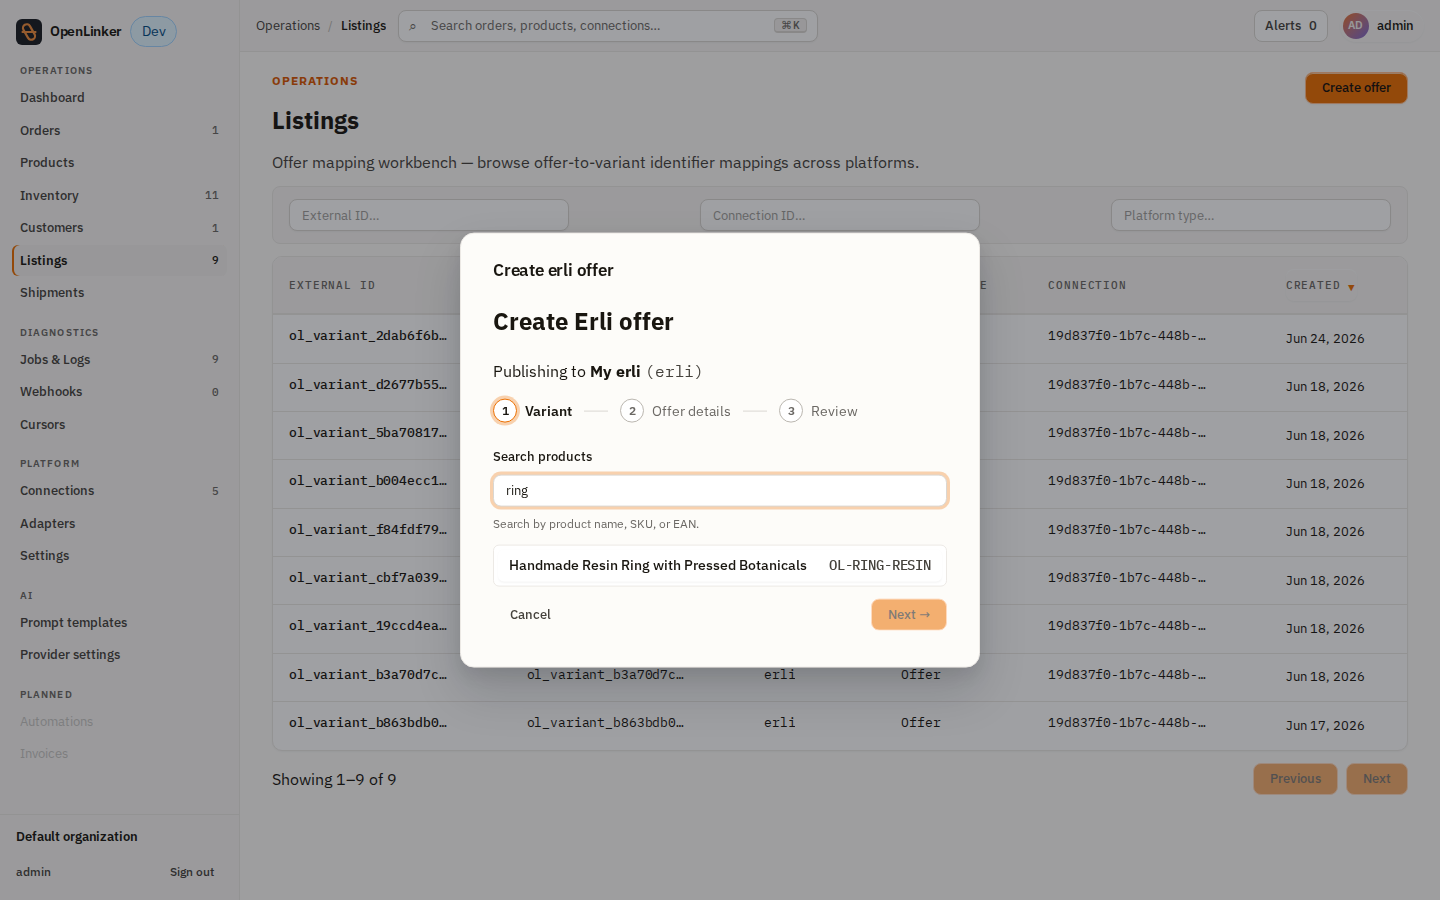
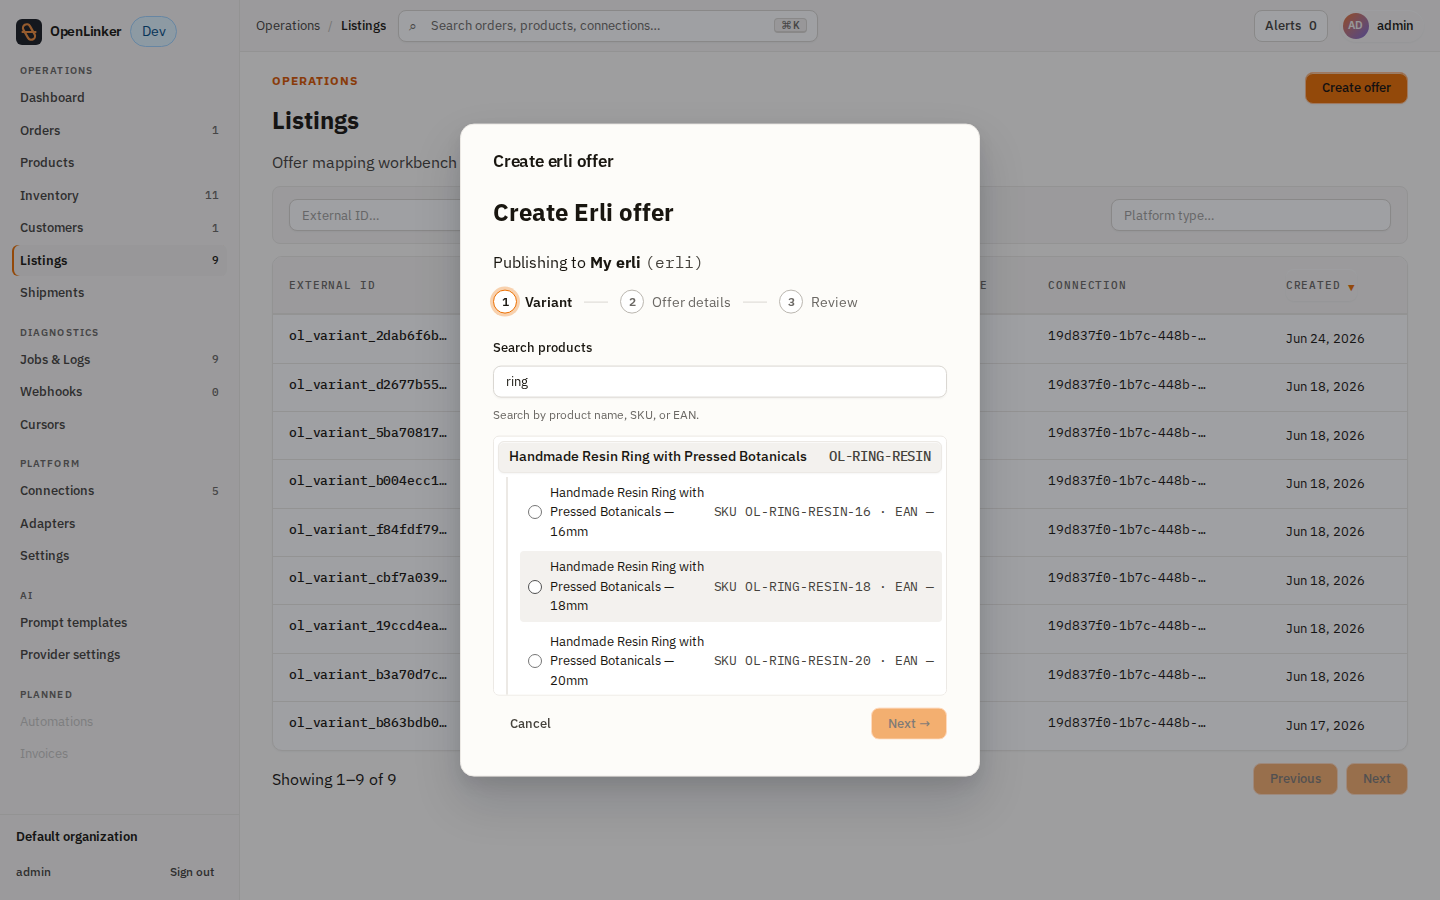
Search by product name, SKU, or EAN, then expand a product and pick the variant to publish:
Step 2 — Offer details. Set the title, price (PLN), stock, dispatch time, and
(optionally) a category. The dispatch time defaults to the connection’s
defaultDispatchTime; the category can be left blank to resolve from the variant
barcode at create time:
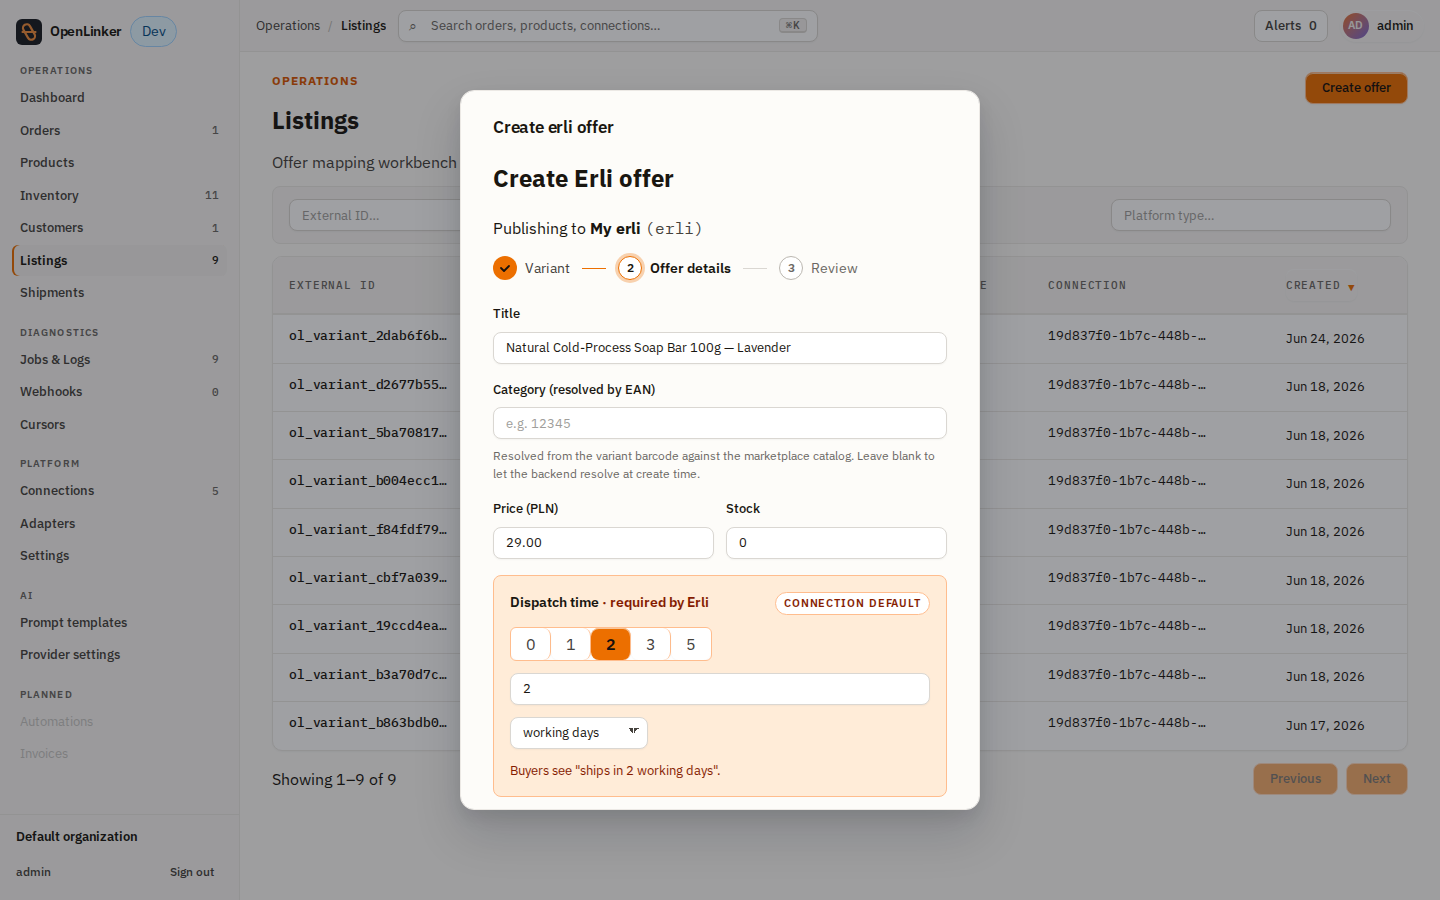
Step 3 — Review. The final step summarises the chosen values (variant, price, stock, dispatch, images, publish-as-draft). Submitting enqueues the creation job; Erli accepts it asynchronously (HTTP 202) and the offer starts as a draft.
Image requirement (gates submit). Erli rejects offers without at least one public
httpsimage. OpenLinker pulls images from the master product and drops any non-https/non-public URL. If the master product has no usable image, the wizard blocks at the variant step and submit fails with “overrides.imageUrls must be an array of valid URLs”. Ensure the master product carries publichttpsimages (or passoverrides.imageUrlsvia the API).
Developer aside. The wizard posts to the offer-creation API; you can also create offers programmatically (single or bulk, one offer per variant) via the same endpoint.
Verify your offers
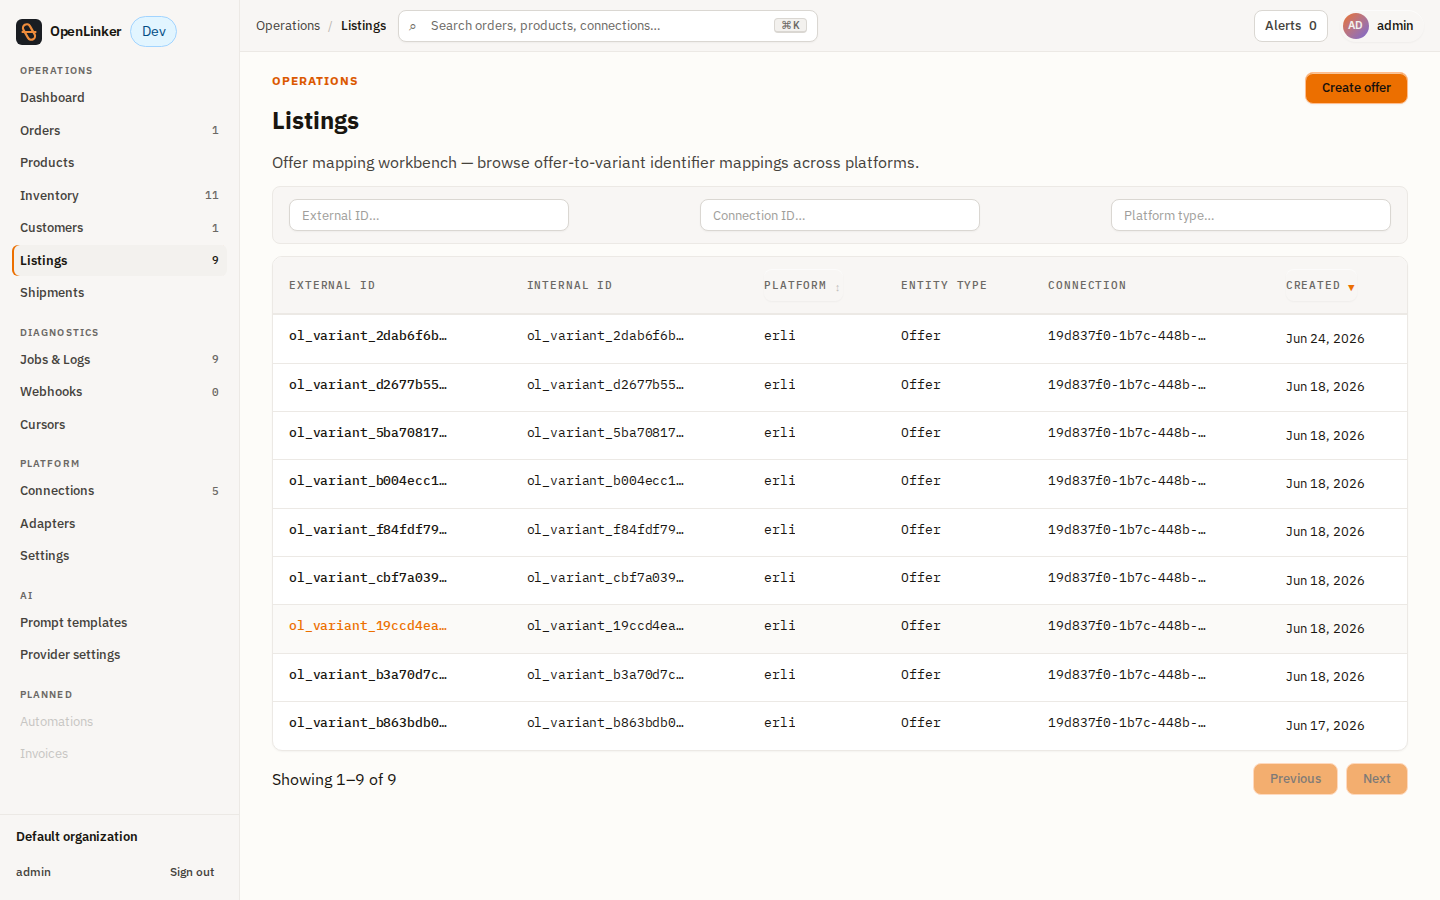
Section titled “Verify your offers”Created offers appear in Listings, the offer-to-variant mapping workbench. Erli keys each offer by the OpenLinker variant id, so the row shows the variant, platform erli, the target connection, and the created date:

Use the External ID / Connection / Platform filters at the top of Listings to
narrow to a single Erli connection’s offers. Click a row to open the listing
detail page — it shows the mapping (variant, external/internal id, platform,
connection) and the offer-creation status (DRAFT for a freshly created Erli
offer that is set up and ready to list):
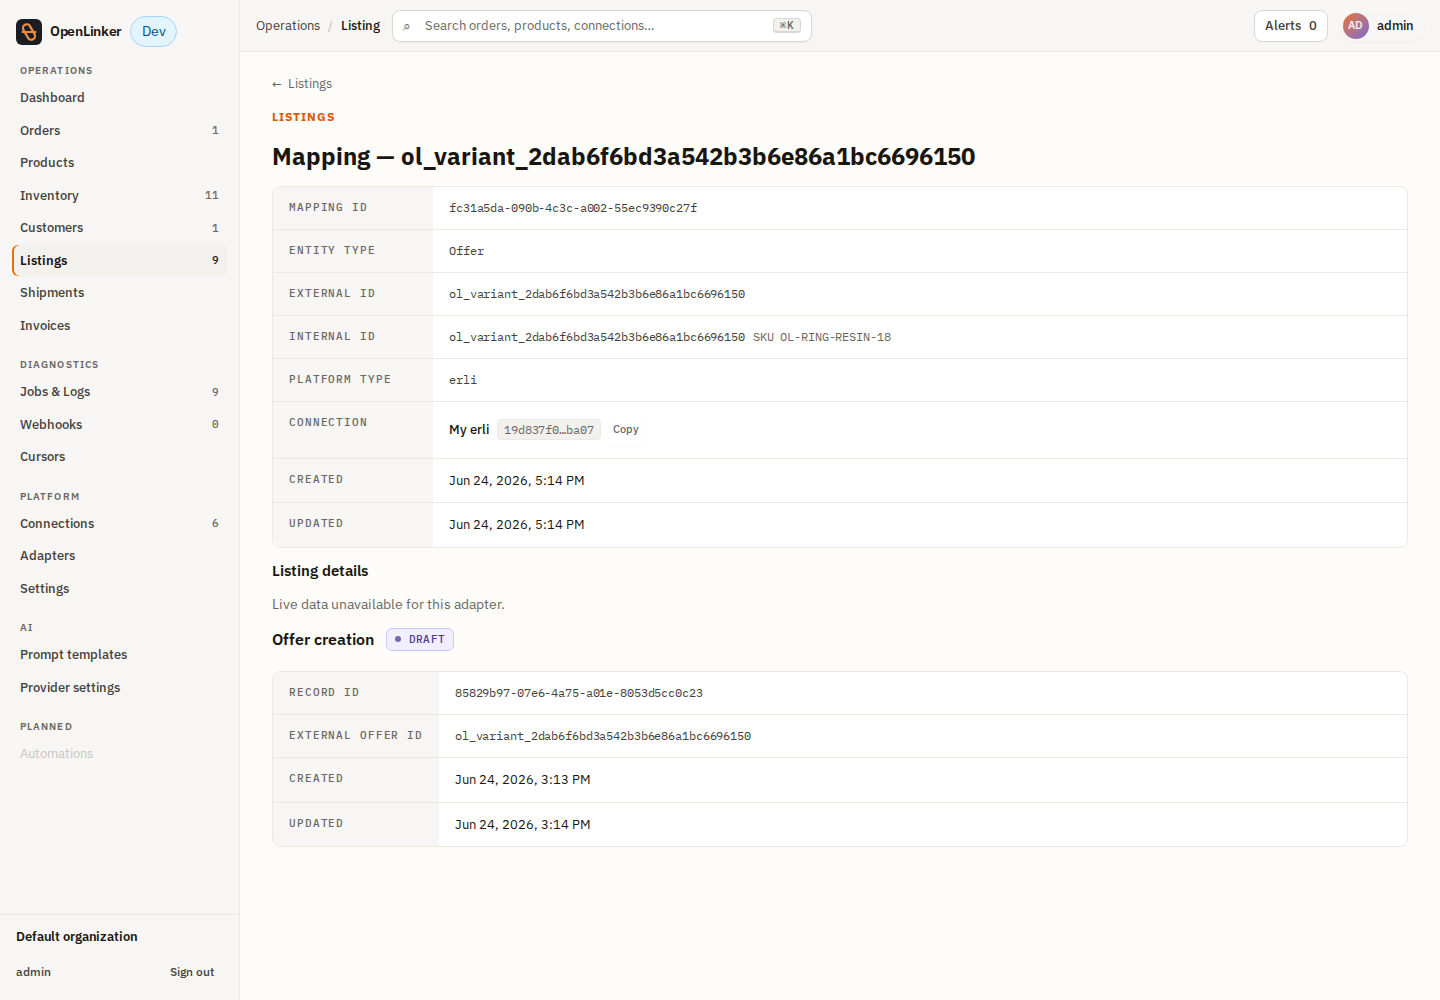
The “Listing details” panel reads “Live data unavailable for this adapter” until Erli’s async write settles — because Erli writes are async (~20-min cache lag), a freshly created offer’s live marketplace status becomes authoritative only after offer-status reconciliation runs (see the runbook).
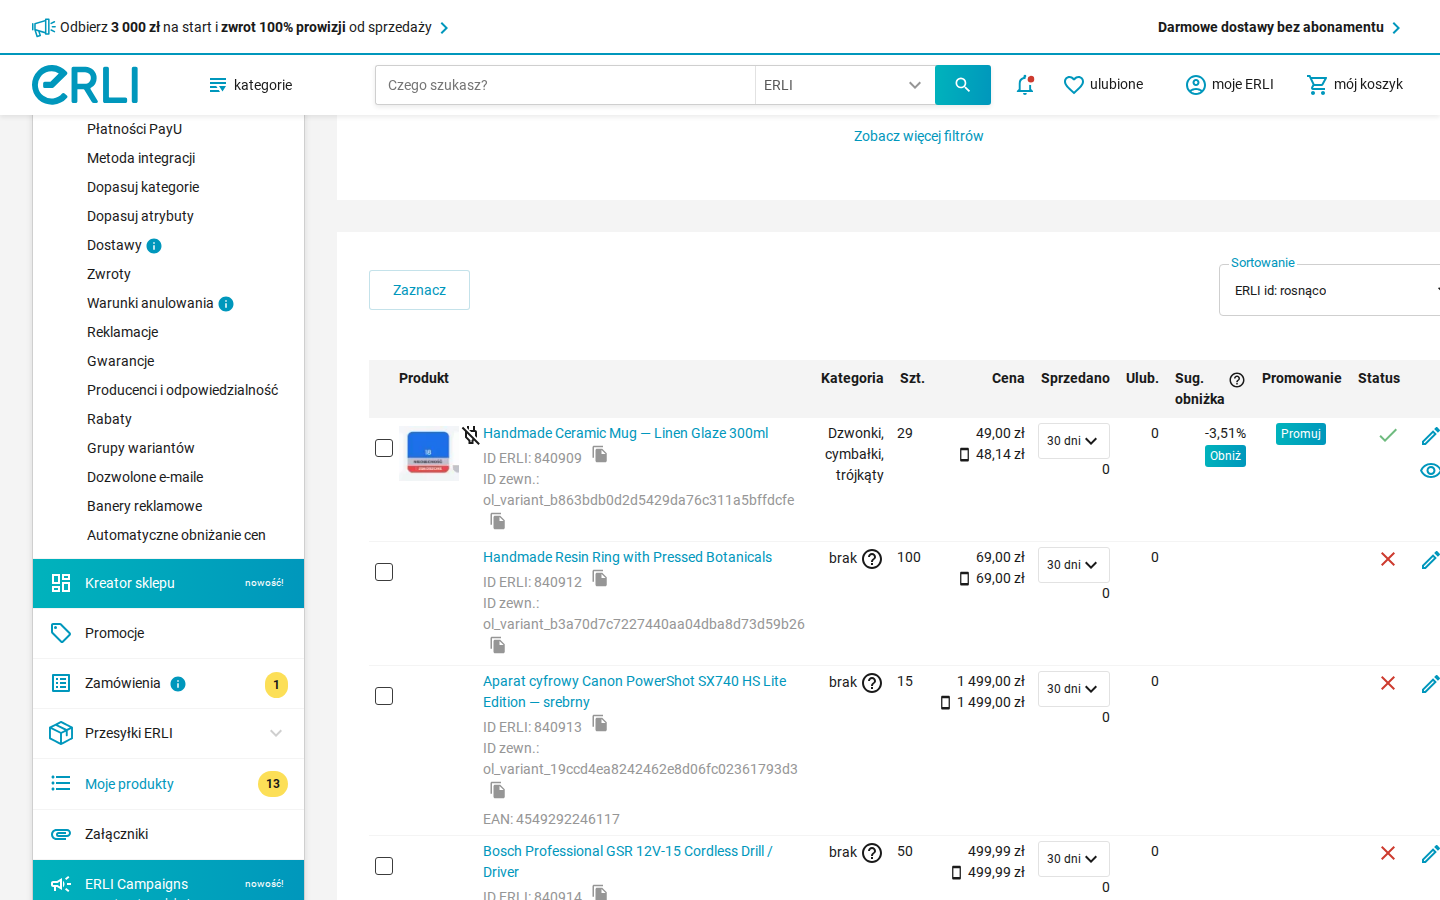
On the Erli side, the published offers appear in your seller panel under
Moje produkty. Each OpenLinker-created offer carries its OpenLinker variant
id as the external id (ID zewn. = ol_variant_…), alongside the Erli-assigned
ID ERLI, the stock (Szt.) OpenLinker pushed, and the price:
7. Stock sync
Section titled “7. Stock sync”Stock propagation is event-driven from your master catalog — under normal operation there is no manual step:
master inventory change → inventory.propagateToMarketplaces → marketplace.offerQuantity.update (per Erli offer) → Erli PATCH /products/{id} { stock }When the master (e.g. PrestaShop) stock for a mapped product changes, the next master-inventory sync writes the new value and OpenLinker pushes it to every linked Erli offer automatically. The OpenLinker Inventory view reflects the new master quantity for the mapped variant:

Triggering a stock sync manually
Section titled “Triggering a stock sync manually”Stock to Erli always originates from the master (PrestaShop) — Erli is a
destination, not an inventory master. So to force a stock push without waiting for
the scheduled cycle, trigger the master inventory sync on the PrestaShop
connection (the one holding the InventoryMaster capability):
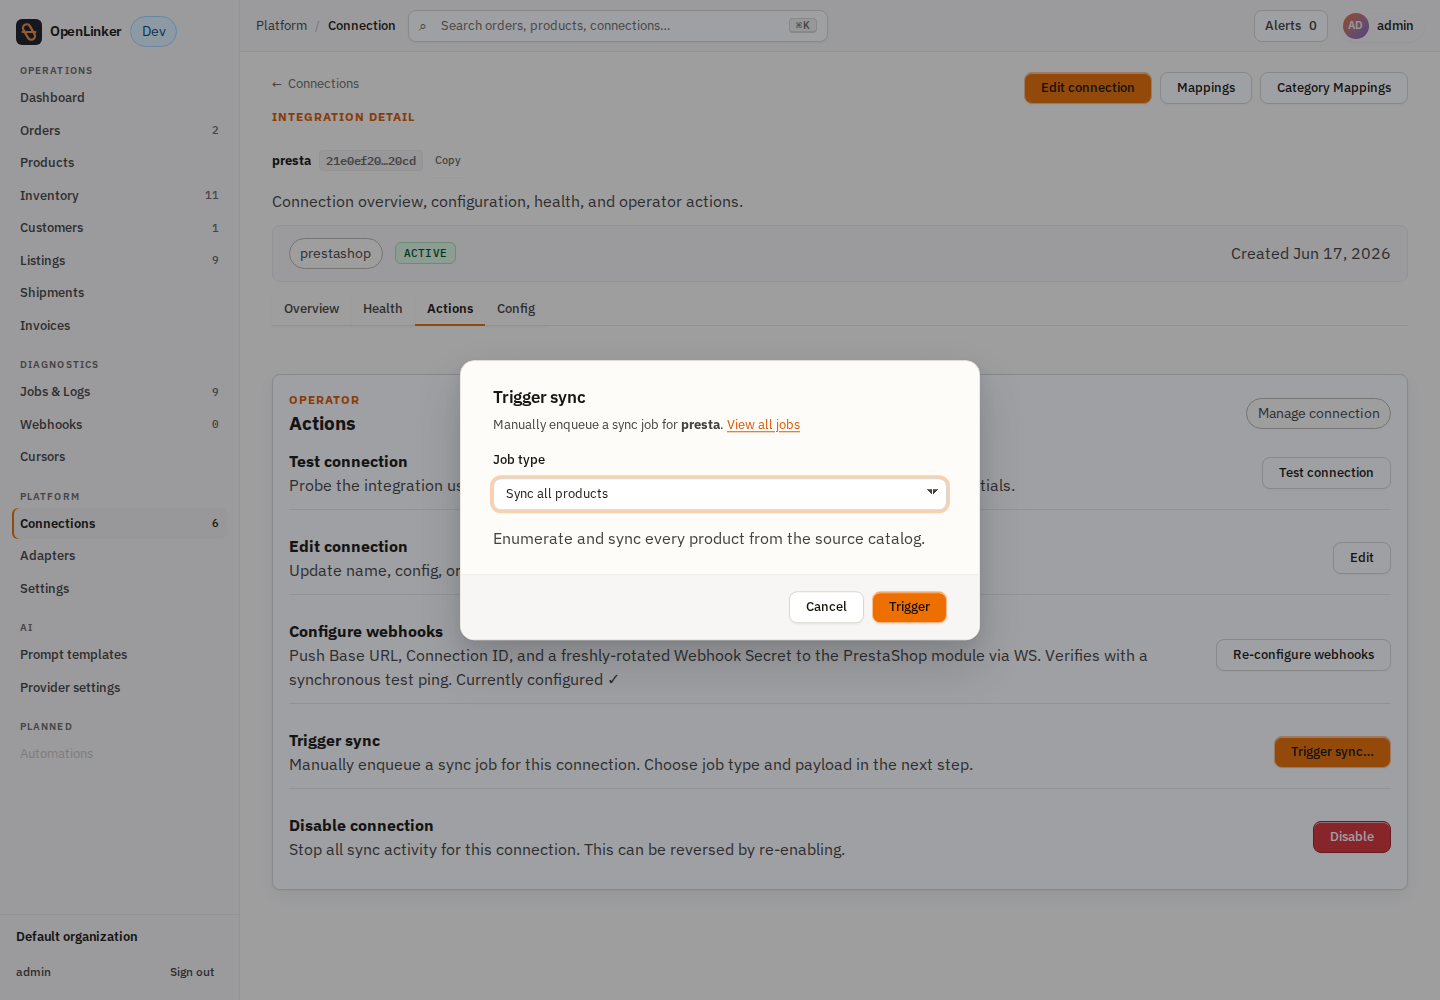
- Open the PrestaShop connection → Actions tab → Trigger sync….
- Pick Sync all inventory (
master.inventory.syncAll) — or Sync inventory by ID (master.inventory.syncByExternalId) for one product — and click Trigger.
OpenLinker re-reads master stock and propagates each change to the linked Erli
offers (marketplace.offerQuantity.update → Erli PATCH). Watch progress under
Jobs & Logs.
The Erli connection’s own Trigger sync offers
marketplace.offers.sync(refresh offer mappings) andmarketplace.orders.poll(pull orders) — not stock, because stock is owned by the master. Frozen-stock handling and the offer-status reconciliation scheduler are covered in the runbook.
8. Update an offer (price, title, description)
Section titled “8. Update an offer (price, title, description)”Unlike stock, OpenLinker does not auto-propagate price from the master —
price, title, and description are operator-initiated changes to the offer’s
content fields. OpenLinker sends them to Erli via updateOfferFields
(PATCH /products/{id}, sparse), enqueued as a marketplace.offer.updateFields
job (HTTP 202 — async, like every Erli write).
From the UI:
- Open the offer’s listing-detail page (Listings → pick the Erli mapping).
- Click Edit offer in the page header — this opens the edit drawer with Title, Price (PLN; the currency is read-only — Erli is PLN-only), and Description fields.
- Fill one or more fields, then click Save changes. The button stays disabled until you change something, so an empty save never hits the API.
- A “Update dispatched” toast confirms the change was queued as a
marketplace.offer.updateFieldsjob; the drawer closes.
You can draft the description with Suggest with AI — available once the offer is linked to a product variant (the suggestion uses the variant’s master content, falling back to the master template when no Erli-specific template exists).
API (equivalent):
POST /listings/connections/{connectionId}/offers/{offerId}/fields{ "price": { "amount": "59.00", "currency": "PLN" }, "title": "…", "description": { "sections": [ { "items": [ { "type": "TEXT", "content": "…" } ] } ] } }At least one field is required; the response returns a { jobId }.
Frozen fields. If a field was edited directly in the Erli panel, Erli marks it
frozenand OpenLinker excludes it from the update (it won’t overwrite a seller’s manual edit) — the drawer still reports success even when a frozen field is silently skipped. Surfacing skipped fields in the UI is a follow-up. See the runbook.
9. Bulk offer creation
Section titled “9. Bulk offer creation”To list many products on Erli at once, use the bulk wizard instead of the single-offer flow. It’s a four-step flow — Config → Resolving → Review → Confirm — with an Erli-specific dispatch-time section on the Config step:
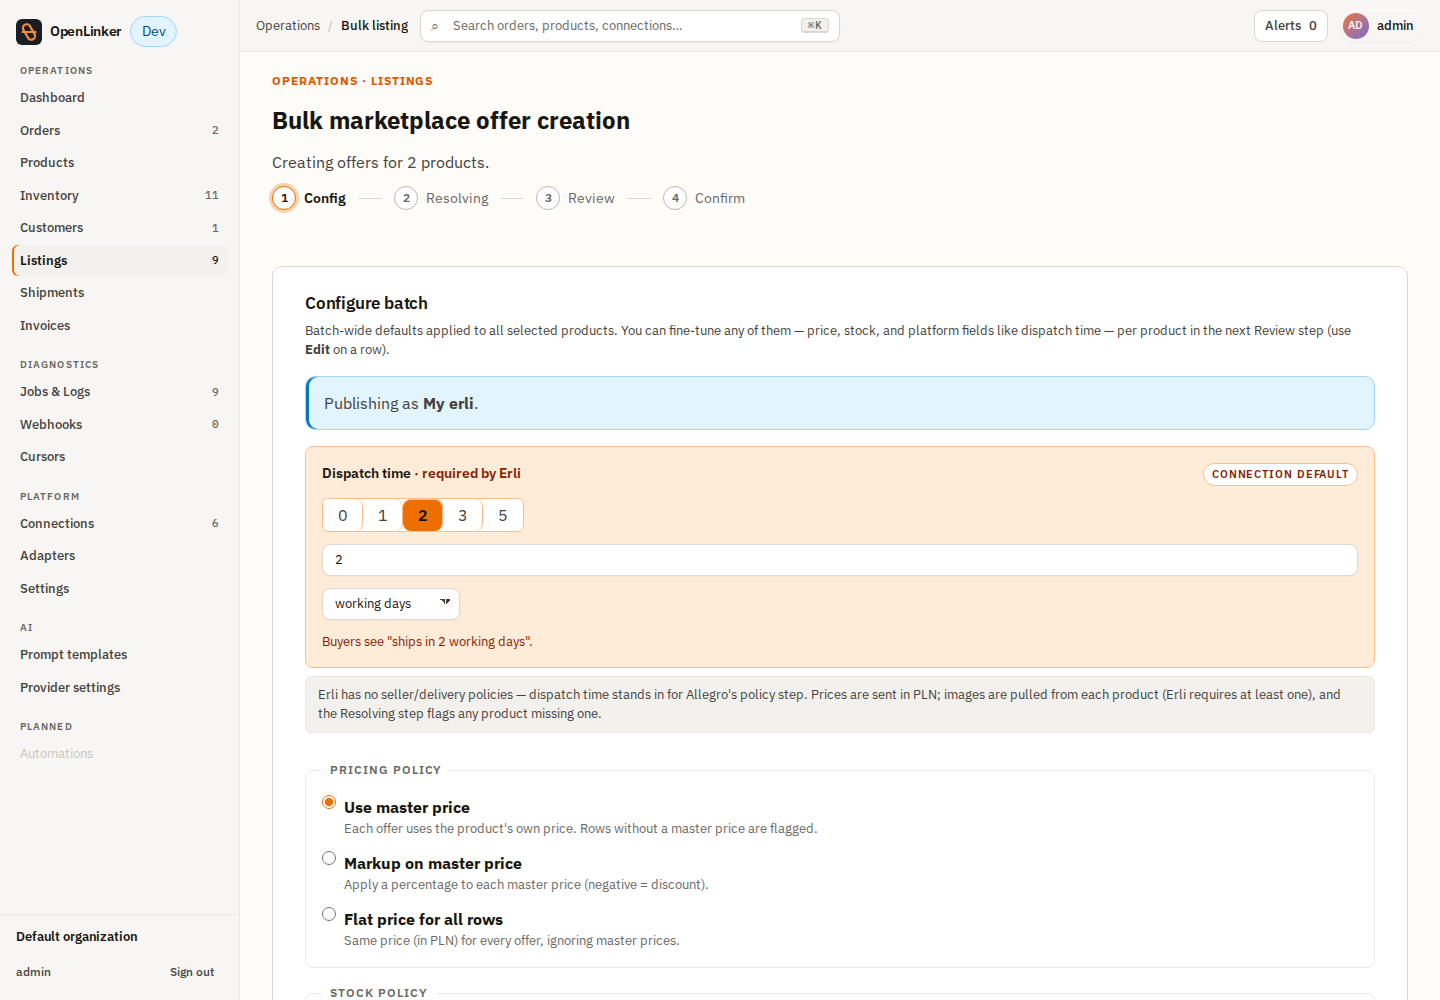
- Go to Products, select up to 100 products, and click Bulk create
(the action bar appears once rows are selected). This opens
/listings/bulk-create/wizard. - Config — pick the Erli connection, a pricing policy (use master price / markup / flat), a stock policy (use master / cap / flat), currency (PLN for Erli), and toggles for Generate AI description and Publish immediately. Erli’s config section adds the dispatch time (its stand-in for Allegro’s policy step — Erli has no seller/delivery policies).
- Resolving — OpenLinker batch-resolves each product’s category and stock and
flags blockers (e.g. missing image — Erli requires ≥1 public
httpsimage). Only blocker-free rows can submit. - Review — inspect each row; click a row to override price, stock, category, or (Erli) a per-product dispatch-time override.
- Confirm — Approve all & submit enqueues the batch
(
POST /listings/bulk-create); you land on the batch progress page (/listings/bulk-batches/{batchId}) to watch each offer’s creation.
Each offer follows the same async path and public-https-image requirement as the
single-offer flow (§6).
10. Orders
Section titled “10. Orders”Orders reach OpenLinker two ways, which converge idempotently on one order record:
- Webhook (trigger): Erli posts to
{callbackBaseUrl}/webhooks/erli/{connectionId}with the order id → OpenLinker pulls the full order and ingests it. Erli webhooks are fire-once, 5 s timeout, no retry, so they are a latency optimization, not a guarantee. - Inbox poll (backstop, recommended): the
erli-orders-pollscheduler reads Erli’s unread inbox on an interval and ingests any order events the webhook missed. Enable it on the worker (see the runbook).
Ingested orders appear under Orders:
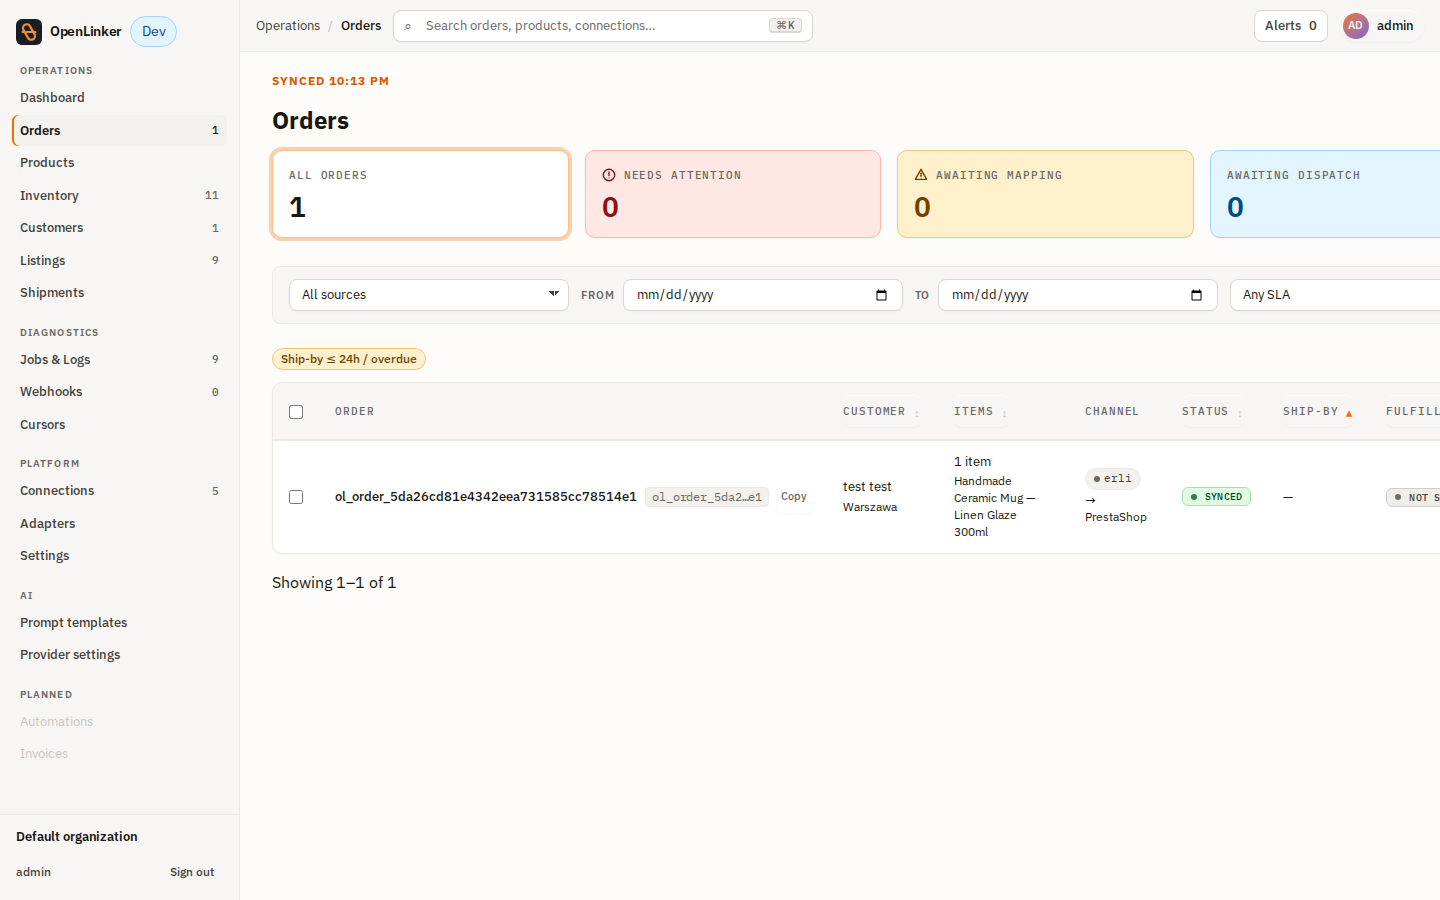
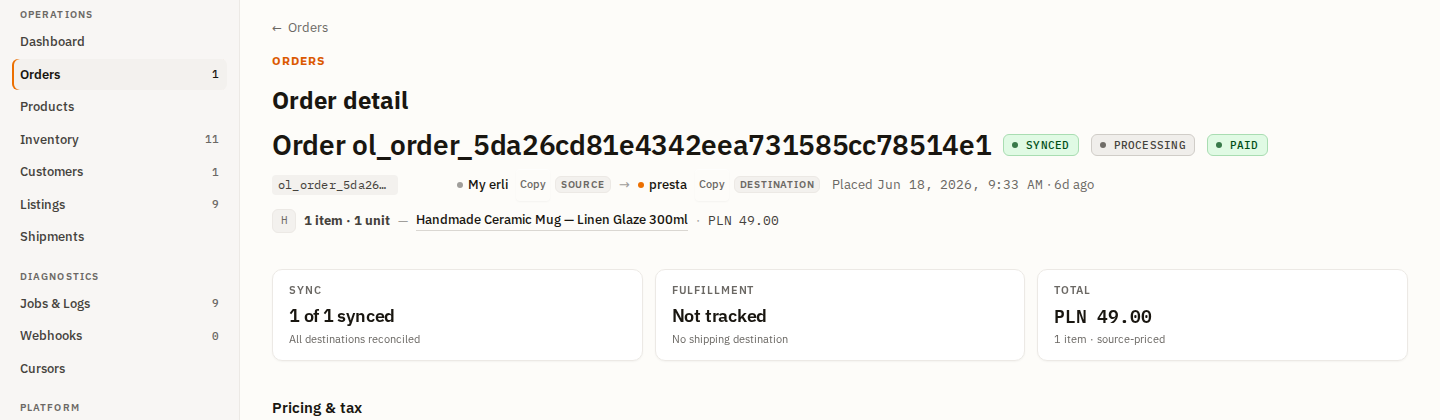
Opening an ingested order shows its source = the Erli connection flowing to the PrestaShop destination, with the line items, customer, and totals:
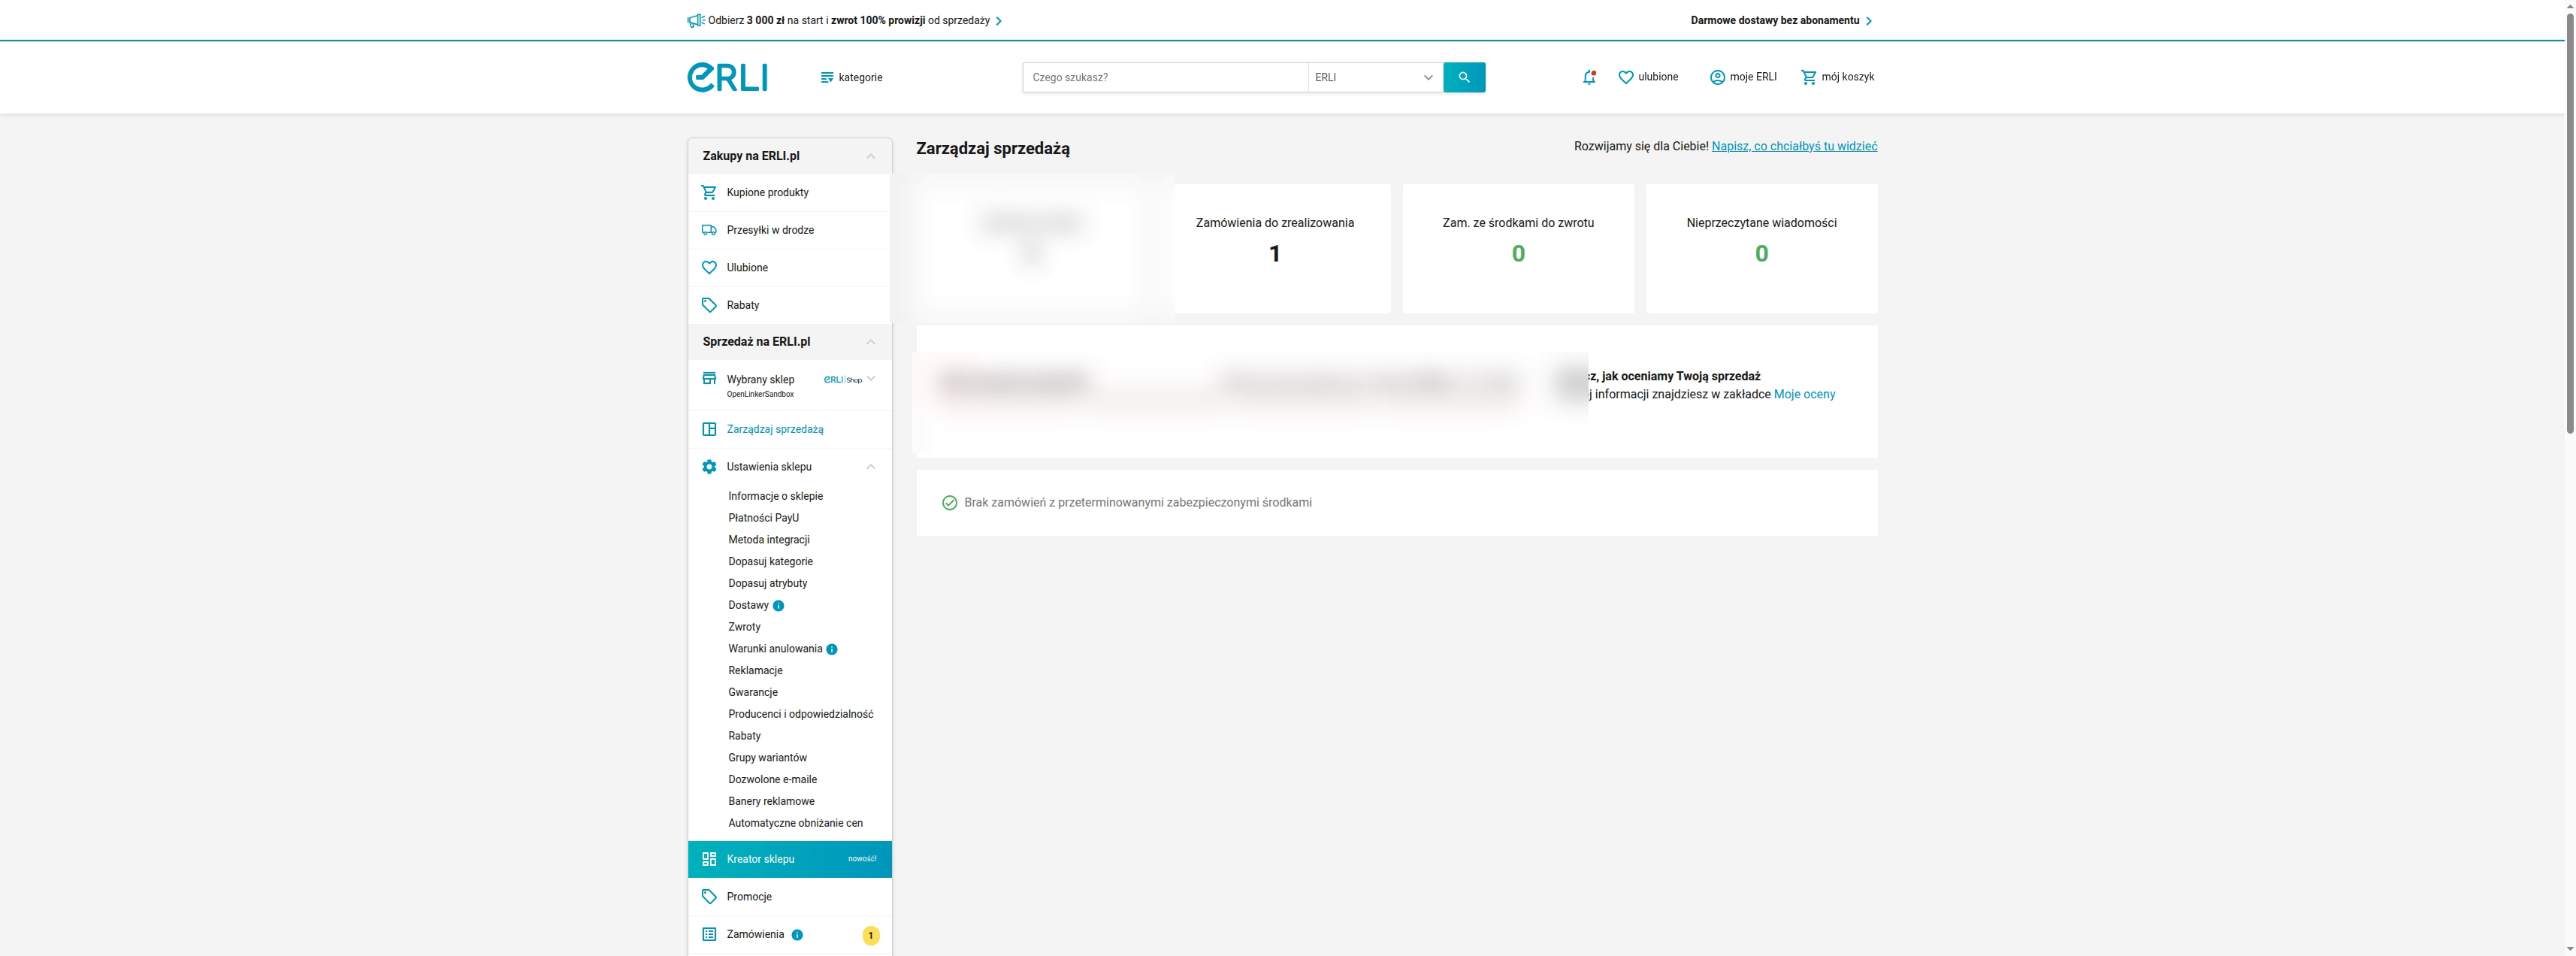
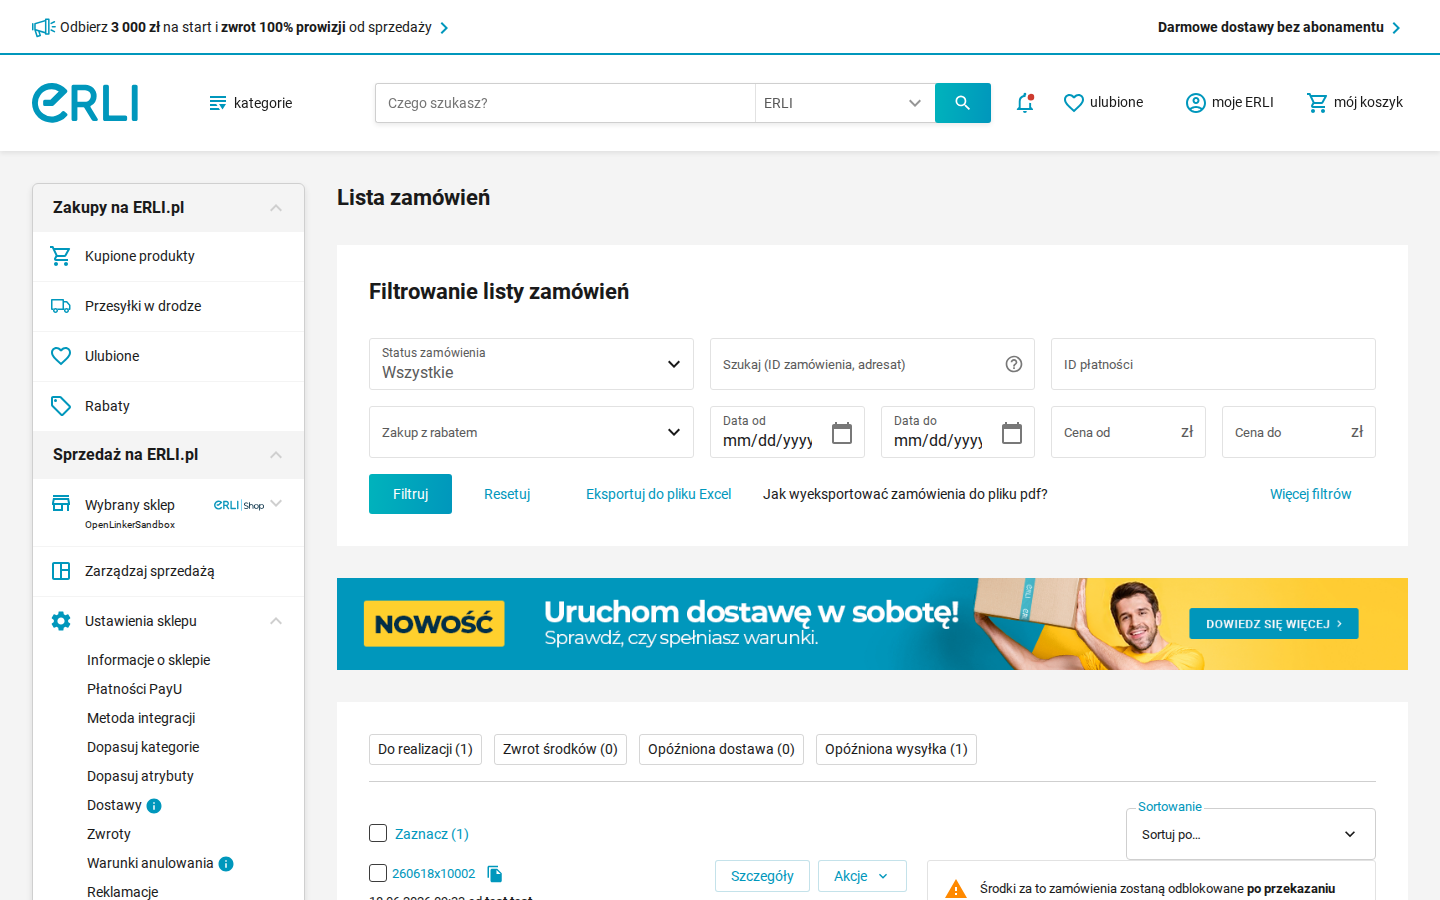
The same order is visible on the Erli side in the seller panel. The dashboard (“Zarządzaj sprzedażą”) shows it in the Zamówienia do zrealizowania (orders to fulfil) count:
…and it appears in the Erli Zamówienia (orders) list — here the same order
(260618x10002) under Do realizacji:
Customer identity. Erli orders carry a buyer email (no buyer id). OpenLinker resolves the internal customer from that email so the order can be created on the PrestaShop destination. Ensure customer identity resolution is configured for your deployment (see the architecture overview → Customer Identity Resolution).
11. Fulfillment routing (dispatch & labels)
Section titled “11. Fulfillment routing (dispatch & labels)”Ingesting an order is not enough to dispatch it. Before OpenLinker can generate a shipping label for an Erli order, it needs to know which carrier connection handles each Erli delivery method - otherwise the order lands with no carrier and label generation has nothing to route to. This mapping is not created automatically on a fresh connection; you configure it once per Erli connection.
Each rule maps one source delivery method (the Erli delivery method the
buyer chose) to a processor:
| Processor kind | Meaning |
|---|---|
ol_managed_carrier | OpenLinker generates the label via a connected carrier (e.g. an InPost or DPD connection). |
source_brokered | The label is brokered by the source marketplace, not OL. |
omp_fulfilled | The order is fulfilled by the master shop / operator - represented by rule absence (omit the method). |
Methods you don’t map fall back to
omp_fulfilled(shop-fulfilled). Only map the methods you want OpenLinker to dispatch.
Configure it in the UI (recommended)
Section titled “Configure it in the UI (recommended)”Open the Erli connection → Mappings → the Fulfillment routing panel
(/connections/:connectionId/mappings). For each Erli delivery method, pick the
carrier connection that should fulfil it, then save. The panel lists the
processors the connection is allowed to route to. On the Mappings page the
Fulfillment routing panel sits alongside the category/attribute mappings the
connection also needs.
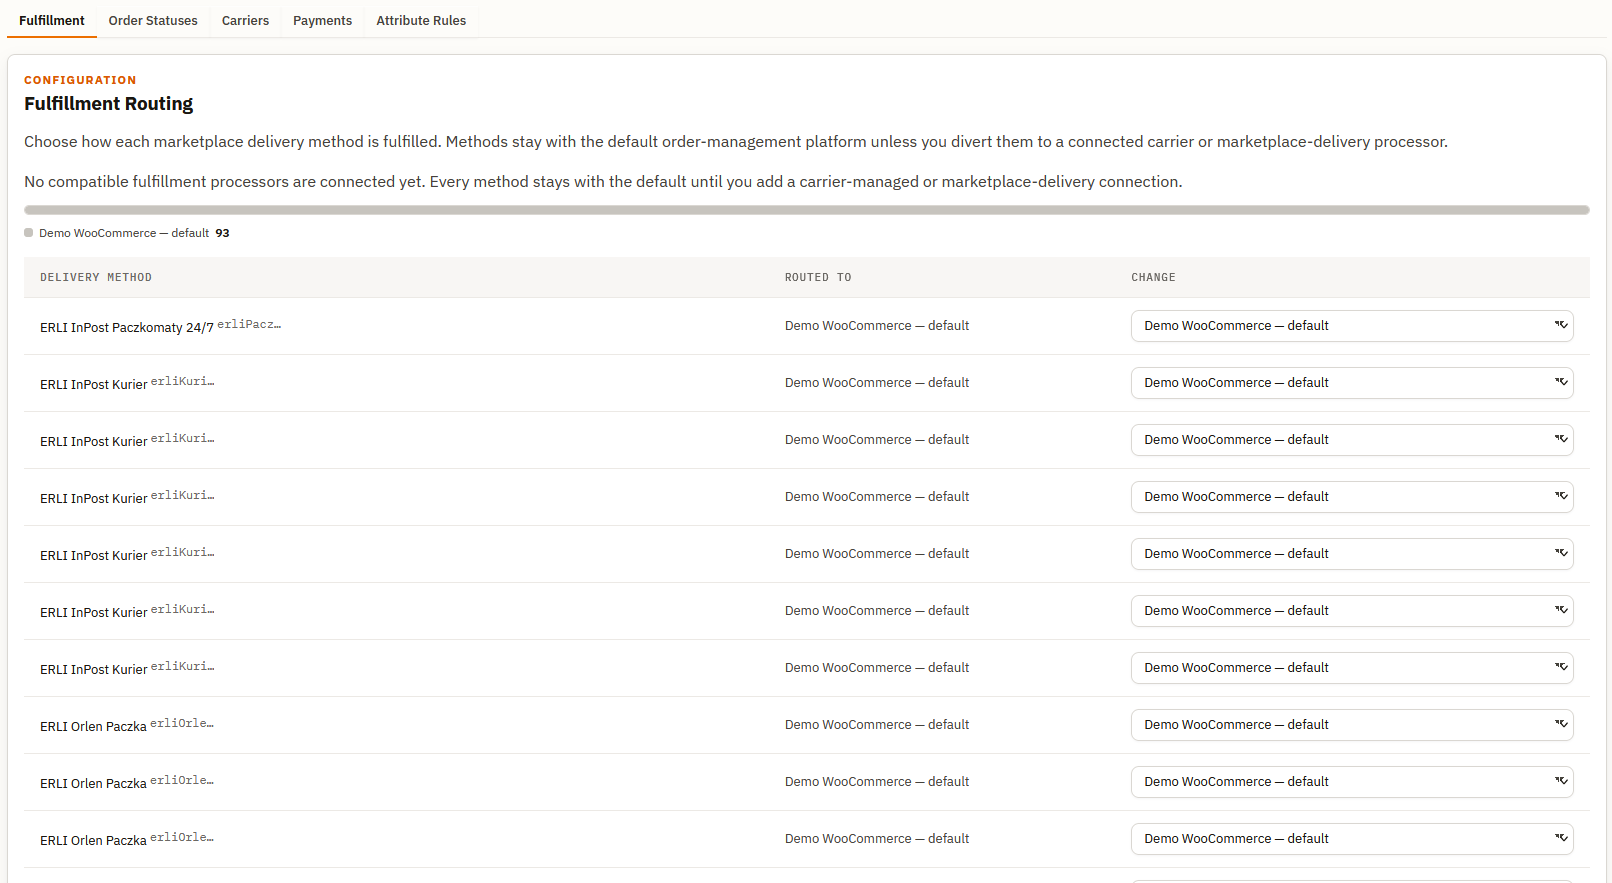
The Fulfillment Routing panel on an Erli connection. Each row is an Erli delivery method; the ROUTED TO column shows the current processor, and the CHANGE dropdown lets you reassign it. Methods not listed here default to shop-fulfilled (operator-managed).
Configure it via the API (for scripted / demo provisioning)
Section titled “Configure it via the API (for scripted / demo provisioning)”The panel is backed by two endpoints. First discover the candidate processors,
then replace the full rule set (the PUT is replace-all - send every rule you
want to keep):
BASE=https://api.demo.openlinker.io/v1        # your API originERLI_CONN=<erli-connection-id>TOKEN=<admin-bearer-token>
# 1. Discover which processors this connection may route tocurl -s -H "Authorization: Bearer $TOKEN" \  "$BASE/connections/$ERLI_CONN/routing-rules/candidates"
# 2. Replace all routing rules (only diverted methods; omit shop-fulfilled ones)curl -s -X PUT -H "Authorization: Bearer $TOKEN" -H "Content-Type: application/json" \  "$BASE/connections/$ERLI_CONN/routing-rules" \  -d '{    "items": [      {        "sourceDeliveryMethodId": "<erli-delivery-method-id>",        "processorKind": "ol_managed_carrier",        "processorConnectionId": "<inpost-or-dpd-connection-id>"      }    ]  }'
GET /connections/:connectionId/routing-rules returns the current rules for
verification.
Next steps
Section titled “Next steps”- Day-2 operations — scheduler env flags, known Erli quirks (async writes, no webhook retry, stock-on-cancel, frozen fields), and troubleshooting: Erli runbook.
- Multiple connections — you can connect more than one Erli shop; each has its own credentials, config, and offer mappings.