

Connecting a Platform
OpenLinker works by connecting to your existing platforms — a master shop (PrestaShop or WooCommerce) that is the source of truth for products and inventory, and one or more marketplace connections (Allegro) where offers are created and orders are ingested. This section walks you through the full connection flow using PrestaShop and Allegro as worked examples.
For WooCommerce-specific wizard steps, see the WooCommerce Setup Guide.
Connections list
Section titled “Connections list”Open Connections in the sidebar (under the Platform group). The connections list shows every platform you’ve configured.
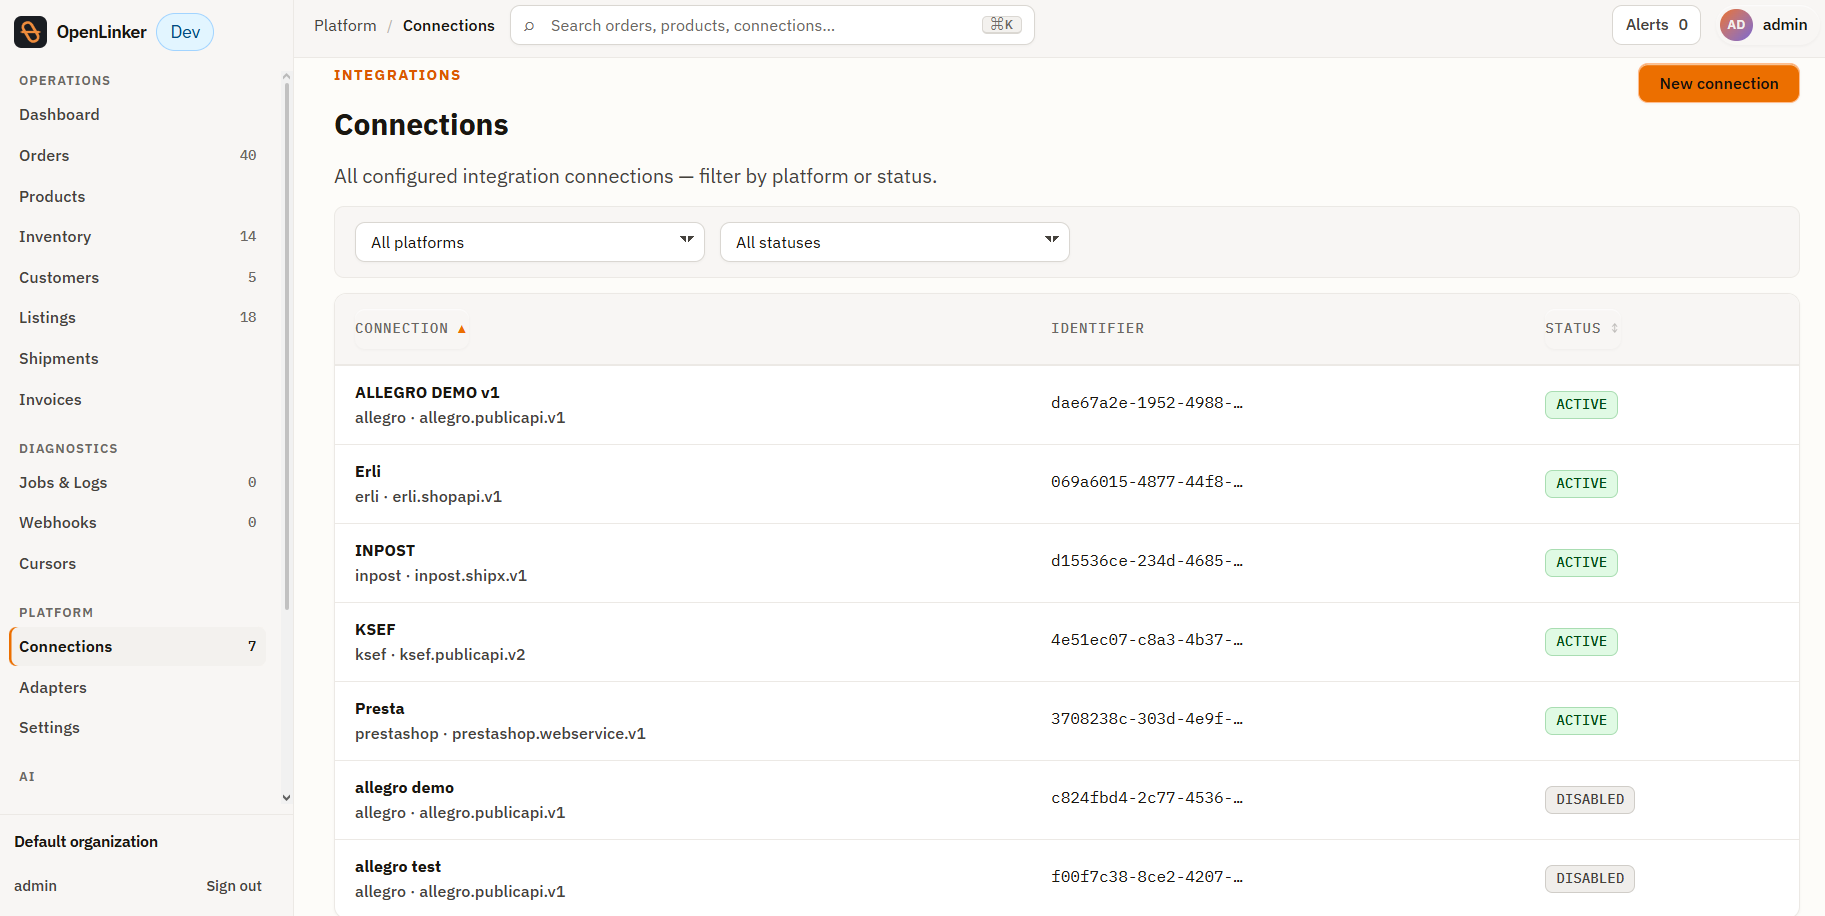
Each row shows:
- Name — the label you gave the connection
- Platform — e.g.
prestashop,allegro - Adapter — the specific adapter version, e.g.
prestashop.webservice.v1 - Status — one of:
| Status | Meaning |
|---|---|
| active | Connected and all capabilities resolve correctly |
| error | Last connection test or sync attempt failed — check the connection detail for the error |
| needs_reauth | OAuth token has expired or been revoked; click the connection to re-authorize |
| disabled | Manually disabled; no sync jobs are scheduled for this connection |
Adding a new connection
Section titled “Adding a new connection”Click New connection (or the Add connection button if the list is empty) to open the platform picker.
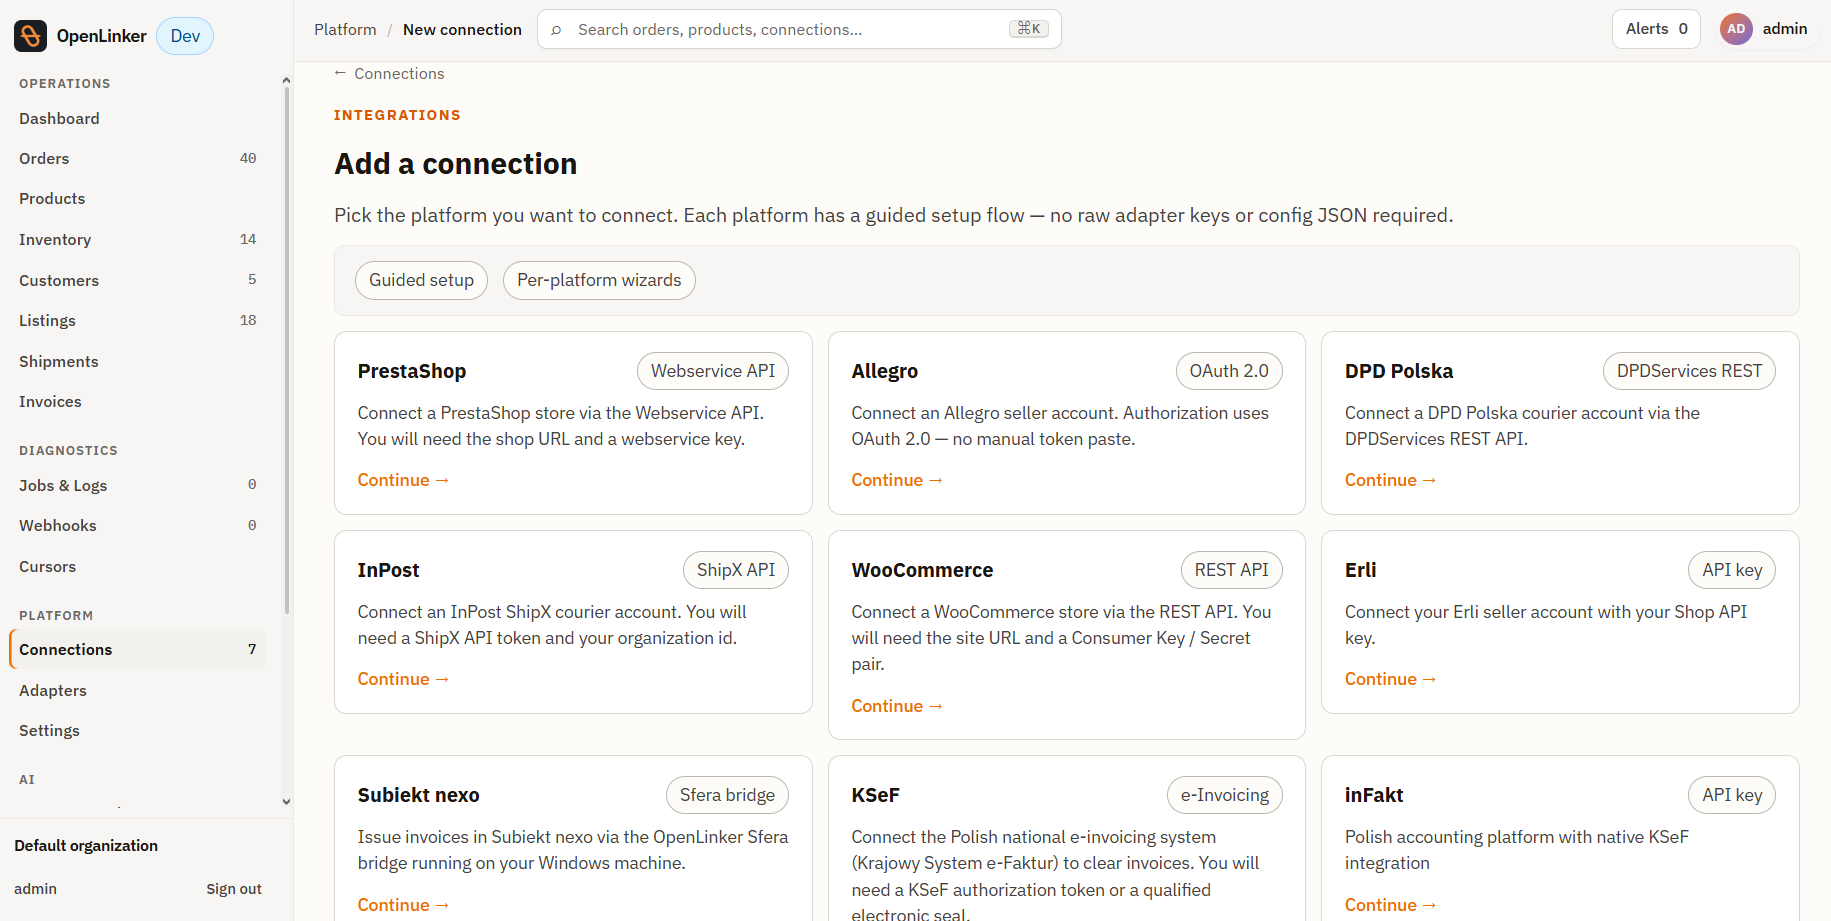
Select the platform you want to connect. The wizard adapts to the chosen platform.
PrestaShop walkthrough
Section titled “PrestaShop walkthrough”Before you start — generate a webservice API key
Section titled “Before you start — generate a webservice API key”OpenLinker calls the PrestaShop API using a webservice key. Create one in the PrestaShop admin before running the wizard:
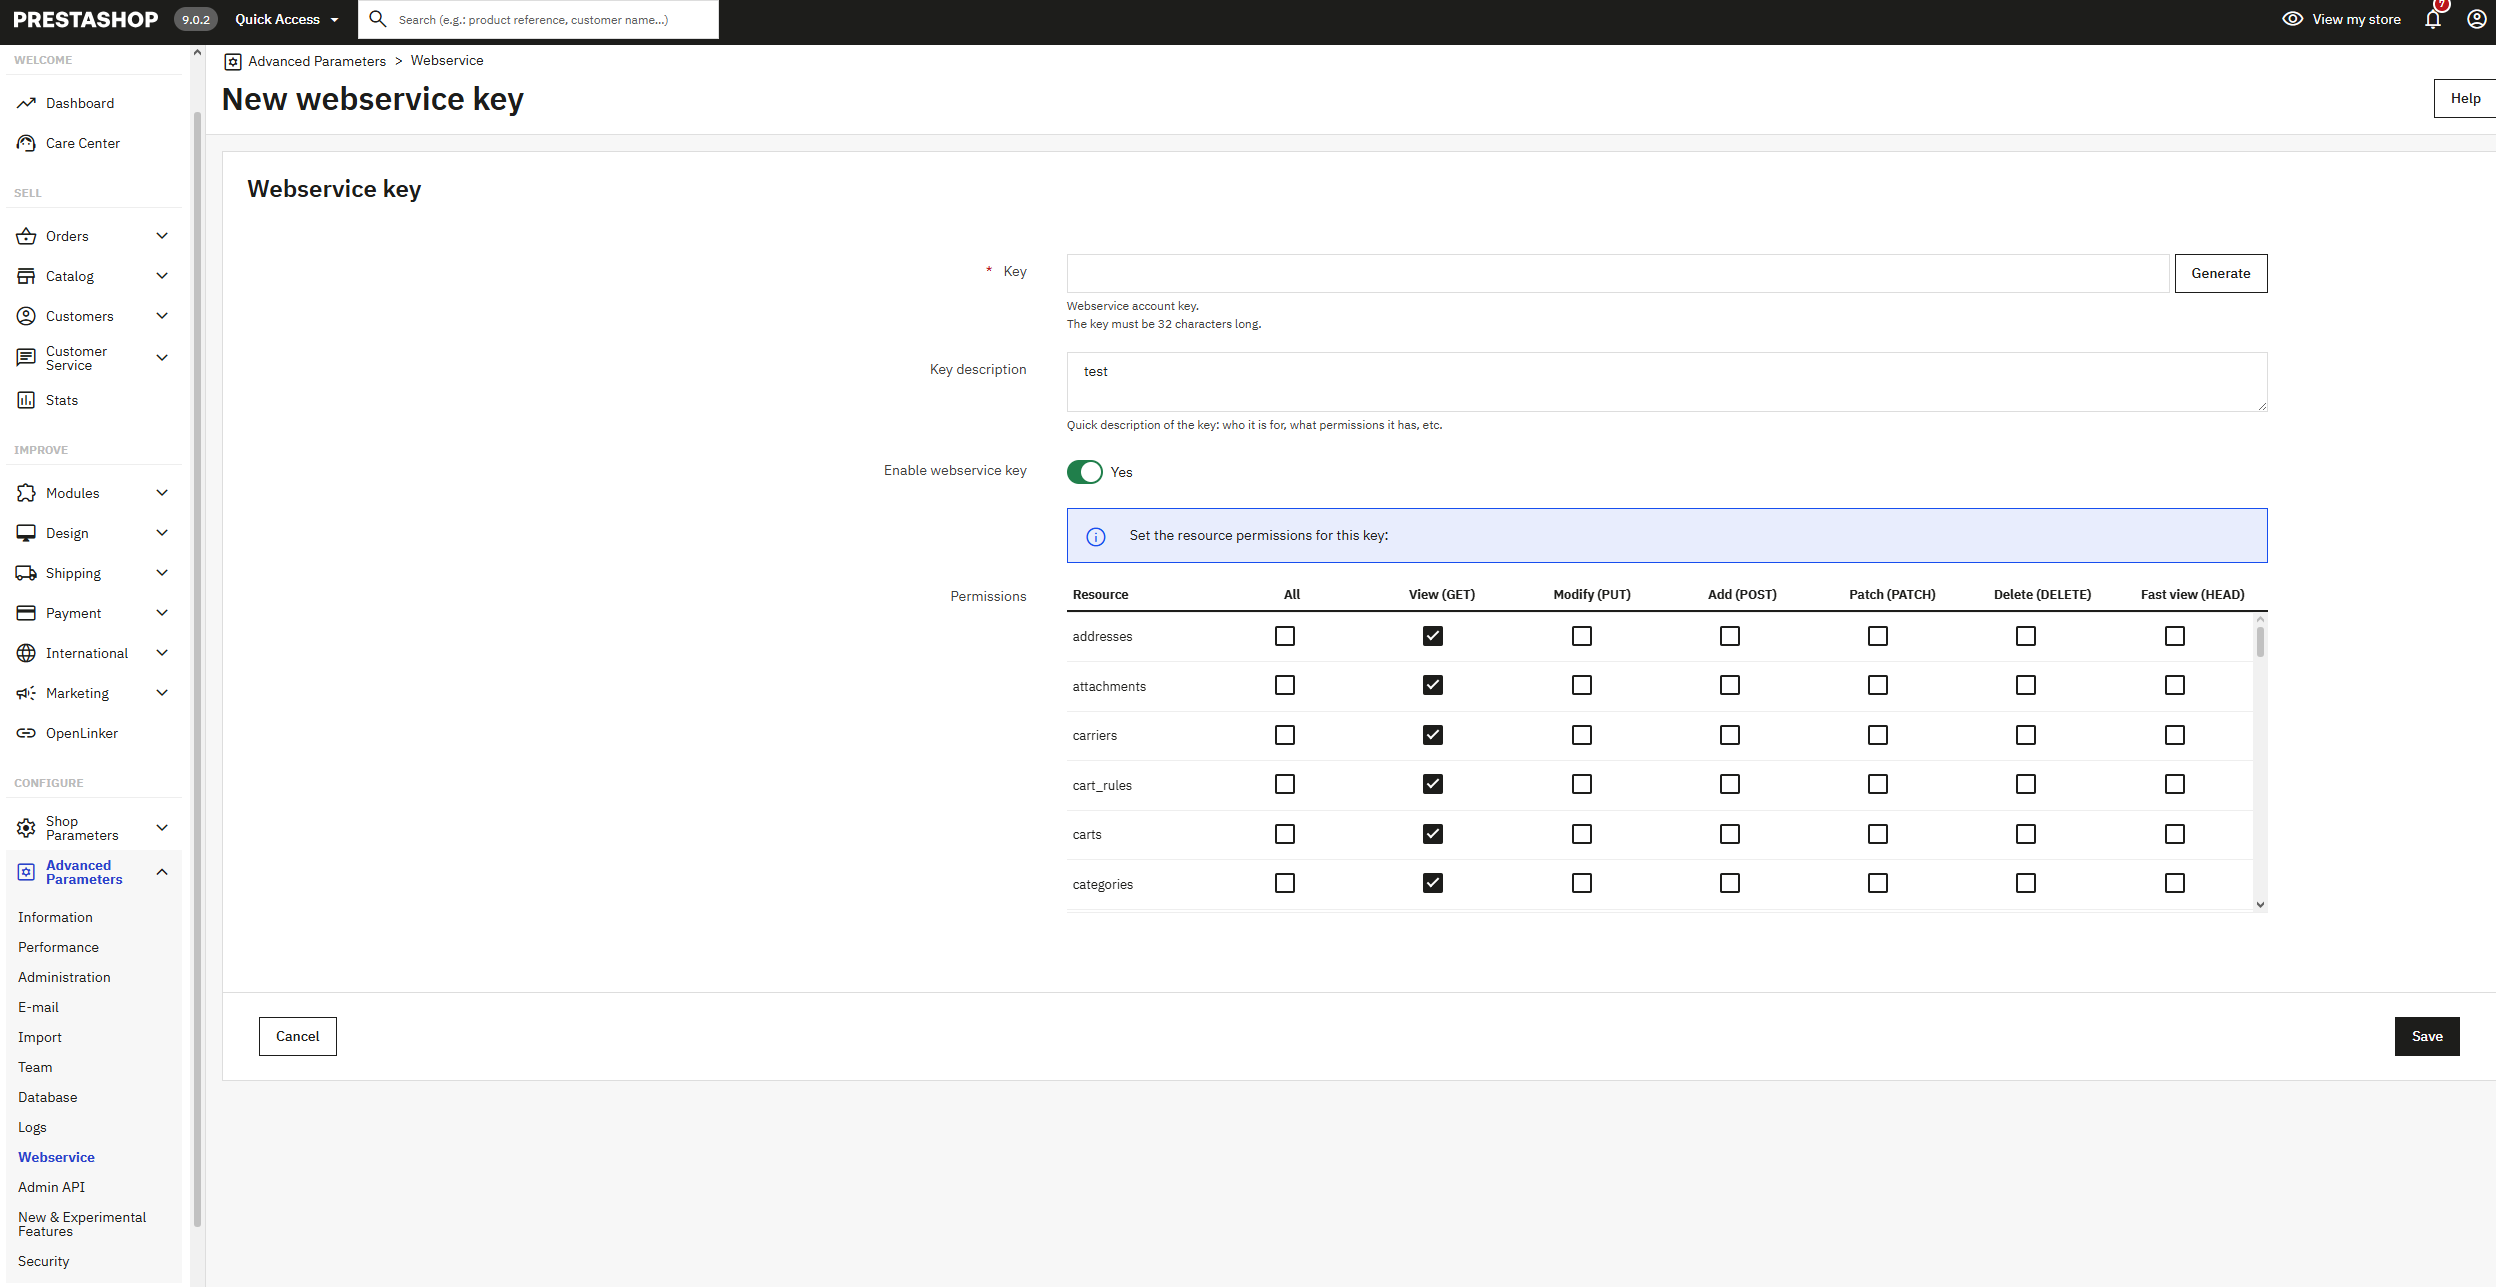
- Open the PrestaShop admin → Advanced Parameters → Webservice.
- The webservice should be enabled (the dev stack enables it automatically).
- Click Add new webservice key.
- Set a description (e.g.
OpenLinker), tick GET permissions on all resources, and save. - Copy the generated key — you’ll paste it into the OpenLinker wizard.
Step 1 — Credentials form
Section titled “Step 1 — Credentials form”After selecting PrestaShop, fill in the wizard form:
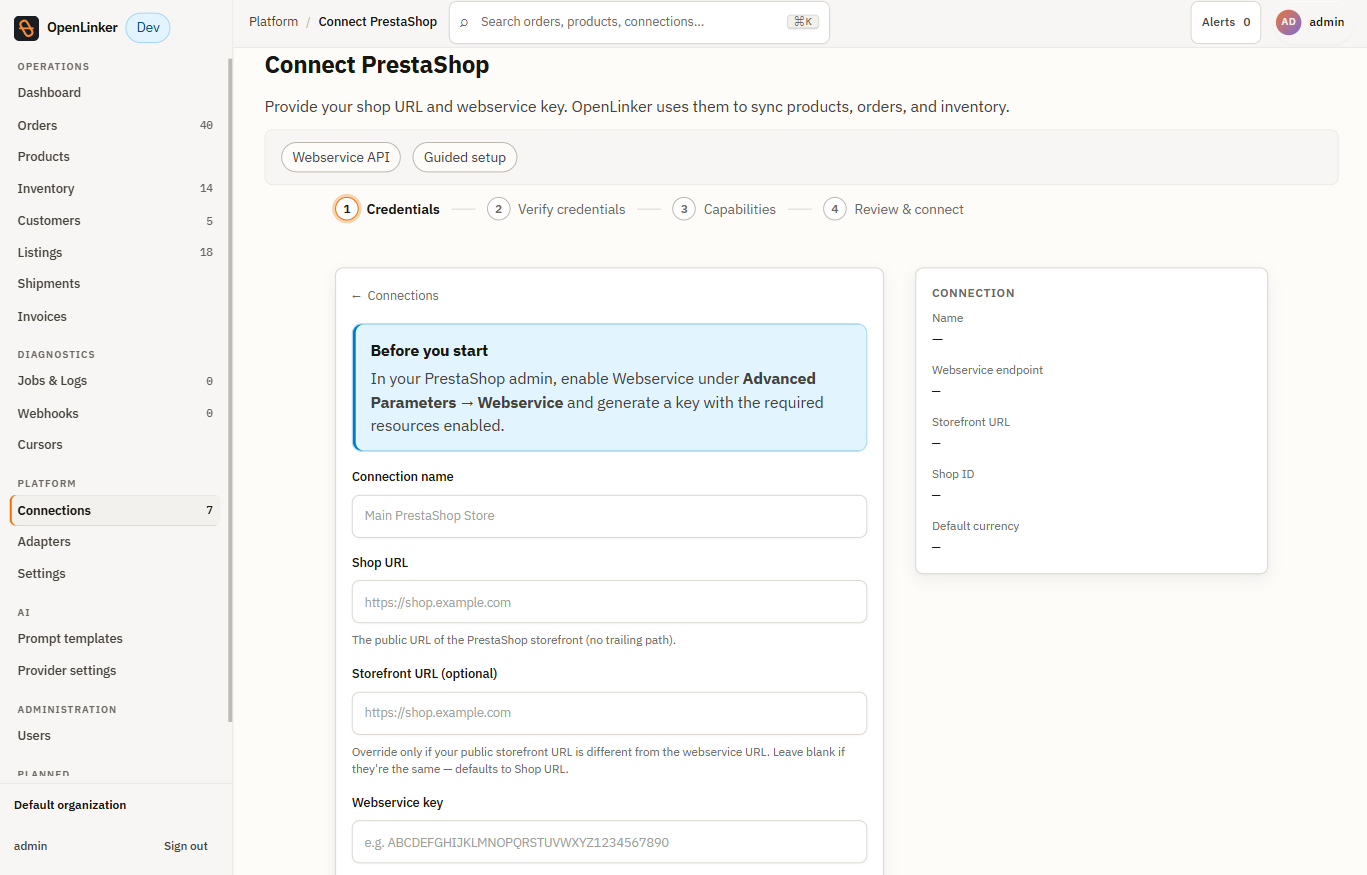
| Field | Description |
|---|---|
| Connection name | A human-readable label, e.g. Main store |
| Shop URL | Base URL of the PrestaShop install, e.g. http://localhost:8080/ |
| Storefront URL (optional) | Public-facing URL if different from the admin URL |
| Webservice key | The API key generated above |
| Shop ID (optional) | Leave blank for a standard single-shop install |
| Default currency (optional) | Override the shop’s default currency for this connection |
Click Create connection. OpenLinker validates the credentials and, if successful, redirects you to the connection detail page.
Step 2 — Test the connection
Section titled “Step 2 — Test the connection”On the connection detail page, click Test connection in the Actions tab.
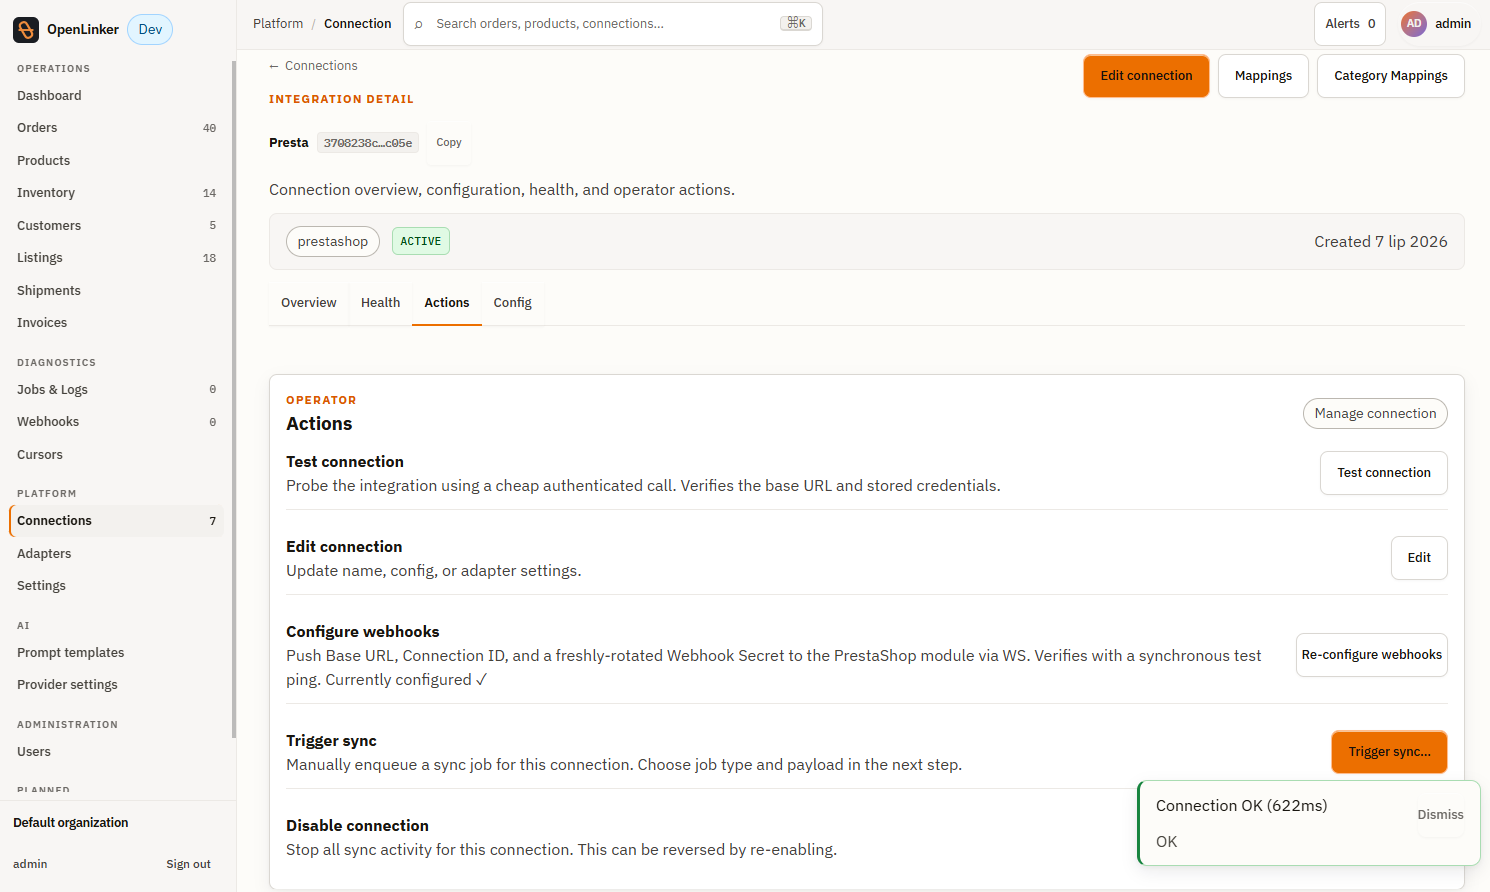
A Connection OK toast confirms the webservice key is valid and all registered capabilities resolve correctly.
If the test fails, check:
- The shop URL includes a trailing slash and is reachable from the OpenLinker host
- The webservice is enabled in PrestaShop (Advanced Parameters → Webservice → Enable)
- The key has at least
GETpermissions on the required resources
Connection detail tabs
Section titled “Connection detail tabs”The connection detail page has four tabs:
- Overview — platform type, adapter key, status chip, and configured capabilities
- Health — per-capability diagnostic checks and recent job activity for this connection
- Actions — Test connection, Edit connection, Configure webhooks, Trigger sync, Disable connection
- Config — current configuration values stored for this connection
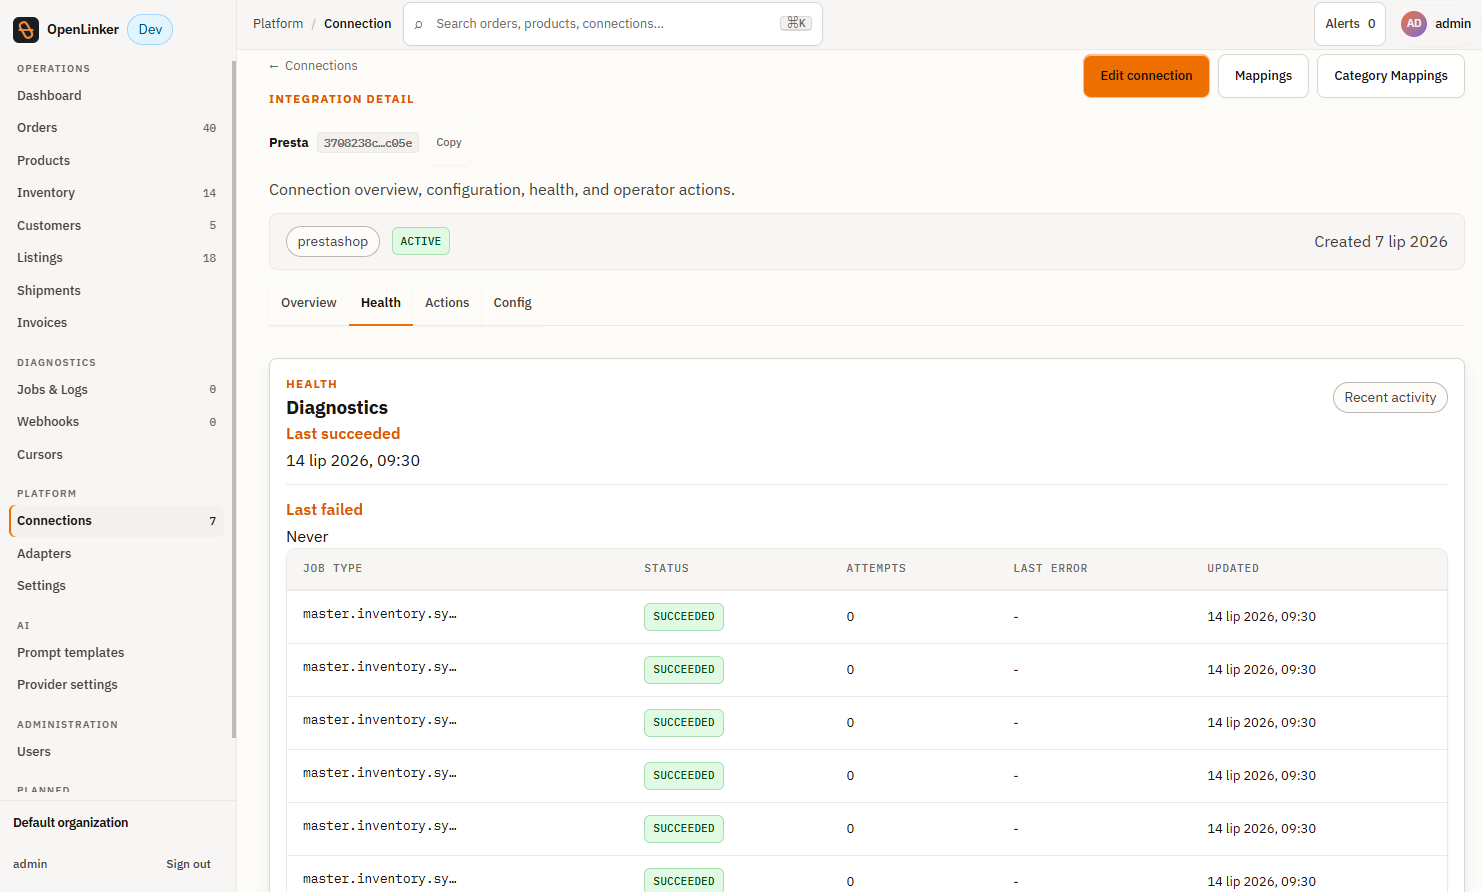
Category Mappings
Section titled “Category Mappings”The PrestaShop connection detail also exposes a Category Mappings page, accessible from the connection’s action bar. This is where you map your PrestaShop product categories to Allegro’s category tree — a prerequisite for creating Allegro offers. See Listings & Offers for details.
Allegro walkthrough
Section titled “Allegro walkthrough”Step 1 — OAuth credentials
Section titled “Step 1 — OAuth credentials”After selecting Allegro, the wizard asks for OAuth credentials from your registered Allegro application:
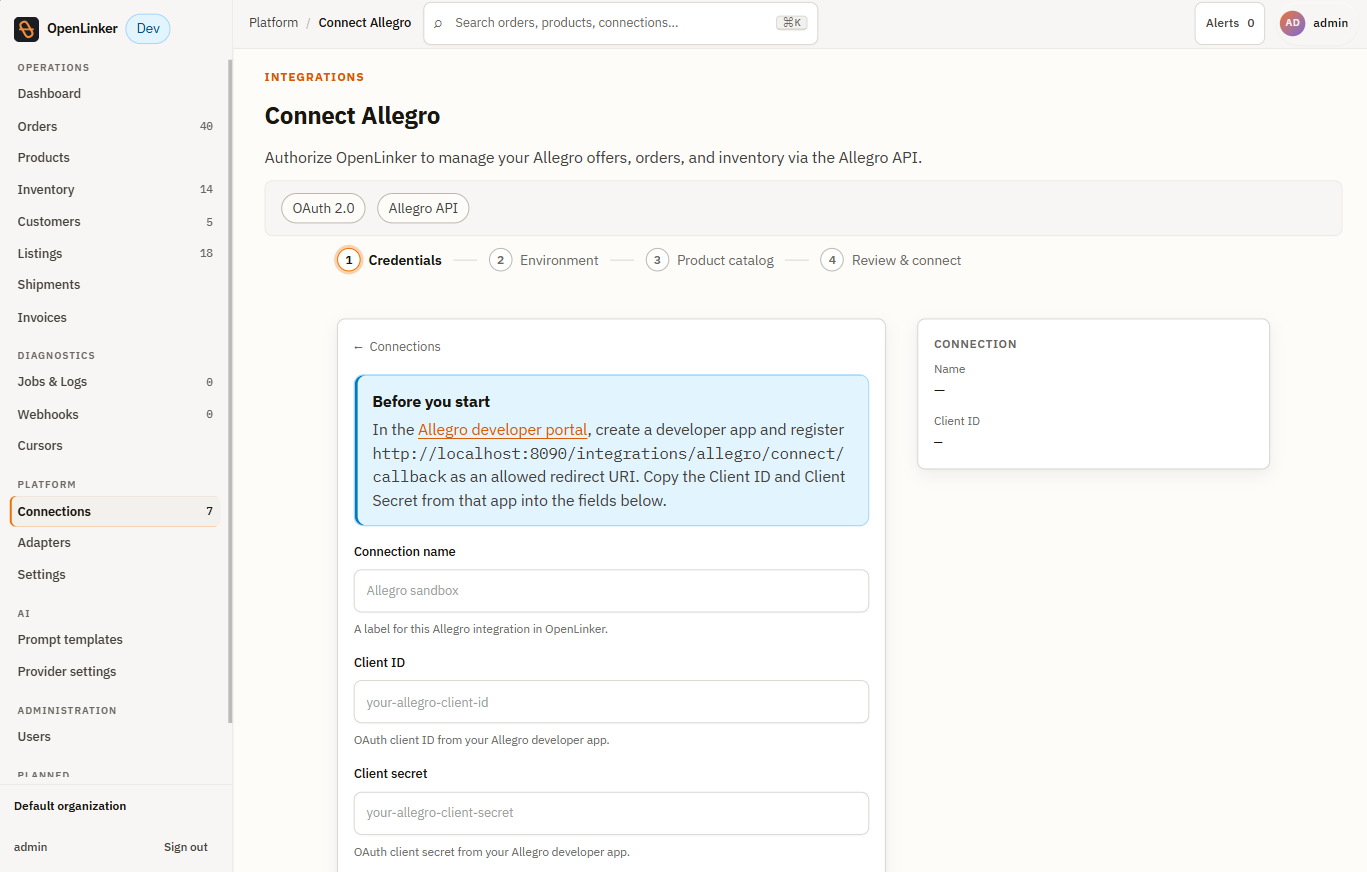
| Field | Description |
|---|---|
| Connection name | A human-readable label, e.g. Allegro sandbox |
| Client ID | From your Allegro developer application |
| Client secret | From your Allegro developer application |
The wizard also lets you configure the Allegro environment (Sandbox / Production) and link a PrestaShop product catalog.
⚠️ Required defaults for Allegro: The wizard includes a step to configure GPSR (General Product Safety Regulation) required fields and a default ship-from location. These are required by Allegro for offer creation. Fill them in before finishing the wizard.
Step 2 — Authorize via OAuth
Section titled “Step 2 — Authorize via OAuth”After filling in credentials, the wizard redirects you to Allegro’s authorization page. Log in to your Allegro account and authorize the application. You are redirected back to OpenLinker and the connection is saved.
Step 3 — Verify
Section titled “Step 3 — Verify”On the Allegro connection detail, click Test connection:
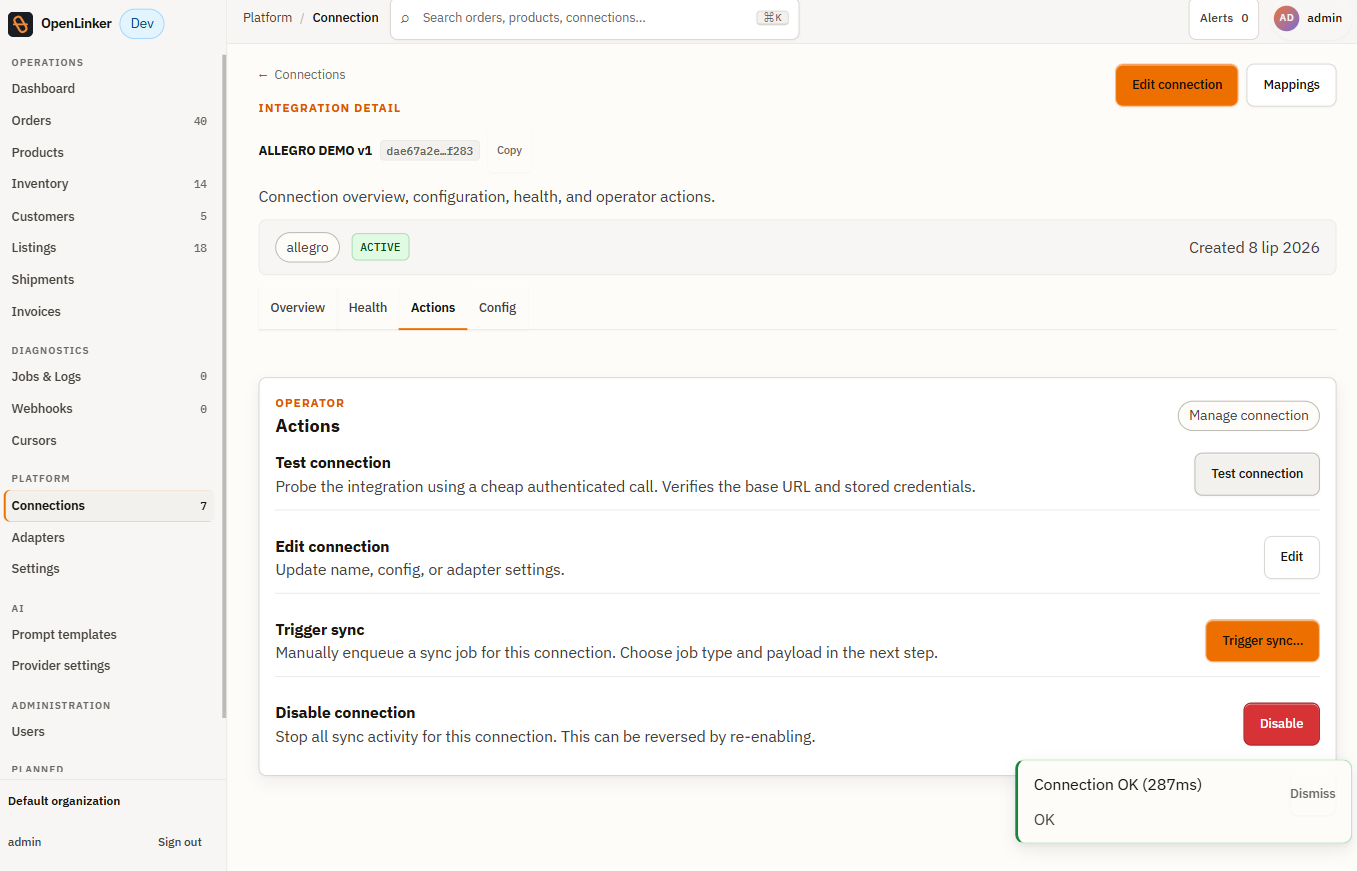
The Connection OK toast and the displayed response time confirm the Allegro API credentials are valid.
Multiple connections
Section titled “Multiple connections”You can add multiple connections of the same platform type — for example, two PrestaShop stores and three Allegro accounts. Each connection has its own credentials, config, and set of scheduled sync jobs. The Dashboard and Jobs & Logs views aggregate across all connections.
All available adapters
Section titled “All available adapters”Every adapter registered in this OpenLinker instance — and the exact capabilities it implements — is listed read-only on the Adapters page (Platform → Adapters, /adapters). The platform picker’s card list in Add connection reflects the same registry.
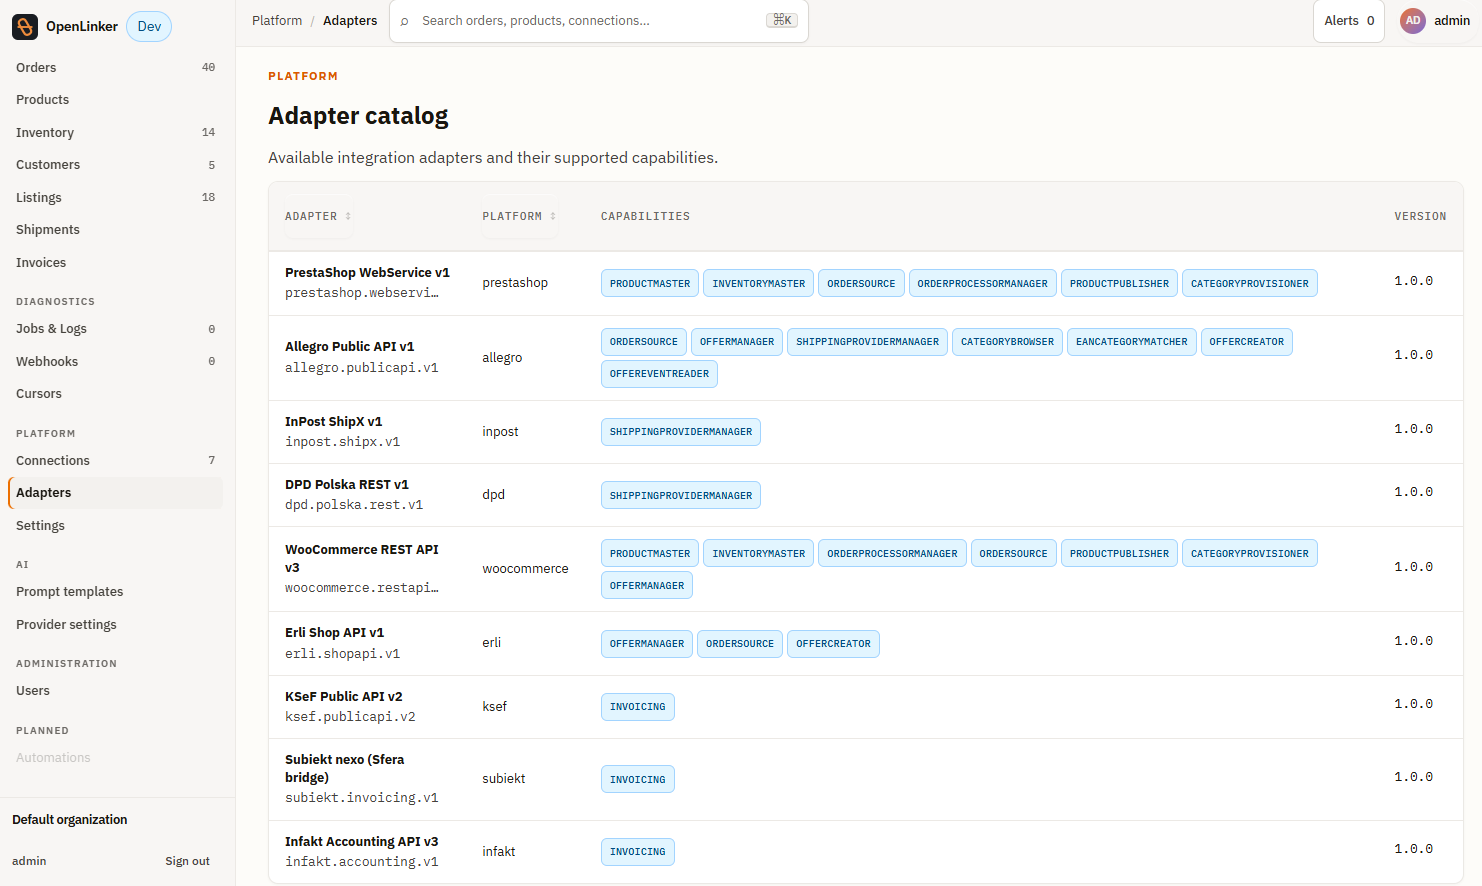
Beyond the PrestaShop/Allegro worked example above:
| Platform | Adapter key | Capabilities | Notes |
|---|---|---|---|
| PrestaShop | prestashop.webservice.v1 | ProductMaster, InventoryMaster, OrderSource, OrderProcessorManager, ProductPublisher, CategoryProvisioner | Worked example above |
| Allegro | allegro.publicapi.v1 | OrderSource, OfferManager, ShippingProviderManager, CategoryBrowser, EanCategoryMatcher, OfferCreator, OfferEventReader | Worked example above |
| WooCommerce | woocommerce.restapi.v3 | ProductMaster, InventoryMaster, OrderProcessorManager, OrderSource, ProductPublisher, CategoryProvisioner, OfferManager | See the WooCommerce Setup Guide |
| Erli | erli.shopapi.v1 | OfferManager, OrderSource, OfferCreator | Reconciliation-first marketplace adapter; reuses an existing PrestaShop → Allegro category/attribute mapping rather than requiring a separate one (borrowed-taxonomy model). Static API-key auth — no OAuth step. |
| InPost | inpost.shipx.v1 | ShippingProviderManager | Generates shipment labels and paczkomat (parcel-locker) tracking, surfaced in the order’s Shipment panel |
| DPD Polska | dpd.polska.rest.v1 | ShippingProviderManager | Same shipment-panel integration point as InPost |
| KSeF | ksef.publicapi.v2 | Invoicing | Polish national e-invoicing; see Invoices |
| Subiekt (nexo, Sfera bridge) | subiekt.invoicing.v1 | Invoicing | Alternative invoicing provider; see Invoices |
| inFakt | infakt.accounting.v1 | Invoicing | Alternative invoicing provider; see Invoices |
Invoicing providers
Section titled “Invoicing providers”To issue invoices for orders, add a connection to any one of the Invoicing-role adapters above (KSeF, Subiekt, or inFakt) the same way you’d add a shop or marketplace connection: New connection → pick the provider → fill in its credentials form → Test connection. KSeF in particular requires a Polish NIP and a KSeF authorization token generated from the taxpayer’s own KSeF portal — see the KSeF setup guide for the full flow and current limitations.
Once the connection is active and has Invoicing in its enabled capabilities, the Invoice panel appears on every order’s detail page. See Invoices for the full walkthrough.
What’s next
Section titled “What’s next”With at least one shop connection active and catalog synced:
→ Catalog & Inventory — browse the synced product catalog and inventory levels