

Subiekt nexo — integration setup guide
Issue invoices (faktura) and receipts (paragon) in Subiekt nexo for the orders OpenLinker ingests from your shop or marketplace. OpenLinker never talks to Subiekt directly — it goes through the OpenLinker Sfera bridge, a small .NET service you run on the Windows machine where Subiekt nexo is installed.
What you get: the
Invoicingcapability for a Subiekt connection — issue a document for an order (manual, from the order screen, or auto-on-paid), track its status and KSeF (e-faktura) state, and download the PDF.
How it works
Section titled “How it works”Shop / marketplace OpenLinker Subiekt Bridge (Windows) Subiekt nexo(orders) → (orchestrates) → (HTTPS + Bearer) → (Sfera SDK) - connection of type - translates to - issues the "Subiekt nexo" Sfera business ops real FS / PA - issues invoices for document, numbering, ingested orders KSeF- OpenLinker holds a connection of type Subiekt nexo pointing at the bridge.
- The bridge runs next to Subiekt on Windows, exposes an HTTPS API, and translates OpenLinker’s neutral invoice command into Sfera business operations.
- Subiekt nexo issues the real document (faktura
FS …/ paragonPA …), assigns the number, and handles KSeF.
Document type is driven by the buyer tax id: an order issued with a buyer NIP becomes a faktura (B2B); without one it becomes a paragon (B2C).
Prerequisites
Section titled “Prerequisites”- Windows machine with Subiekt nexo PRO + Sfera (the Sfera SDK ships with the demo/trial database; a purchased Subiekt nexo needs the paid Sfera add-on — see the runbook).
- .NET 8 runtime on that machine.
- The bridge — the
openlinker-subiekt-bridgerepository. Build/run per itsdocs/DEPLOYMENT.md; the essentials are in Part A. - An order source connection in OpenLinker — e.g. a PrestaShop connection — so there are orders to invoice. See Connecting a platform.
- Network reachability: OpenLinker must reach the bridge over HTTPS. On a LAN this
is the Windows host’s address, e.g.
https://192.168.1.50:5005.
Part A — Run the bridge on Windows
Section titled “Part A — Run the bridge on Windows”Full detail lives in the bridge repo’s docs/DEPLOYMENT.md. The essentials:
- Configure
appsettings.json(or environment variables). Point Sfera at your deployment and set the operator credentials:Sfera.BinariesDir/ConfigDir/TempDir→%LOCALAPPDATA%\InsERT\Deployments\Nexo\<deployment>\…Sfera.SqlServer,Sfera.SqlDatabase,Sfera.NexoUser- Secrets go in environment variables, never in the file:
Sfera__NexoPassword,Sfera__SqlPassword.
- Authentication. Set
Auth__ApiKey(env) to a strong token. OpenLinker sends it asAuthorization: Bearer <token>./healthis anonymous. - TLS (required for network access). A non-loopback listener must serve HTTPS.
- Dev: a self-signed cert —
dotnet dev-certs https -ep dev-cert.pfx -p <pwd>, thenTls__CertPath+Tls__CertPassword. - Production: a real CA cert, or terminate TLS at a reverse proxy and bind the bridge to loopback.
- Dev: a self-signed cert —
- Firewall. Allow inbound TCP on the bridge port (default
5005). - Run on a network address:
The log should show
Terminal window $env:ASPNETCORE_URLS = "https://0.0.0.0:5005"dotnet run -c Release --project bridge\Subiekt.Bridge.ApiNow listening on: https://…:5005andSfera: zalogowano. - Smoke-test from the machine where OpenLinker runs:
Terminal window Invoke-RestMethod https://<bridge-host>:5005/health -SkipCertificateCheck# → {"status":"ok","bridge":"up","sferaSession":"valid","subiekt":"reachable", …}
A healthy bridge prints
Now listening on: https://…:5005and a Sfera login line (Sfera: zalogowano) on start, and/healthreturns{"status":"ok","bridge":"up","sferaSession":"valid","subiekt":"reachable"}. OpenLinker’s Test connection (Part B) exercises this same/healthprobe end-to-end.
Part B — Connect Subiekt in OpenLinker
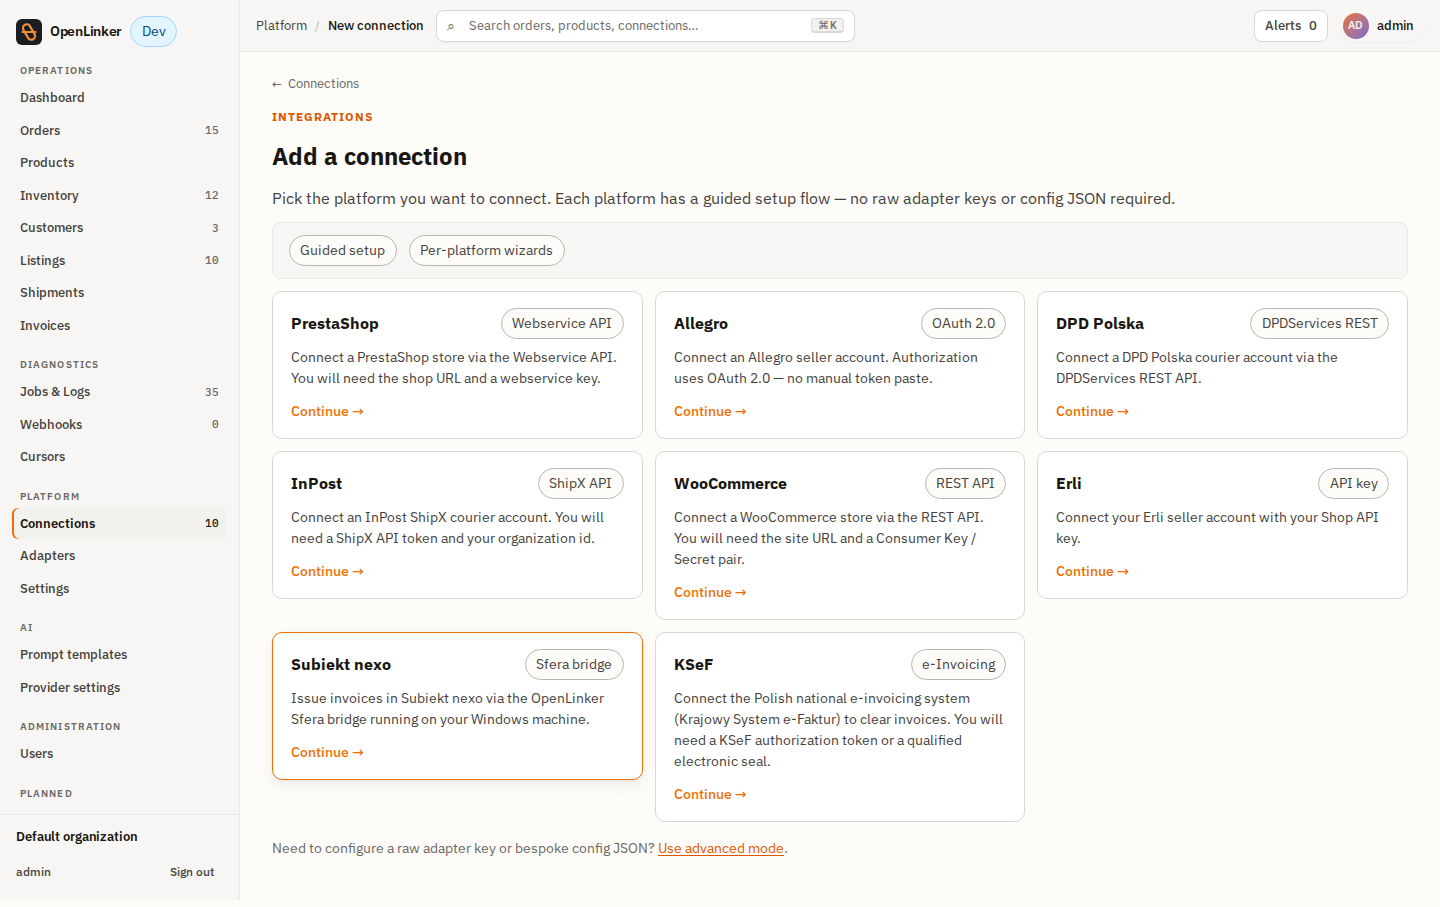
Section titled “Part B — Connect Subiekt in OpenLinker”OpenLinker ships a guided wizard for Subiekt. In OpenLinker go to Connections → Add connection.

Pick Subiekt nexo on the platform picker.
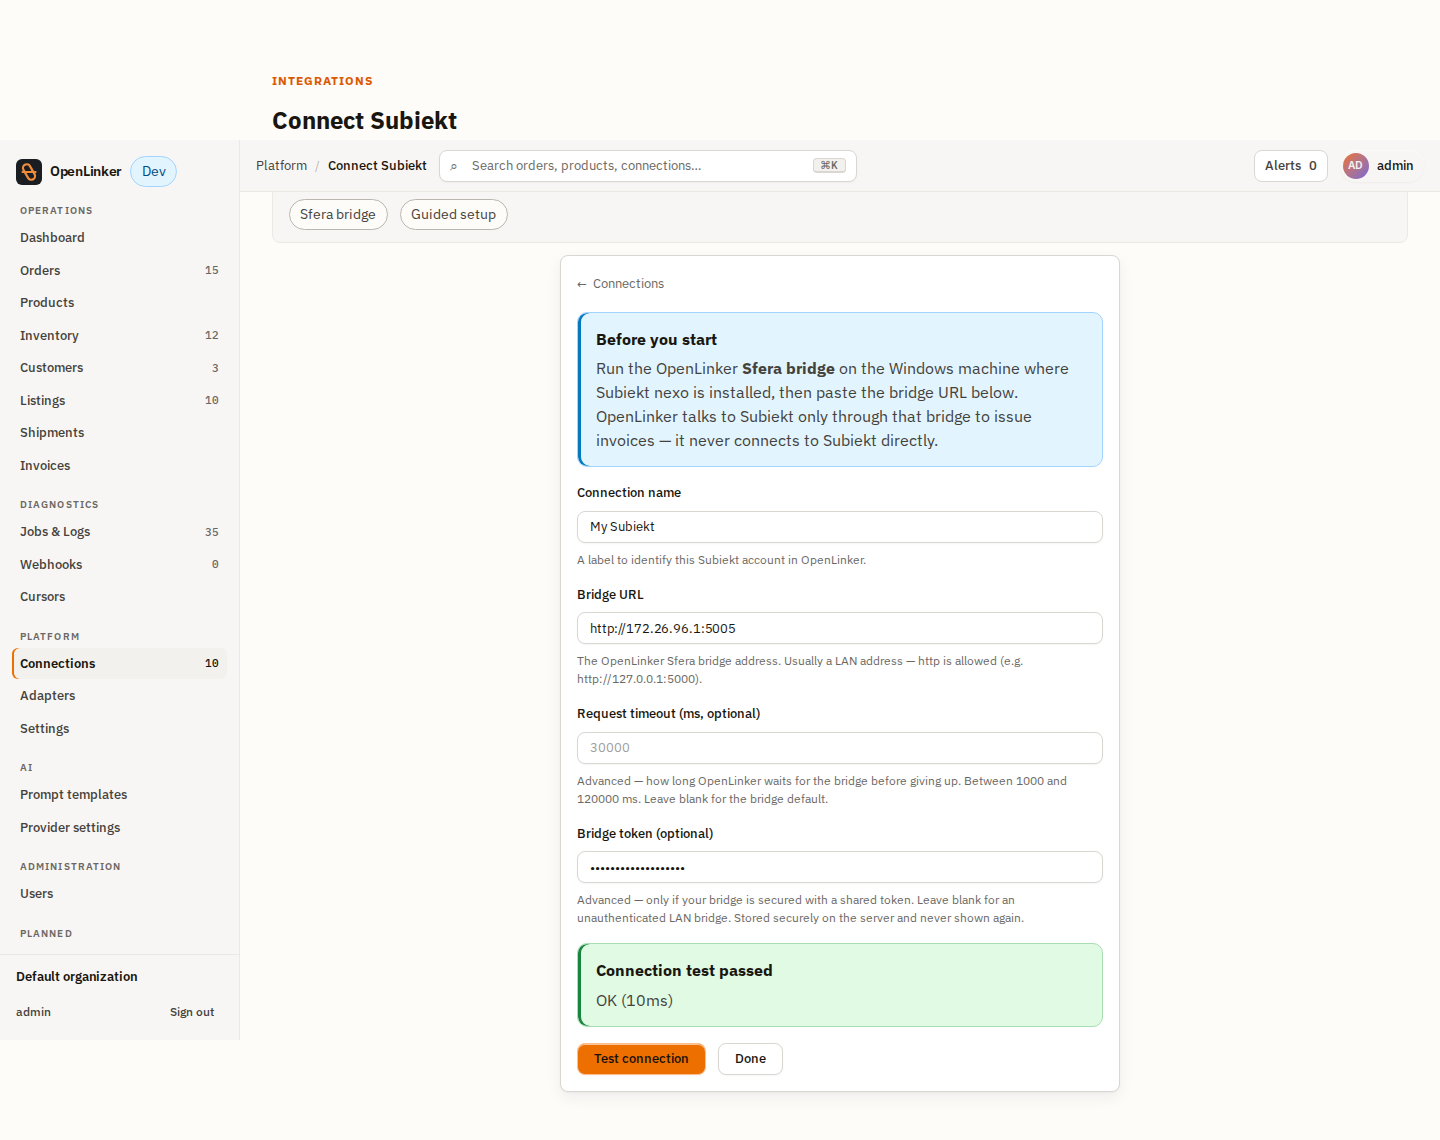
Fill the wizard:
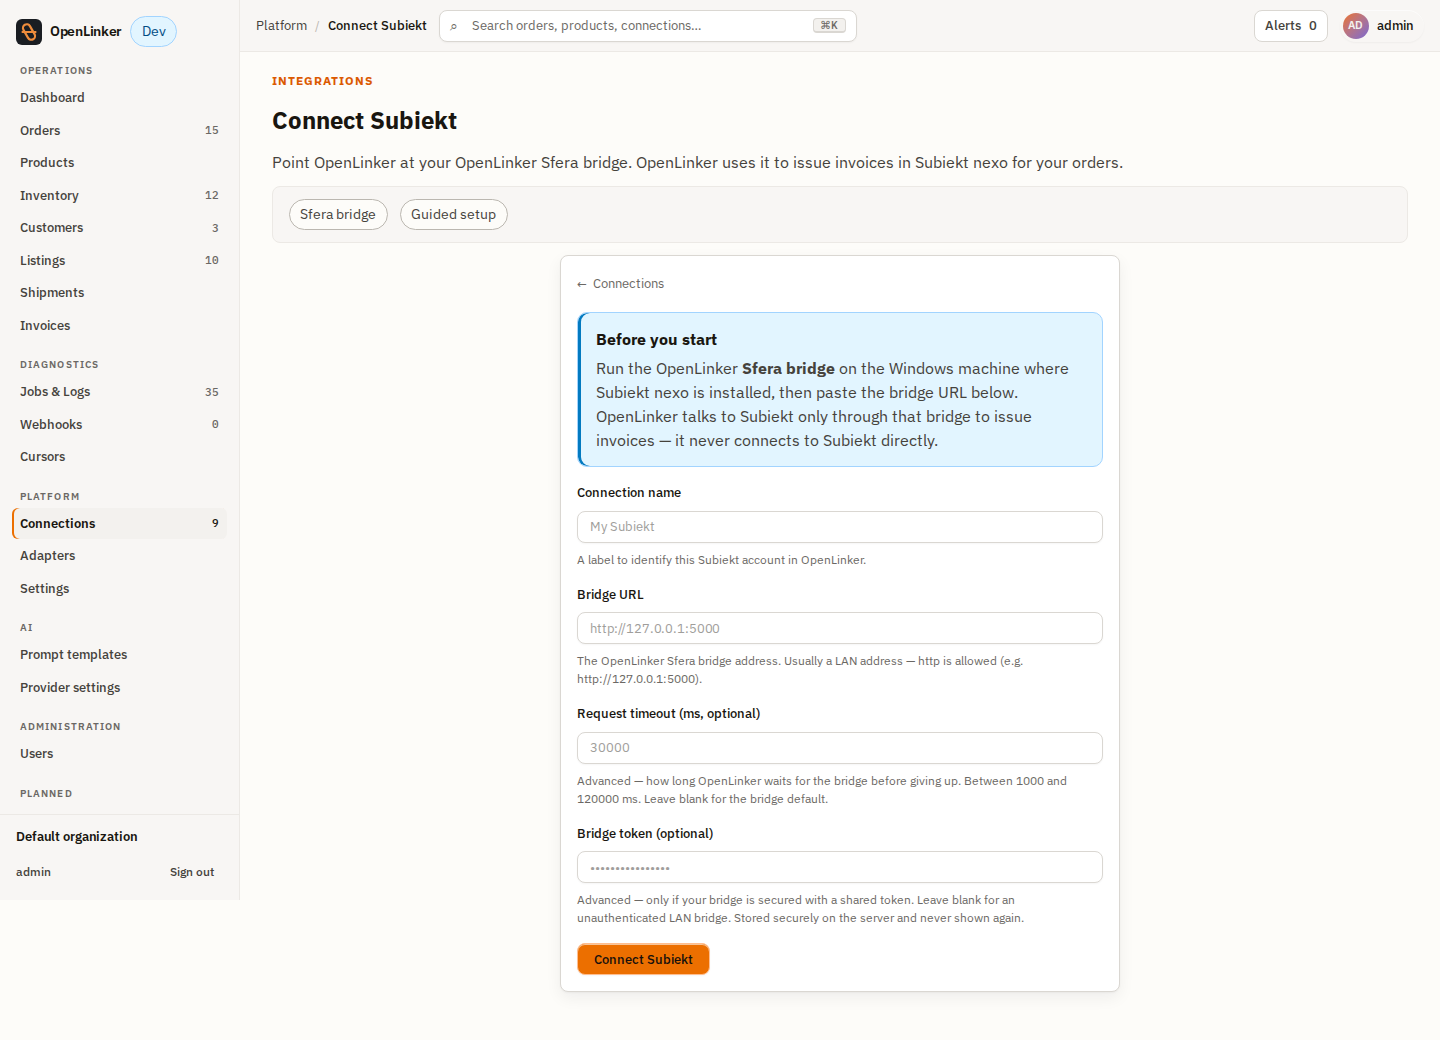
- Connection name — a label, e.g.
My Subiekt. - Bridge URL — the bridge address, without
/api(the adapter appends the paths), e.g.https://192.168.1.50:5005. - Bridge token (optional, advanced) — the same value as the bridge’s
Auth__ApiKey, for a secured bridge. Stored encrypted, never shown again.
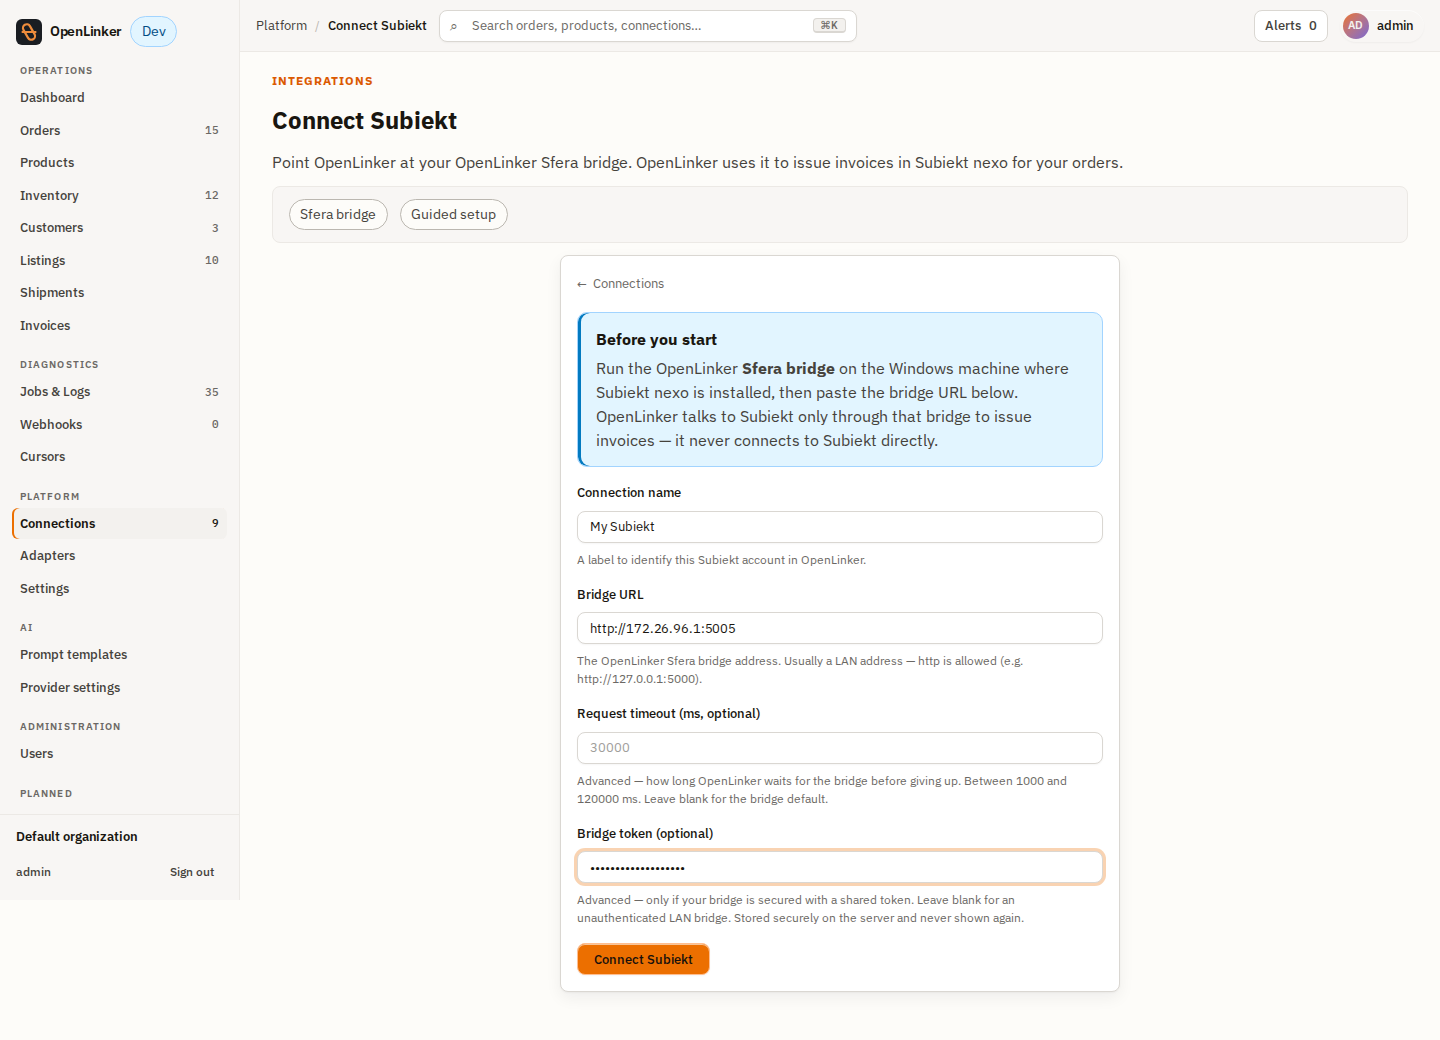
Click Connect Subiekt. After it’s created, click Test connection — this probes the
bridge /health.
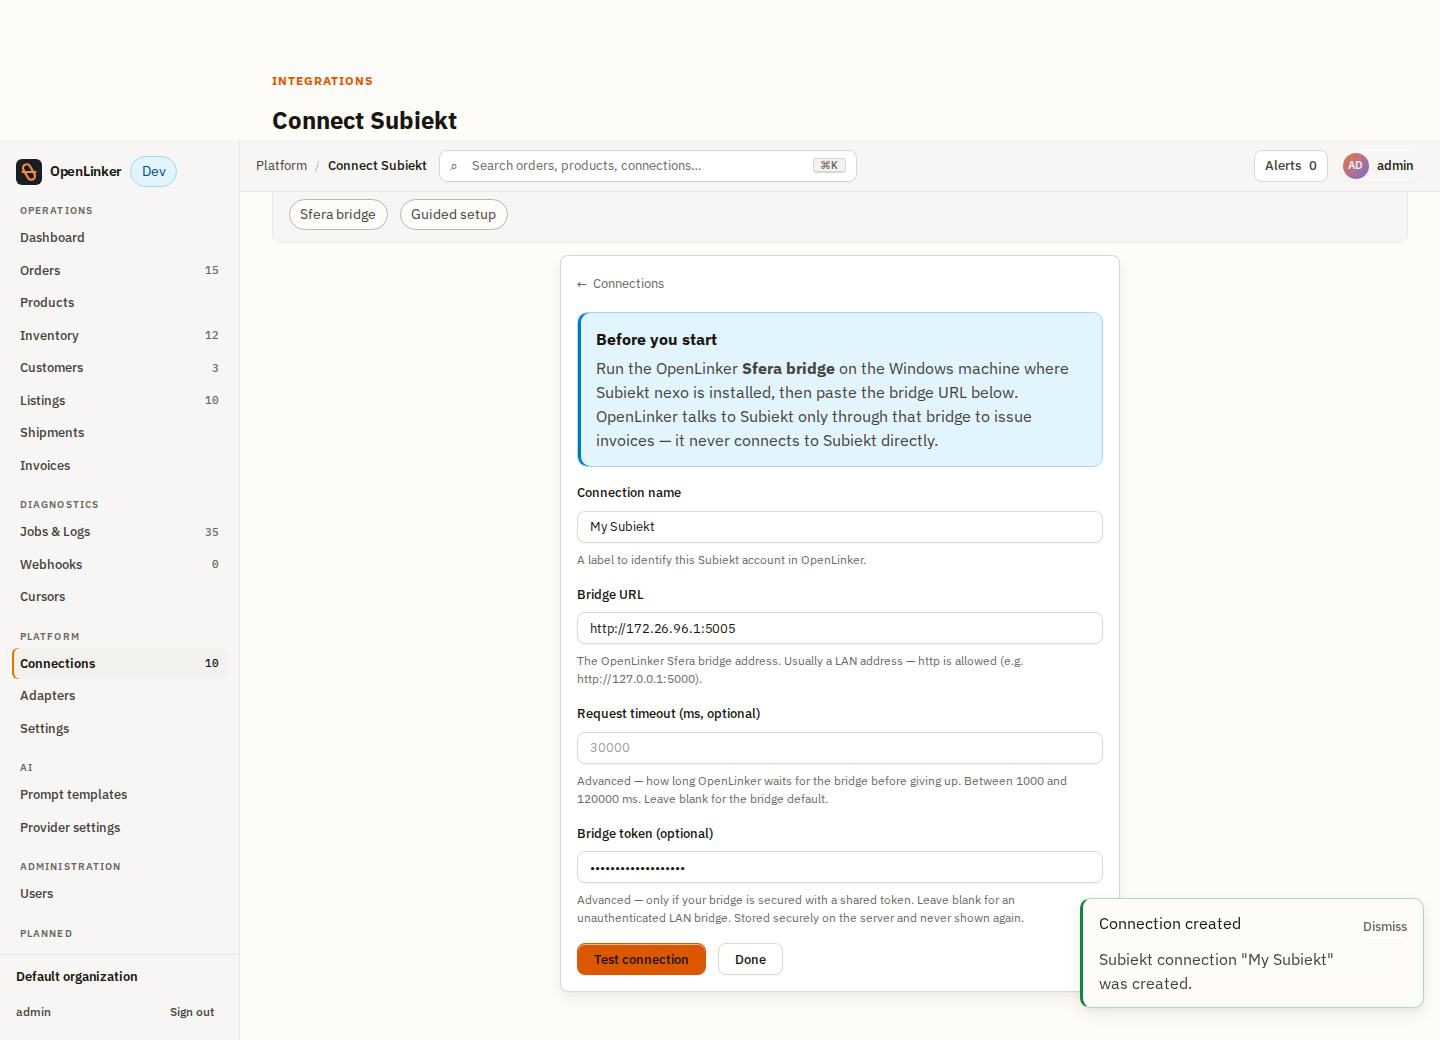
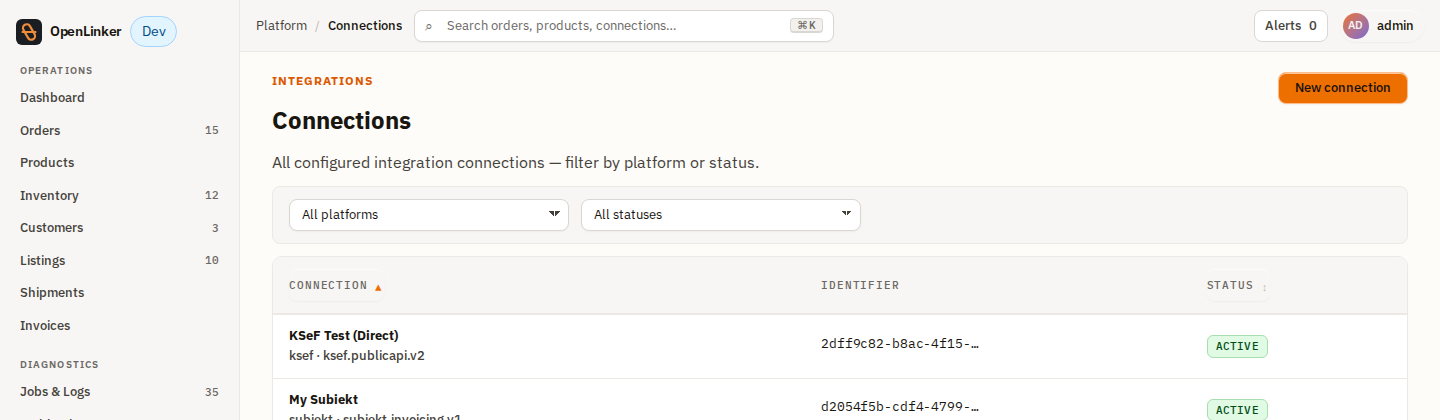
The new connection shows up with the Invoicing capability:
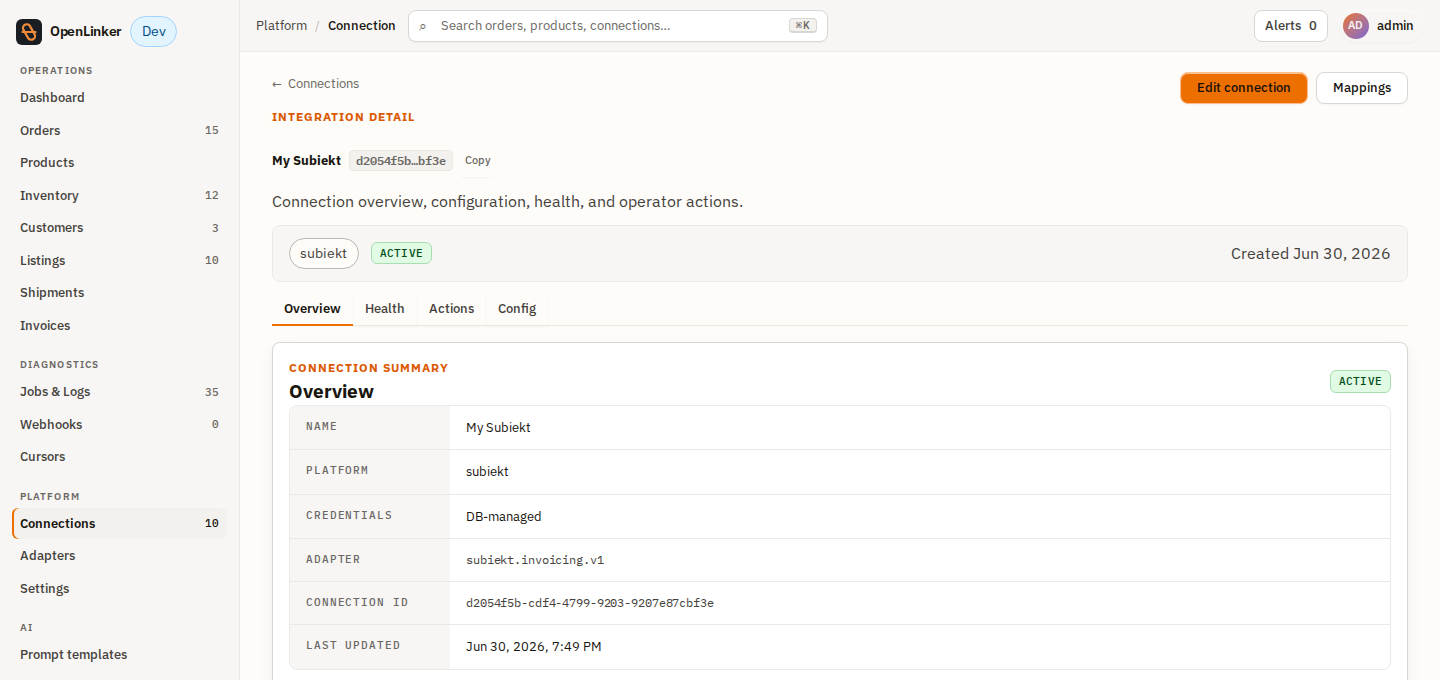
Advanced mode (alternative). You can also add the connection via Add connection → Use advanced mode:
Platform type = Subiekt,Adapter key = subiekt.invoicing.v1,Enabled capabilities = Invoicing,Credentials JSON = { "bridgeToken": "<token>" },Config JSON = { "bridgeBaseUrl": "https://<host>:5005", "invoicing": { "triggerModel": "manual" } }.
Part B2 — Configure the connection (settings & triggers)
Section titled “Part B2 — Configure the connection (settings & triggers)”Open the connection and click Edit (or Connections → My Subiekt → Edit) to reach the settings. Everything you set in the wizard is editable here, plus:
- Invoice trigger — how issuance is kicked off:
- Manual — you issue from the order screen (Part D). Default.
- Auto on order paid — OpenLinker enqueues issuance automatically when an order becomes paid.
- Auto on order shipped — same, on the shipped transition.
- Batched — issuance is deferred and processed in scheduled batches.
- Show KSeF status badge — surface the bridge-reported regulatory (KSeF) status on orders for this connection.
- Rotate bridge token — replace the stored Bearer token without restarting the API
(e.g. after rotating
Auth__ApiKeyon the bridge). The token is write-only — stored encrypted, never shown back. - Adapter key —
subiekt.invoicing.v1(inferred from the platform; rarely changed).
Click Save changes.
Part C — Get an order (PrestaShop example)
Section titled “Part C — Get an order (PrestaShop example)”OpenLinker issues invoices for orders it has ingested. Any order source works; this example uses a PrestaShop order with a company buyer (for a B2B faktura).
In the PrestaShop back office, create the customer.
Add a company address for them (the Company + VAT number / NIP fields make it a B2B buyer).
Create the order (Orders → Add new order): pick the customer, add a product, choose the company address, a carrier, Payment = accepted, and create it.
OpenLinker ingests the order on its next PrestaShop poll (or webhook). It appears on the
Orders screen, ready, with its line items and the buyer address.
Part D — Issue the invoice
Section titled “Part D — Issue the invoice”Open the order in OpenLinker. The Invoice panel shows Not issued with a document-type dropdown and an Issue invoice button. Pick the document type — Invoice (faktura) for B2B (with the buyer NIP) or Receipt (paragon) for B2C — then issue. (If more than one Invoicing connection is active, the panel also shows a connection picker; pick the right Subiekt connection so the document isn’t issued against the wrong one.)
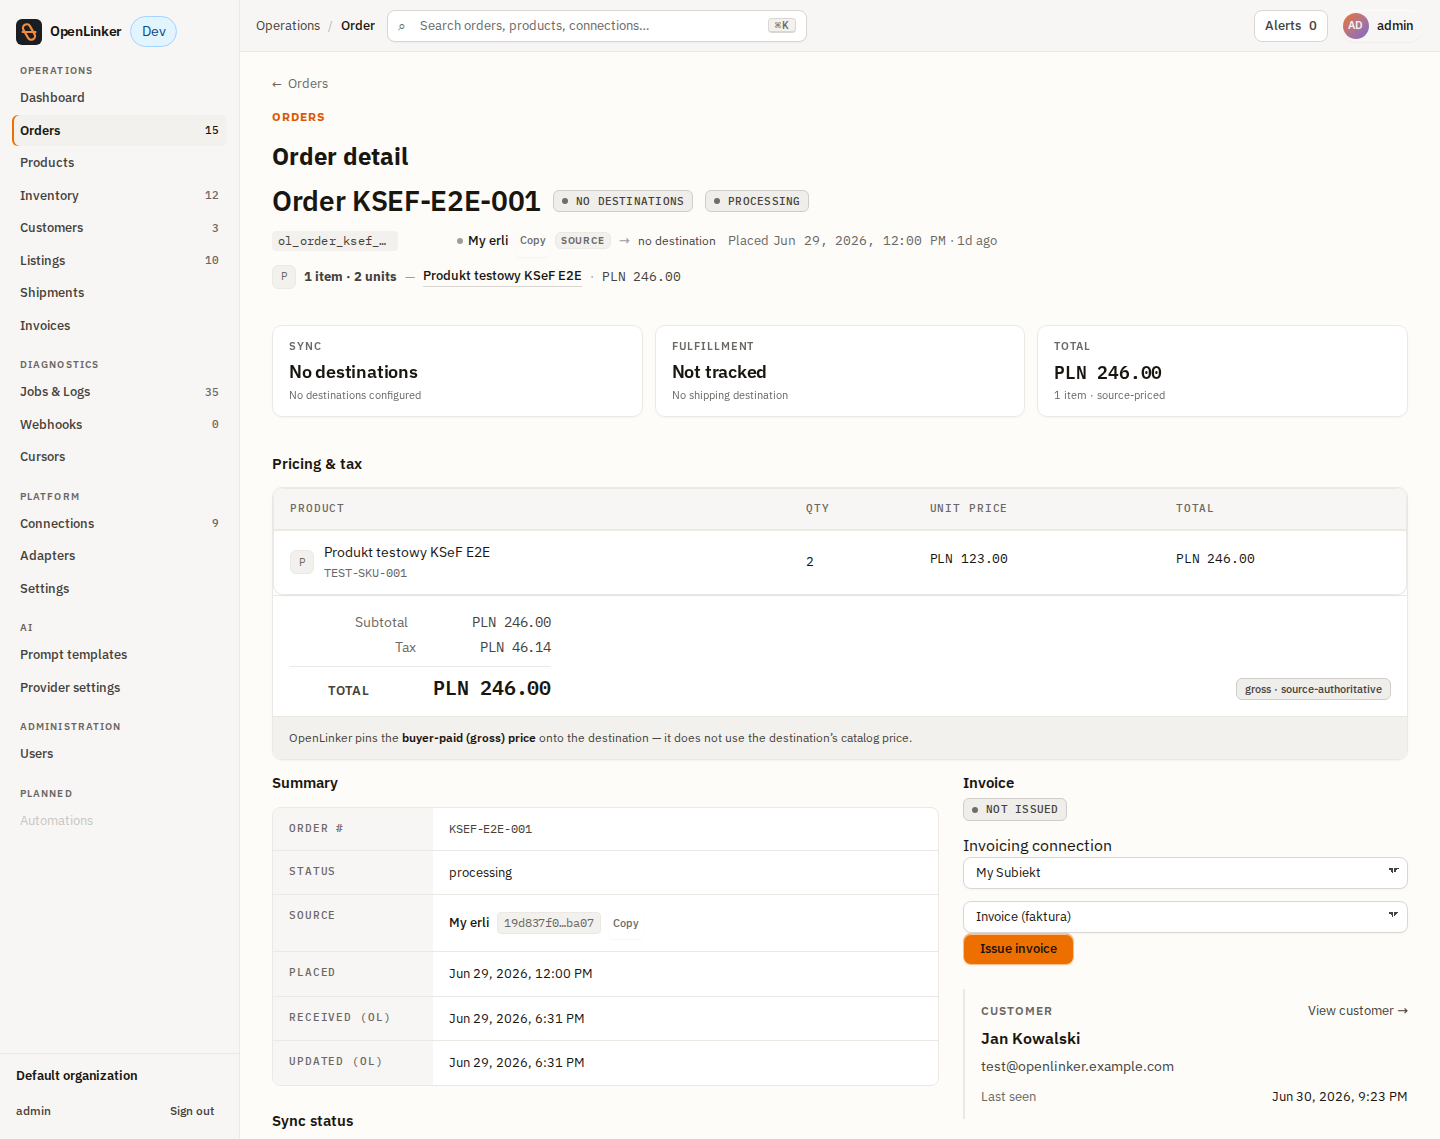
Click Issue invoice. OpenLinker calls the bridge, Subiekt issues the document, and the panel flips to Issued with the document number, type, and KSeF badge:
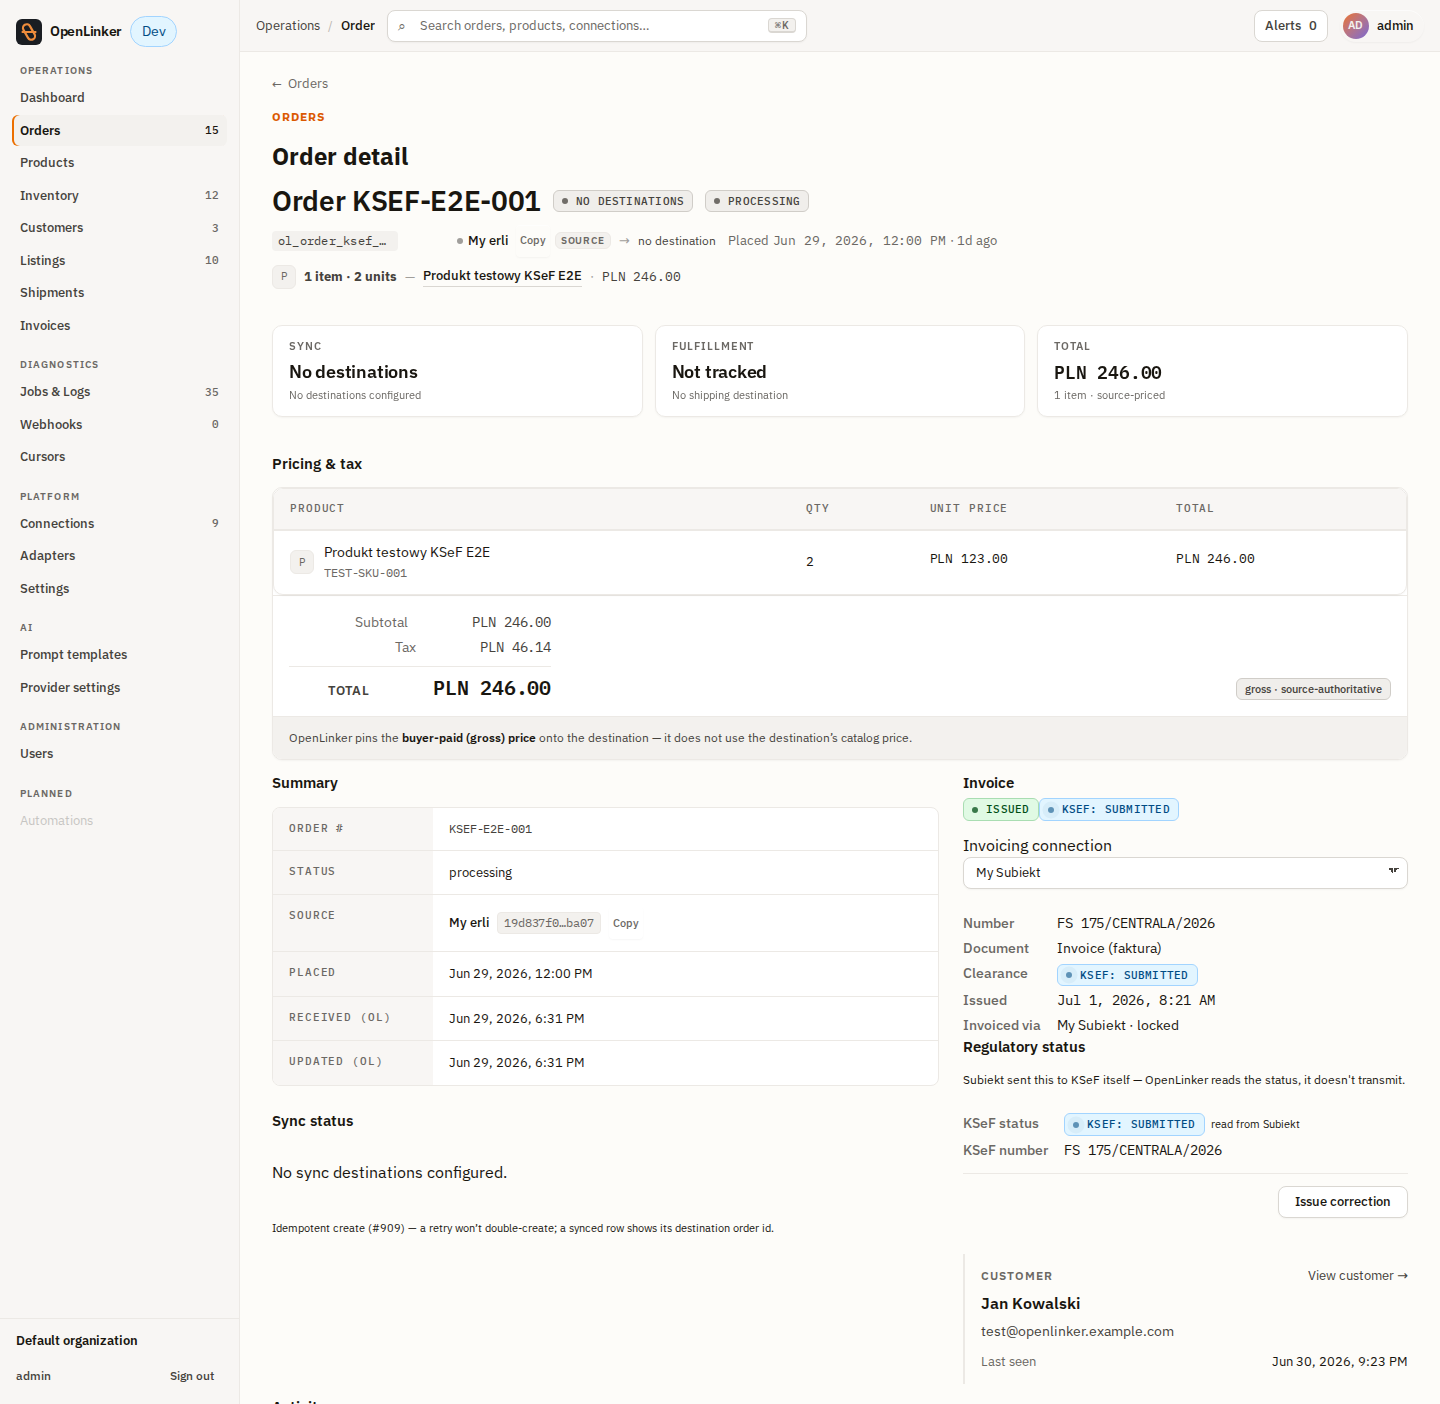
To issue without clicking per order, use an automatic trigger — see Part E.
Verify
Section titled “Verify”-
In OpenLinker —
/invoices(Operations → Invoices): the list, filterable by status, KSeF state, connection and date. Your document is there with its number and KSeF badge; the PDF link works.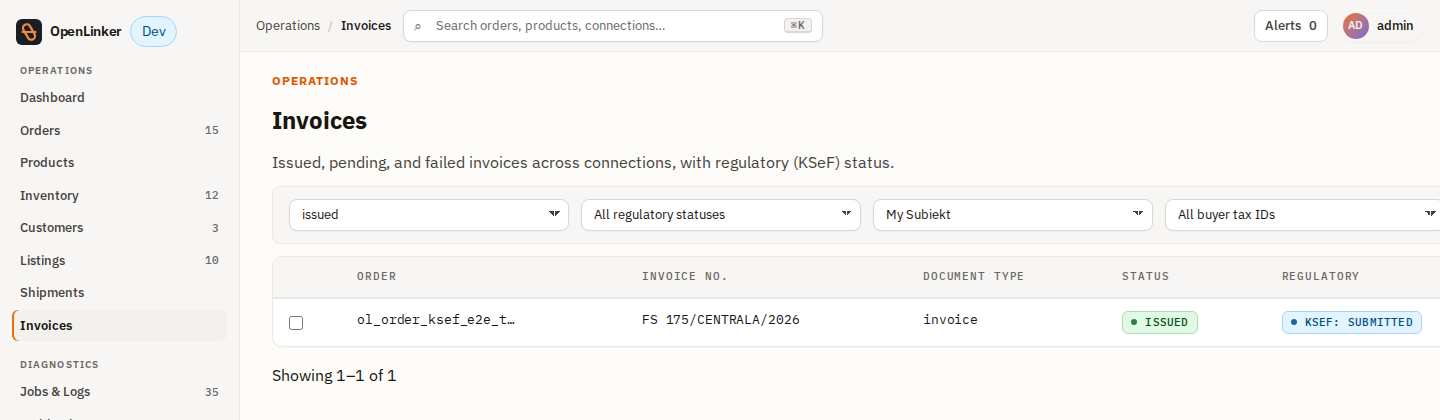
-
In Subiekt nexo — open Dokumenty → Sprzedaży and find the number (e.g.
FS …/CENTRALA/2026). Line items, VAT and the buyer match.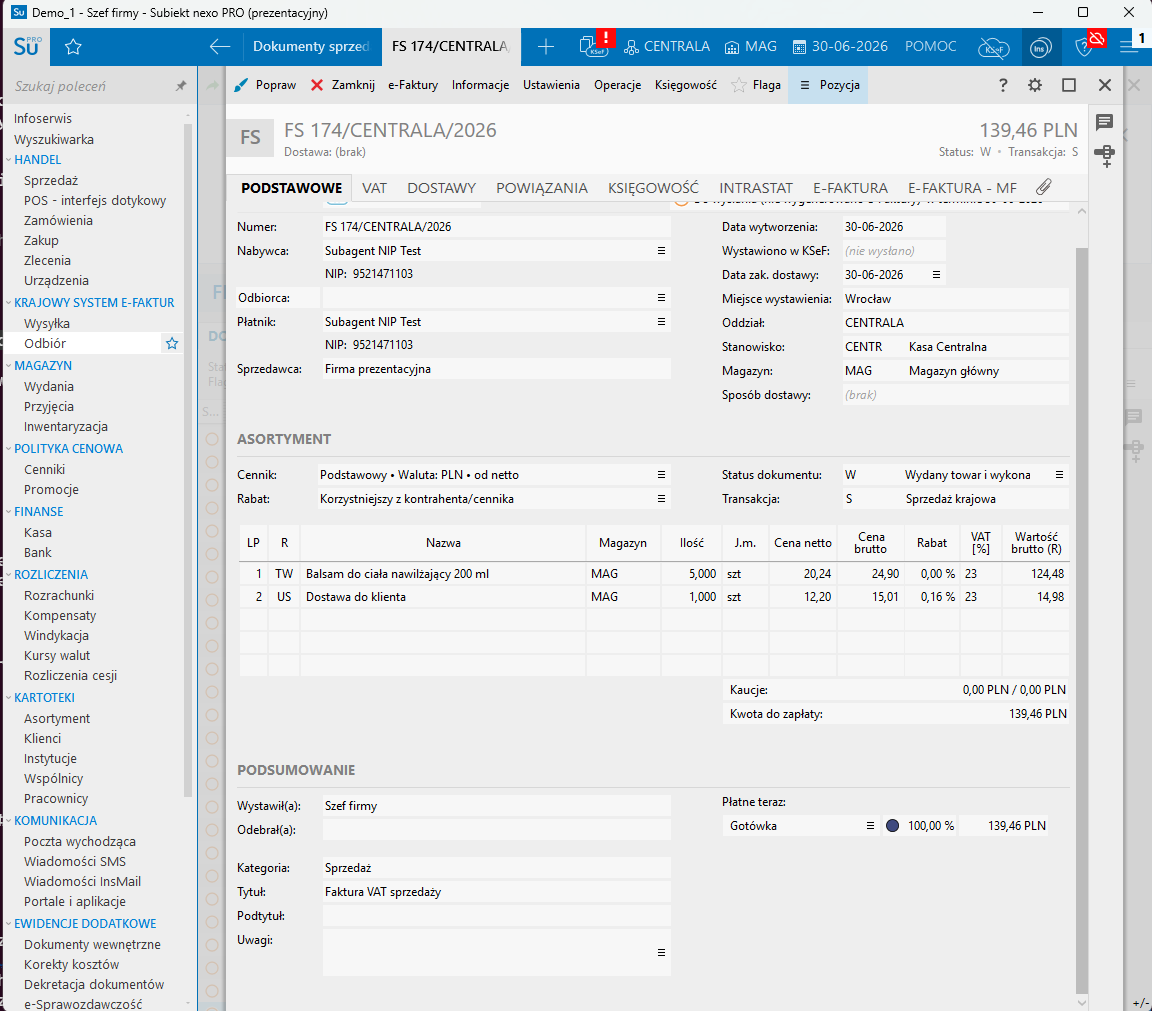
-
KSeF — the badge moves from
pendingtoacceptedas the regulatory reconcile job refreshes it (demo/trial environments report a non-authoritative status).
Part E — Automatic issuance, retry & idempotency
Section titled “Part E — Automatic issuance, retry & idempotency”Auto-issue. Instead of clicking per order, set the connection’s Invoice trigger
(Part B2) to Auto on order
paid (or shipped). When an ingested order reaches that state, OpenLinker enqueues
issuance automatically — no operator action. The result shows on the order’s Invoice panel
and on /invoices exactly as a manual issue does.
Idempotency. Issuance is keyed invoice:{connectionId}:{orderId}. A repeated trigger
event — or an operator who clicks twice — never creates a second document; OpenLinker
returns the existing one. An explicit attempt to re-issue an already-issued order is
rejected with 409 Conflict (“Invoice already issued for order”). This is the guarantee
that makes auto-issue safe to leave on.
Retry a failure. If issuance fails (e.g. the bridge was briefly unreachable, or the
buyer NIP was malformed), the document shows Failed on the order panel and on
/invoices, and the panel offers a Retry button. Fix the cause (e.g. correct the NIP)
and retry — the same idempotency key applies, so a retry that actually succeeded upstream
won’t duplicate. The /invoices list lets you filter by Failed to find everything
needing attention.
Part F — Invoice PDF & KSeF status
Section titled “Part F — Invoice PDF & KSeF status”PDF. When the bridge returns a document PDF URL, the issued Invoice panel and the
/invoices row expose an invoice PDF link (a signed, time-limited URL the bridge
renders from Subiekt). If the bridge doesn’t return one, the number degrades to copy-text —
no broken link.
KSeF (e-faktura). With Show KSeF status badge enabled on the connection, issued
documents carry a regulatory badge — pending → sent → accepted (or rejected).
OpenLinker refreshes it asynchronously via the regulatory-status reconcile job; you don’t
poll manually. On a demo/trial database the status is reported by the bridge but is not
an authoritative government clearance — see the runbook.