

PrestaShop Integration Setup Guide
Step-by-step: from a fresh PrestaShop store to a working OpenLinker connection with catalog sync, inventory propagation, order ingest, and reliable order creation.
Prerequisites
Section titled “Prerequisites”- PrestaShop 8.0 or later (9.0.x is the tested/target version — it’s what the dev stack ships)
- PrestaShop’s Webservice enabled (Advanced Parameters → Webservice)
- OpenLinker API server running
Using InPost paczkomat lockers? See
paczkomat.mdfor the InPost-specific address setup — it’s a separate, optional step from the core connection flow below.
1. Generate a PrestaShop webservice API key
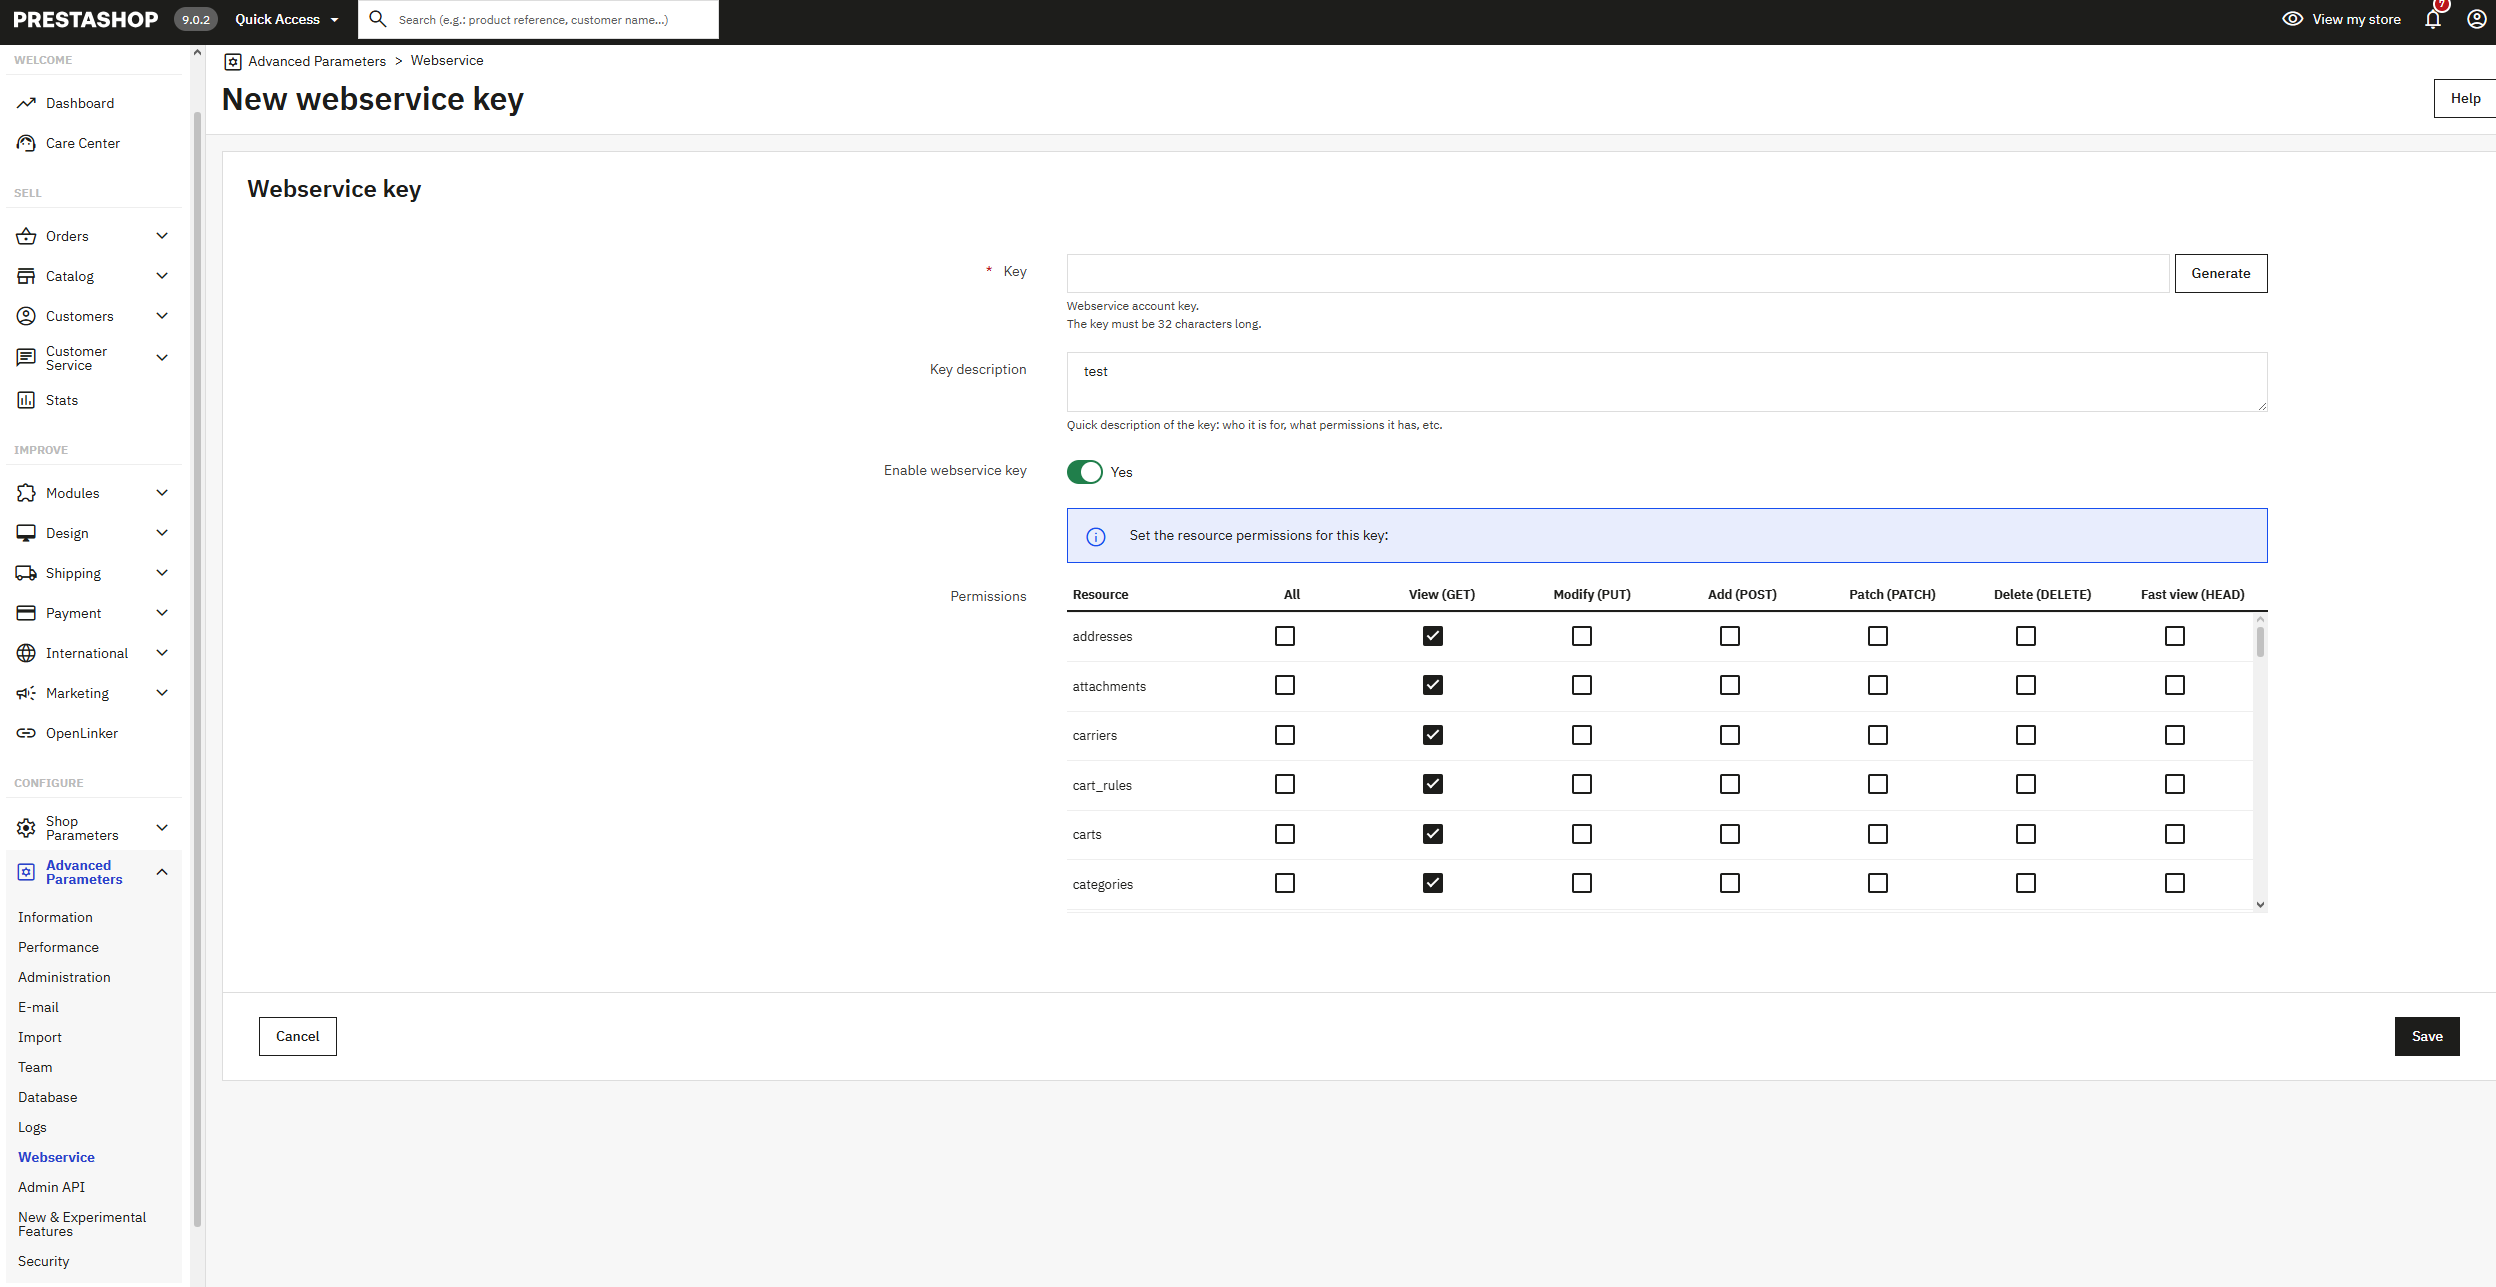
Section titled “1. Generate a PrestaShop webservice API key”- Log in to PrestaShop admin → Advanced Parameters → Webservice
- Confirm the webservice toggle is enabled (the top of the page)
- Click Add new webservice key
- Fill in the key form:
- Description: e.g.
OpenLinker - Permissions: this is a per-resource checkbox grid. At minimum:
- Tick the View (GET) column header to grant read on all resources — OpenLinker reads products, combinations, stock, orders, customers, addresses, carriers, categories, currencies, and more.
- Also tick Modify (PUT) and Add (POST) on the Configurations
row specifically. OpenLinker writes to
ps_configurationwhen you click Configure webhooks later (Step 6) — without this, that button will fail.
- Description: e.g.
- Save and copy the generated key — shown in full only once
Ignore a “Webservice URL rewriting not functional” warning on the status panel if you see one — that check runs from inside the PrestaShop container against its own internal hostname and doesn’t reflect reachability from OL.
2. Create the connection in OpenLinker
Section titled “2. Create the connection in OpenLinker”-
In the OpenLinker web app → Add connection → Guided setup → choose PrestaShop
-
Fill in the fields:
HTTPS is required for the Shop URL. Set the SSL domain in PrestaShop under Shop Parameters → Traffic & SEO → SEO & URLs → Set shop URL (the SSL domain field, alongside Shop domain), and use a
https://Shop URL when creating the connection below — the webservice key travels as Basic Auth on every request, so a plainhttp://Shop URL exposes it in transit.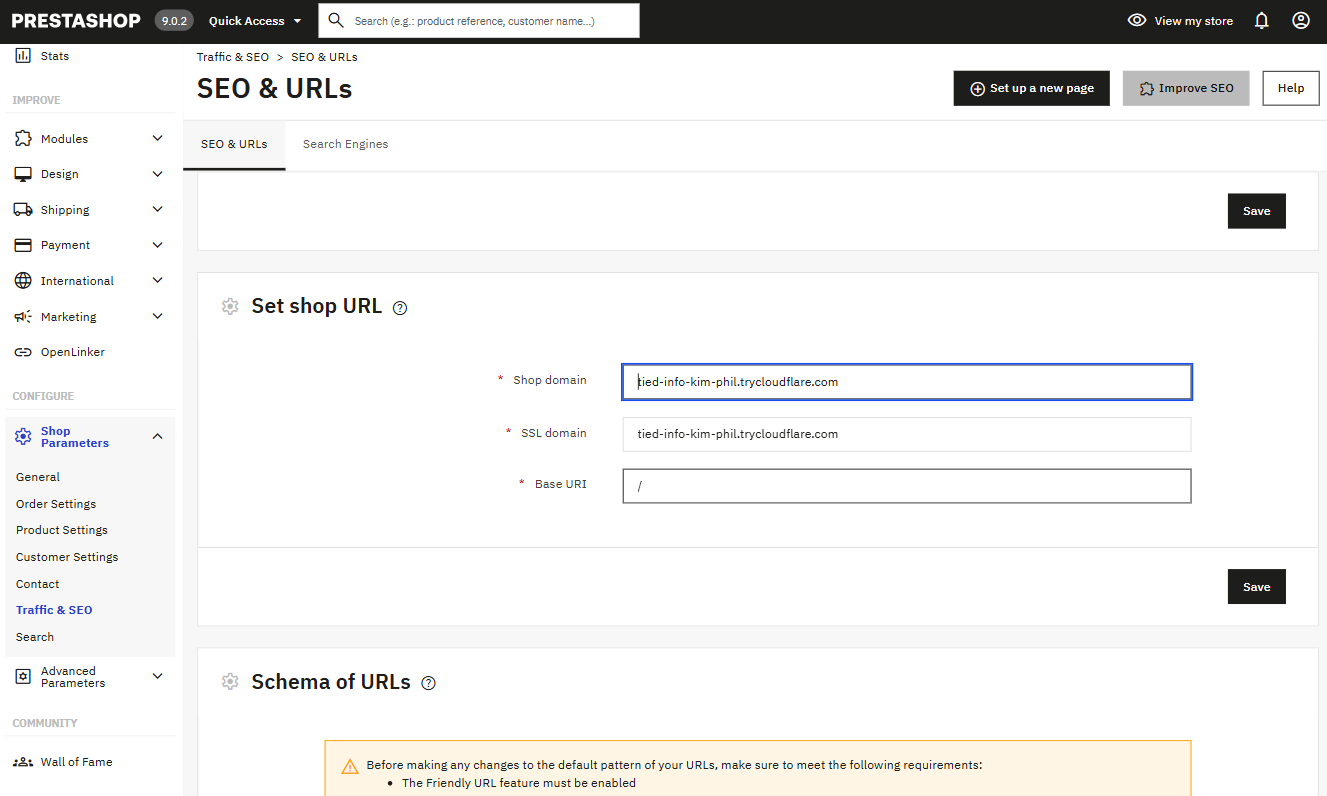
No public TLS yet (local/demo store)? Get an HTTPS URL in one command with a free Cloudflare Quick Tunnel — no account needed:
Terminal window cloudflared tunnel --url http://localhost:8080# → prints something like https://tied-info-kim-phil.trycloudflare.comUse the printed
https://...trycloudflare.comURL as both the SSL domain above and the Shop URL below. The URL rotates every time you restart the tunnel, so re-run Test Connection (and re-set the SSL domain) after restarting it. Any other tunnel tool (ngrok, etc.) or a real domain with a proper certificate works the same way.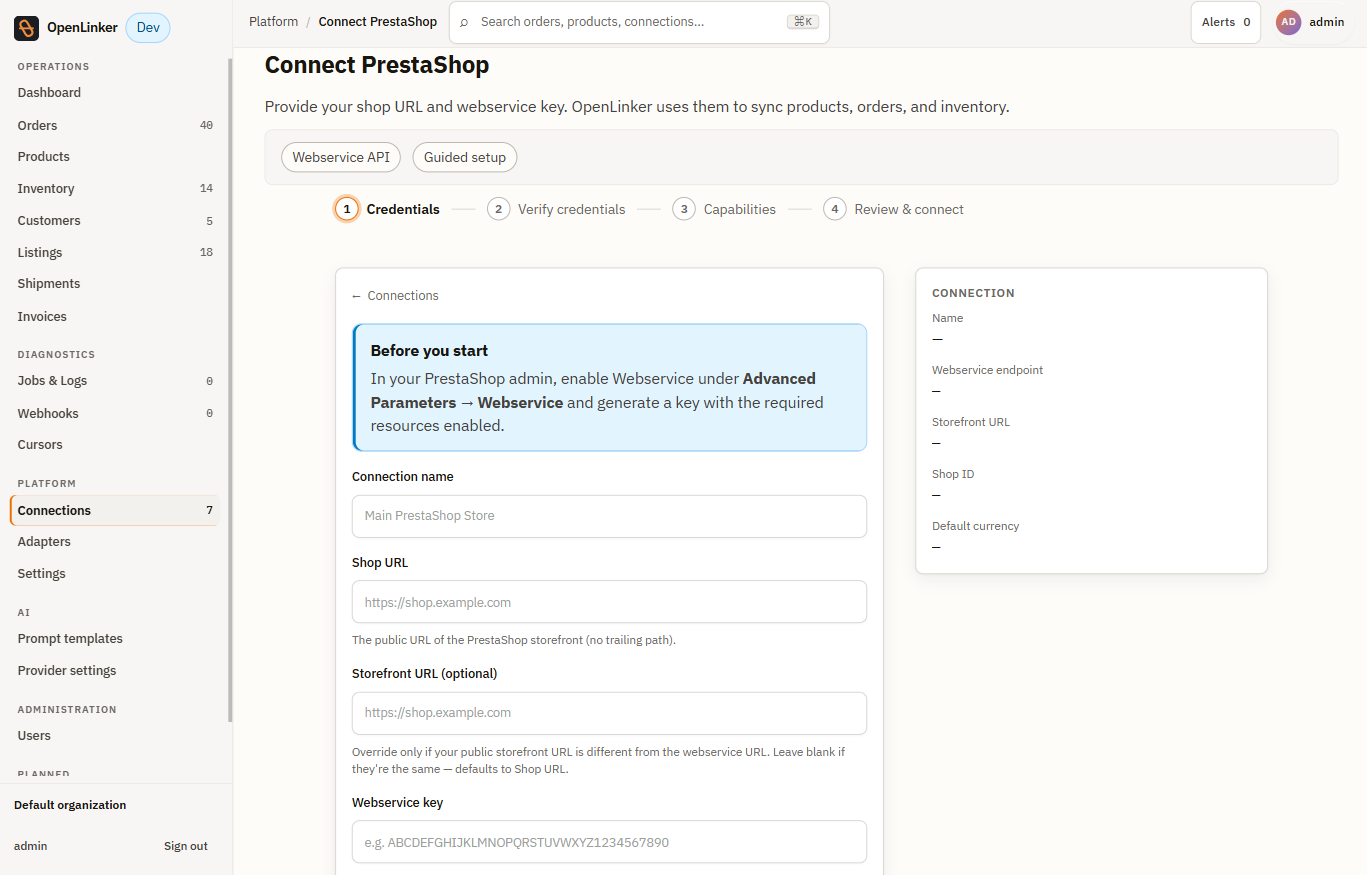
Field Required? What it’s for Connection name yes Human-readable label, e.g. My PrestaShop storeShop URL yes The webservice base URL, e.g. https://shop.example.com. Must be HTTPS — see the callout above.Webservice key yes The key from Step 1 Storefront URL no Only set this if your public storefront is on a different host than the webservice URL. Leave blank to default to Shop URL. Shop ID no Only for multi-shop PrestaShop installations. Leave blank for a single-shop install. OL callback URL no (but required before Step 6) OpenLinker’s own URL, as reachable from PrestaShop — not derived automatically, since guessing it from request headers would be a spoofing risk. Local/Docker dev: http://host.docker.internal:3000. Production: your public OL API URL.Fallback carrier no Which PrestaShop carrier to use when an incoming shipping method has no explicit mapping. Leave unset to fall back to the OpenLinker Dynamic carrier (Step 5) once it’s installed — this always works and carries the exact marketplace shipping cost. InPost PS module type no Only if you use InPost paczkomat lockers — see paczkomat.md. -
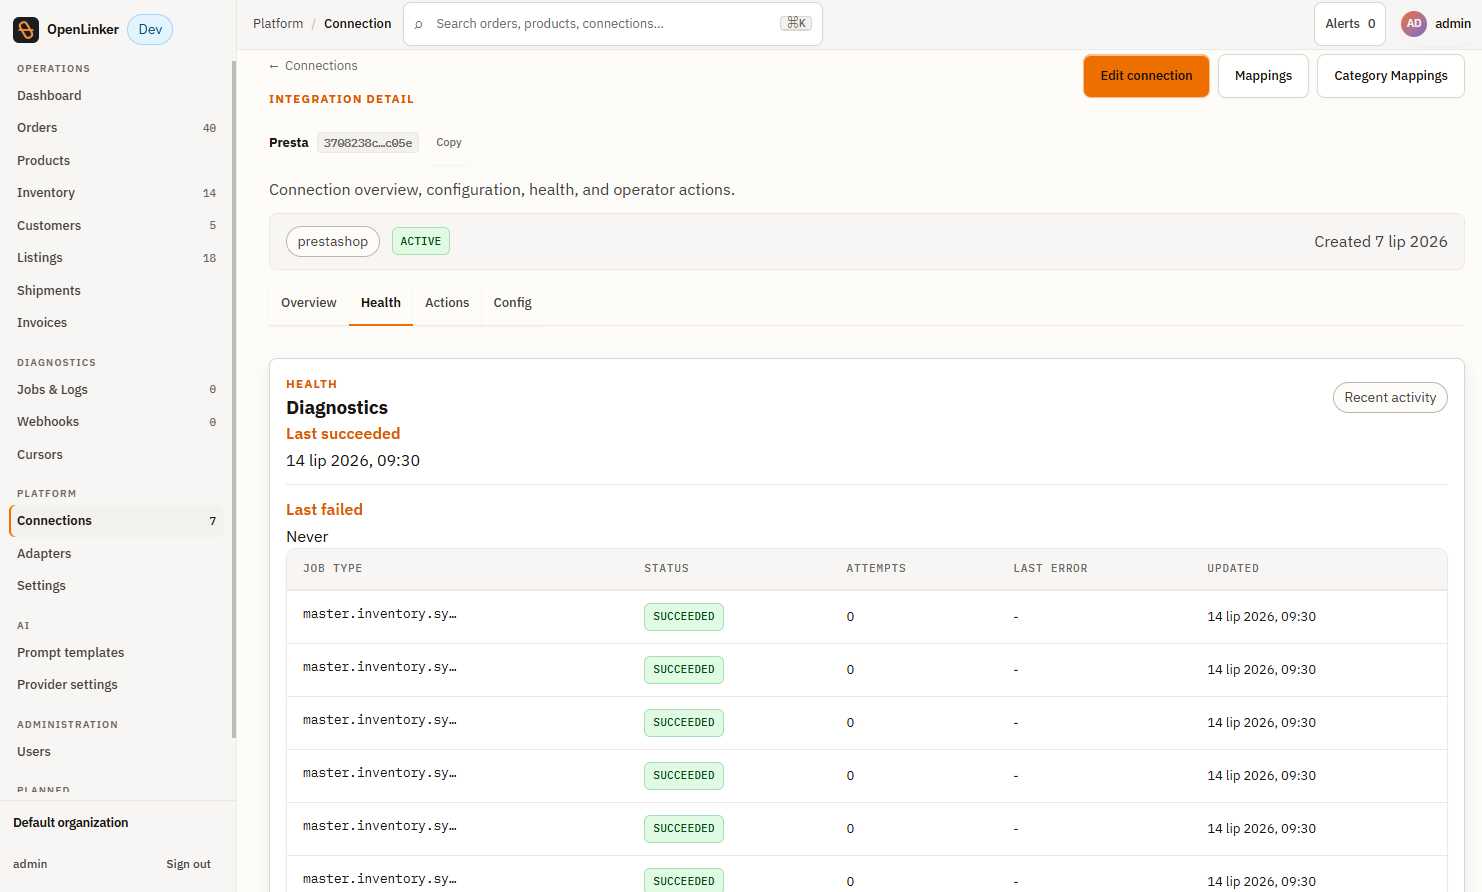
Click Create connection — you’re redirected to the connection detail page
Verify
Section titled “Verify”Click Test connection on the detail page (Actions tab) — it should return a green success indicator confirming the webservice key is valid and reachable.
3. Enable capabilities
Section titled “3. Enable capabilities”After the connection is saved, enable the capabilities you need:
| Capability | What it does |
|---|---|
ProductMaster | Reads the PrestaShop catalog into OL (products, variants/combinations, categories) |
InventoryMaster | Syncs PrestaShop stock levels → marketplace offer quantities |
OrderSource | Ingests PrestaShop orders into OL (date_upd watermark polling — see §8) |
OrderProcessorManager | Creates PrestaShop orders from marketplace order events |
ProductPublisher / CategoryProvisioner | Advanced: lets OL create/update products and categories directly in PrestaShop, for setups where PrestaShop is a destination catalog rather than the source. Most operators using PrestaShop as their master shop won’t need these — skip unless you know you do. |
4. Map categories to your marketplace
Section titled “4. Map categories to your marketplace”With ProductMaster enabled, the connection detail page gains a Category
Mappings entry. This connects your PrestaShop category tree to a
marketplace’s category tree, so products can be listed in the right category
when you create marketplace offers later.
- On the PrestaShop connection’s detail page, click Category Mappings
- Pick the marketplace connection at the top (auto-selected if you only have one)
- Click a PrestaShop category on the left — the right panel activates
- Browse or search the marketplace’s category tree, then click Select
- Click Save mapping — the left-panel row updates to show the mapped category
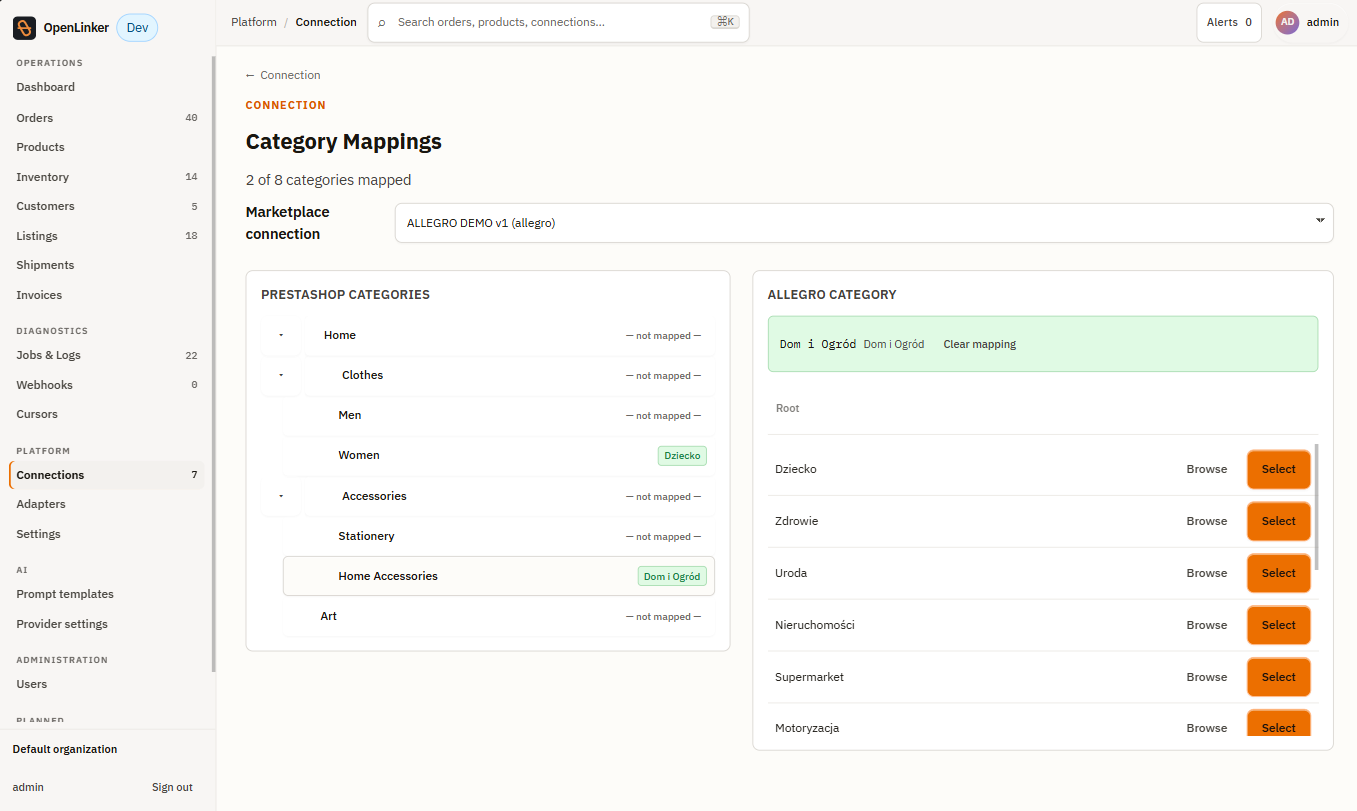
To change a mapping, click the category again and pick a different target. To remove one, click Clear mapping in the green preview bar. This step is optional — you can skip it and map categories later, right before creating your first offer.
5. The OL Dynamic Carrier module
Section titled “5. The OL Dynamic Carrier module”PrestaShop’s own order-creation endpoint recomputes shipping cost from the carrier’s own price-range tables and ignores whatever total OpenLinker sends — which would silently produce the wrong shipping charge on marketplace orders. The OpenLinker PrestaShop module closes this gap, and does two other useful things at the same time:
- Reliable order creation — a front controller that creates orders through PrestaShop’s own canonical order-validation flow, so the carrier, shipping cost, and totals on the resulting order are always correct (see §7 below).
- Dynamic shipping carrier — an OL-owned carrier that reports the exact, authoritative shipping cost OpenLinker calculated for that order.
- Webhook outbox — captures product/order/stock changes in PrestaShop and delivers them to OpenLinker as webhooks, for near-real-time sync instead of relying purely on polling.
Installing this module is recommended, not strictly required — without it, order creation still works via your own carrier mappings or a configured fallback carrier (§2), just without the “exact marketplace shipping cost, zero configuration” convenience the module provides.
Installing — development
Section titled “Installing — development”- Bind-mount the module into your PrestaShop container:
services:prestashop:volumes:- ./apps/prestashop-module/openlinker:/var/www/html/modules/openlinker
- Start/restart PrestaShop:
docker compose up -d prestashop - PrestaShop admin → Modules → Module Manager → search “OpenLinker” → Install
- Code edits under
apps/prestashop-module/openlinker/apply instantly — no reinstall needed while developing
Installing — production
Section titled “Installing — production”- Package the module:
cd apps/prestashop-module && zip -r openlinker.zip openlinker/ - PrestaShop admin → Modules → Module Manager → Upload a module → select the zip
- Click Install on the uploaded module
Module configuration
Section titled “Module configuration”Once “Configure webhooks” (§6) has run, the module’s Base URL, Connection ID, and Webhook Secret are pushed automatically — you don’t need to enter them by hand. One thing still needs a manual step:
-
Cron Token: generated automatically on install. Open the module’s config page (Improve → OpenLinker in the left sidebar, or Modules → Module Manager → OpenLinker → Configure) and copy it, then wire up a system cron job on the PrestaShop server to drive webhook delivery:
Terminal window # Every 1–5 minutes*/2 * * * * curl -s "https://your-shop.com/index.php?fc=module&module=openlinker&controller=cron&token=YOUR_CRON_TOKEN" > /dev/null 2>&1
Everything else on that page (event-type toggles, batch size, retry attempts, backoff multiplier) has sane defaults — leave them unless you have a specific reason to change them. Full internals (outbox pattern, event deduplication, retry/backoff design) are documented in the module’s own README.
6. Configure webhooks
Section titled “6. Configure webhooks”With the module installed (§5) and the OL callback URL set on the connection (§2), click Configure webhooks on the connection detail page.
This one click:
- rotates a fresh webhook secret for this connection,
- pushes the Base URL, Connection ID, and that secret into PrestaShop via the webservice (the reason Step 1 needed Configurations write permission),
- and fires a test ping to confirm the round-trip works —
all in a single request. You’ll see a success indicator once it completes.
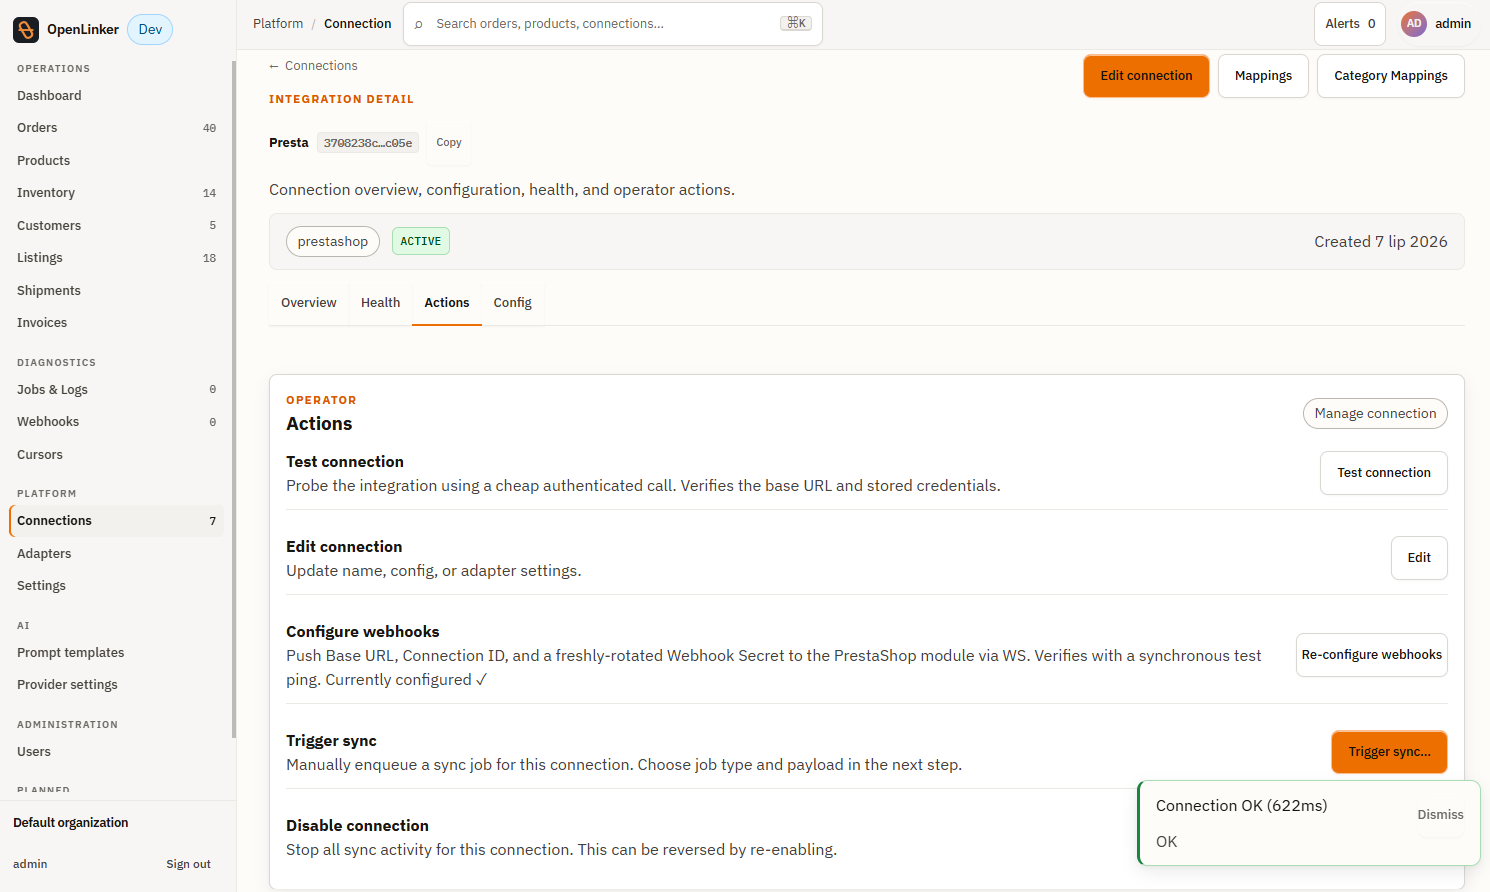
Without this step, OpenLinker still ingests orders via polling (§8) — webhooks just make it near-real-time instead.
7. How orders reach PrestaShop
Section titled “7. How orders reach PrestaShop”OpenLinker creates orders through PrestaShop’s own order-validation flow (the same path PrestaShop’s checkout itself uses), not a raw insert — that’s why the shipping cost and carrier on the resulting order are always correct, instead of being silently recomputed or dropped.
Carrier resolution for an incoming order, in order of priority:
- Your own explicit shipping-method mapping (configured per marketplace connection), if one exists for that shipping method
- The fallback carrier you set in §2, if configured
- The OpenLinker Dynamic carrier (§5) — always available once the module is installed, and always carries the exact marketplace shipping cost
Guest customers are auto-provisioned for marketplace buyers, and PrestaShop’s
own order-confirmation emails are suppressed by default on these
OL-imported orders (the marketplace already notified the buyer). To let
PrestaShop send its own emails too, set OPENLINKER_IMPORT_SEND_MAIL to
1 in the module’s configuration.
8. Environment variables
Section titled “8. Environment variables”| Variable | Default | Description |
|---|---|---|
OL_PRESTASHOP_POLL_SCHEDULER_ENABLED | true | Enable the prestashop-orders-poll scheduler task. Set to false to disable order polling entirely (only sensible if webhooks — §6 — are configured and reliable). |
OL_PRESTASHOP_POLL_INTERVAL_CRON | 0 */10 * * * * | Poll cadence — every 10 minutes by default. |
OL_PRESTASHOP_POLL_PAGE_LIMIT | 100 | Orders fetched per polling page. |
OL_PRESTASHOP_FULFILLMENT_STATUS_SYNC_SCHEDULER_ENABLED | true | Enable fulfillment-status sync back to PrestaShop. |
OL_PRESTASHOP_FULFILLMENT_STATUS_SYNC_INTERVAL_CRON | 0 */15 * * * * | Fulfillment-status sync cadence. |
OL_PRESTASHOP_FULFILLMENT_STATUS_SYNC_PAGE_LIMIT | 100 | Orders checked per sync page. |
OL_PRESTASHOP_FULFILLMENT_STATUS_SYNC_UPDATED_SINCE_DAYS | 30 | How far back to look for orders needing a status check. |
Add any overrides to your worker .env.
9. Local development
Section titled “9. Local development”The dev stack includes a pre-configured PrestaShop instance at
http://localhost:8080 (WooCommerce, if you also run it, uses 8082 to
avoid the collision):
# Start the full dev stack (includes PrestaShop)pnpm dev:stack:up
# Re-seed the fixture catalog if needed (idempotent — safe to run multiple times)pnpm dev:stack:seed-prestashop
Dev stack PrestaShop credentials:
| Field | Value |
|---|---|
| URL | http://localhost:8080 |
| Admin panel | http://localhost:8080/admin-dev/ (demo@prestashop.com / prestashop_demo) |
| Webservice key | generated manually — there is no automated retrieval script for PrestaShop (unlike WooCommerce’s pnpm dev:stack:wc-credentials). Follow Step 1 above against the dev-stack admin every time you rebuild the stack. |
The dev stack seeds five fixture products on first boot (sourced from real
Allegro listings, covering the variant/EAN-coverage matrix the codebase
exercises) — see the full table in
docs/getting-started.md
rather than duplicating it here.
For the complete first-time walkthrough (connection creation, category
mapping, first offer, first order) with a guided narrative, see
docs/getting-started.md.
10. Verify catalog sync with a test product
Section titled “10. Verify catalog sync with a test product”Once ProductMaster is enabled (§3), the fastest way to confirm the
connection is actually pulling catalog data is to create a throwaway product
in PrestaShop and watch it show up in OL.
-
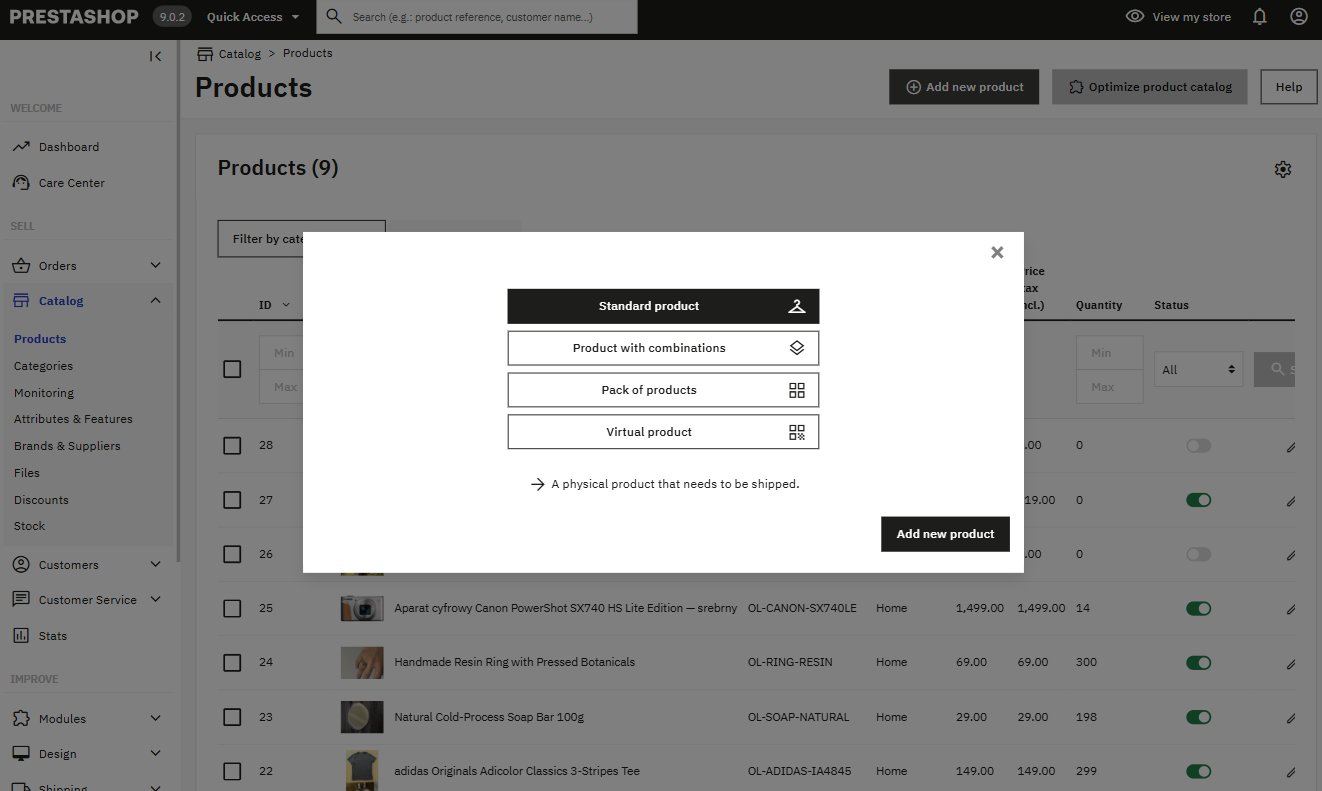
PrestaShop admin → Catalog → Products → Add new product → pick Standard product (a plain physical product is enough for a smoke test)
-
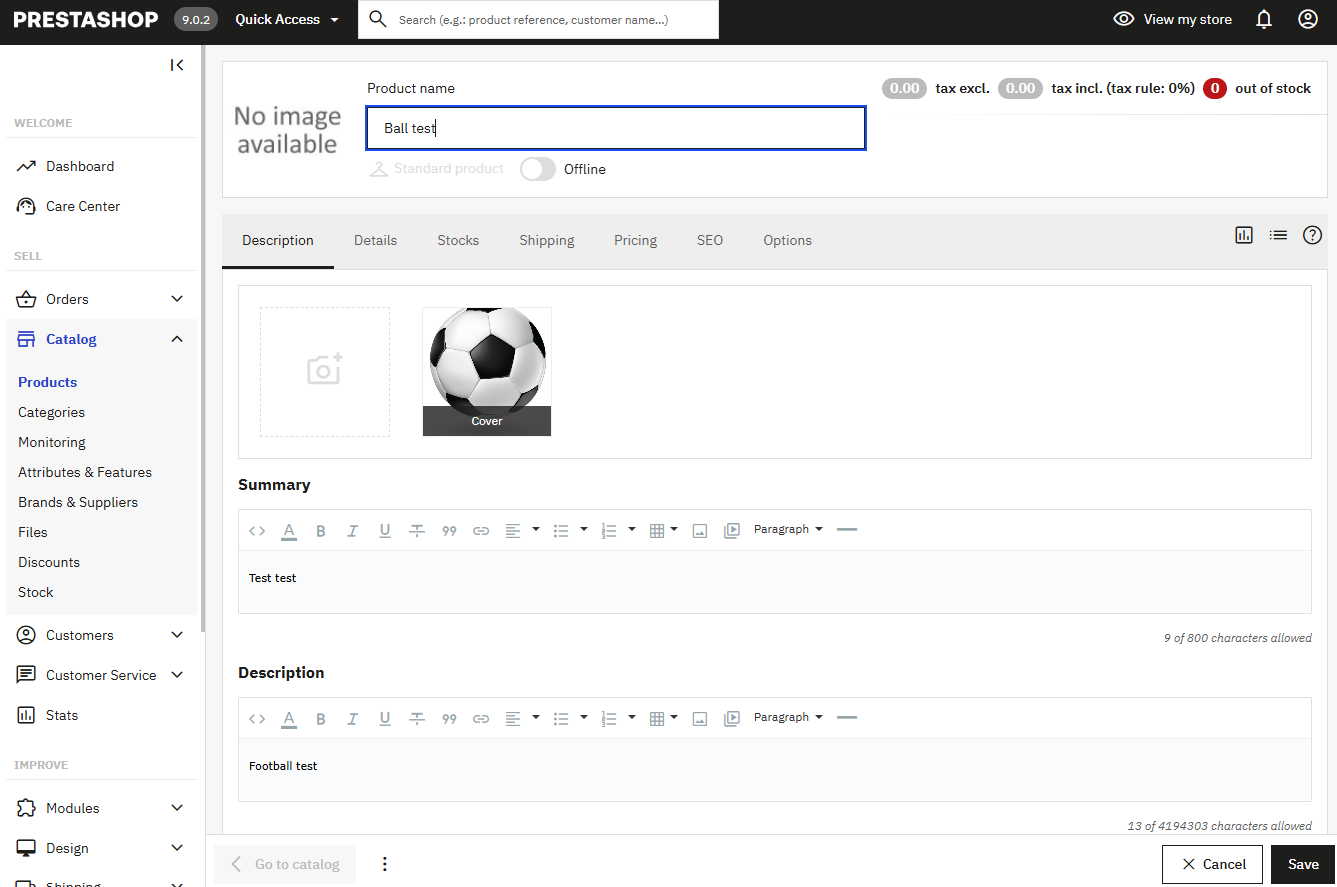
Fill in a name, optionally an image and a description, then Save
-
On the Stocks tab, set a quantity so the product isn’t
0in stock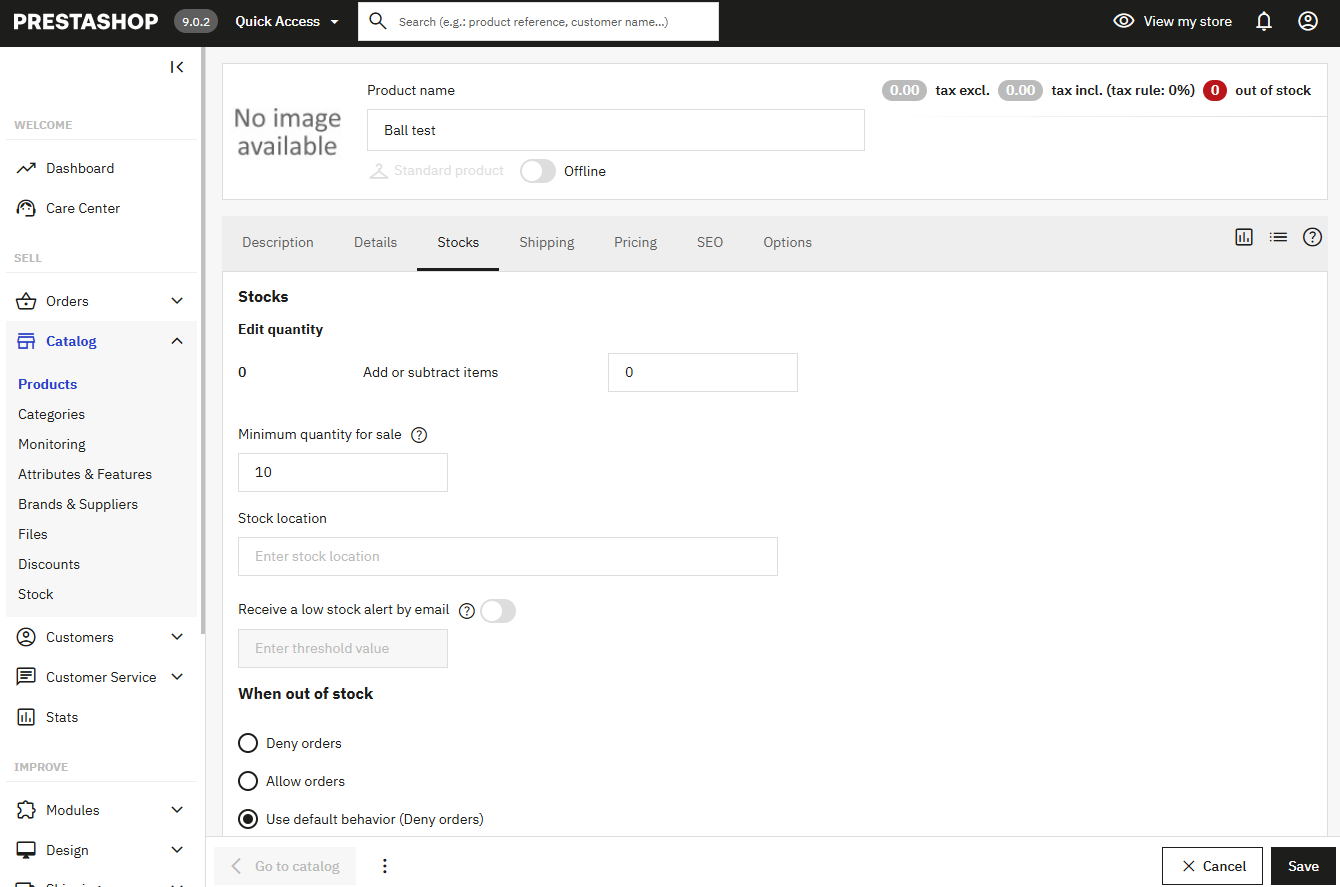
-
On the Pricing tab, set a retail price
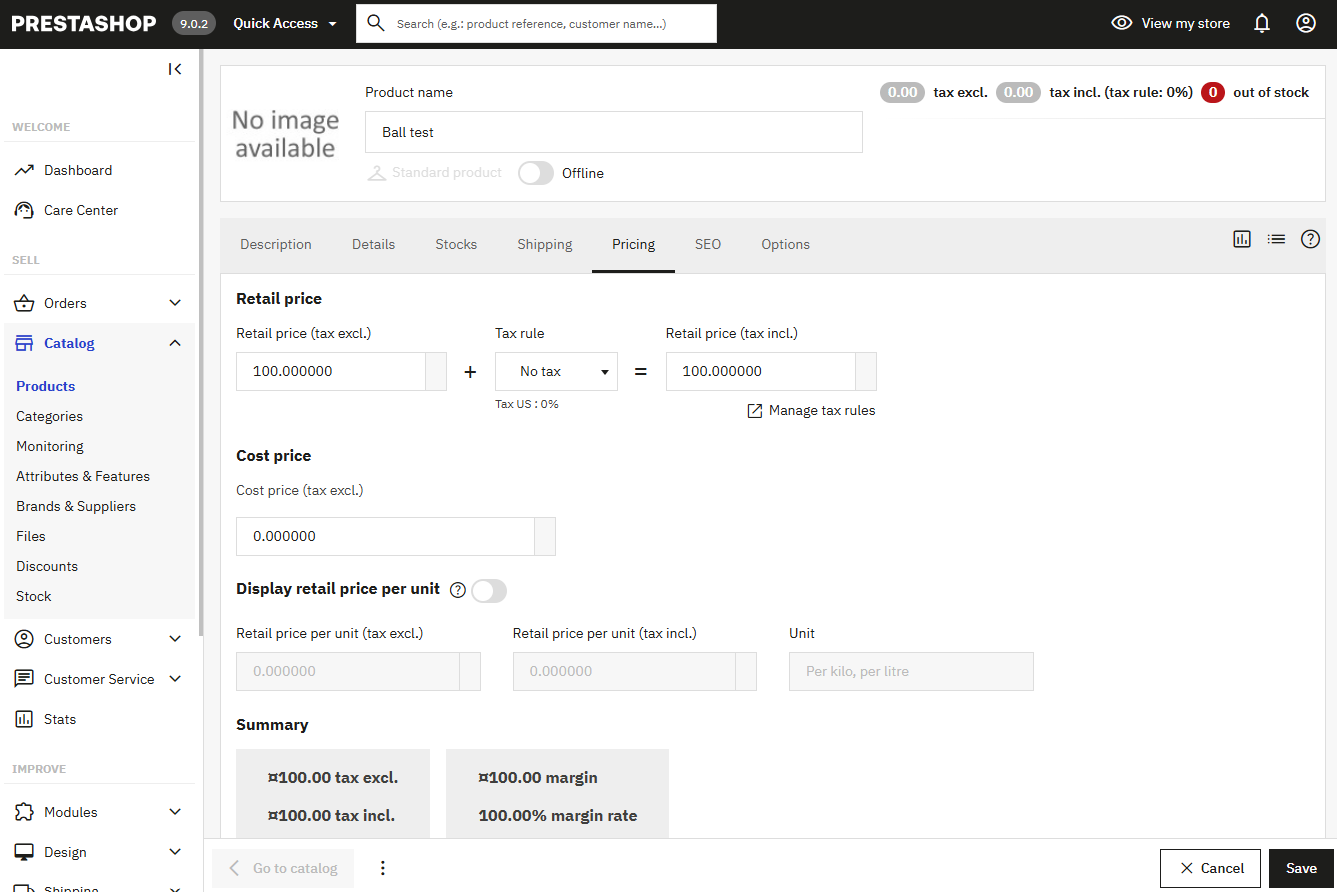
-
Confirm the product now appears in the PrestaShop products list
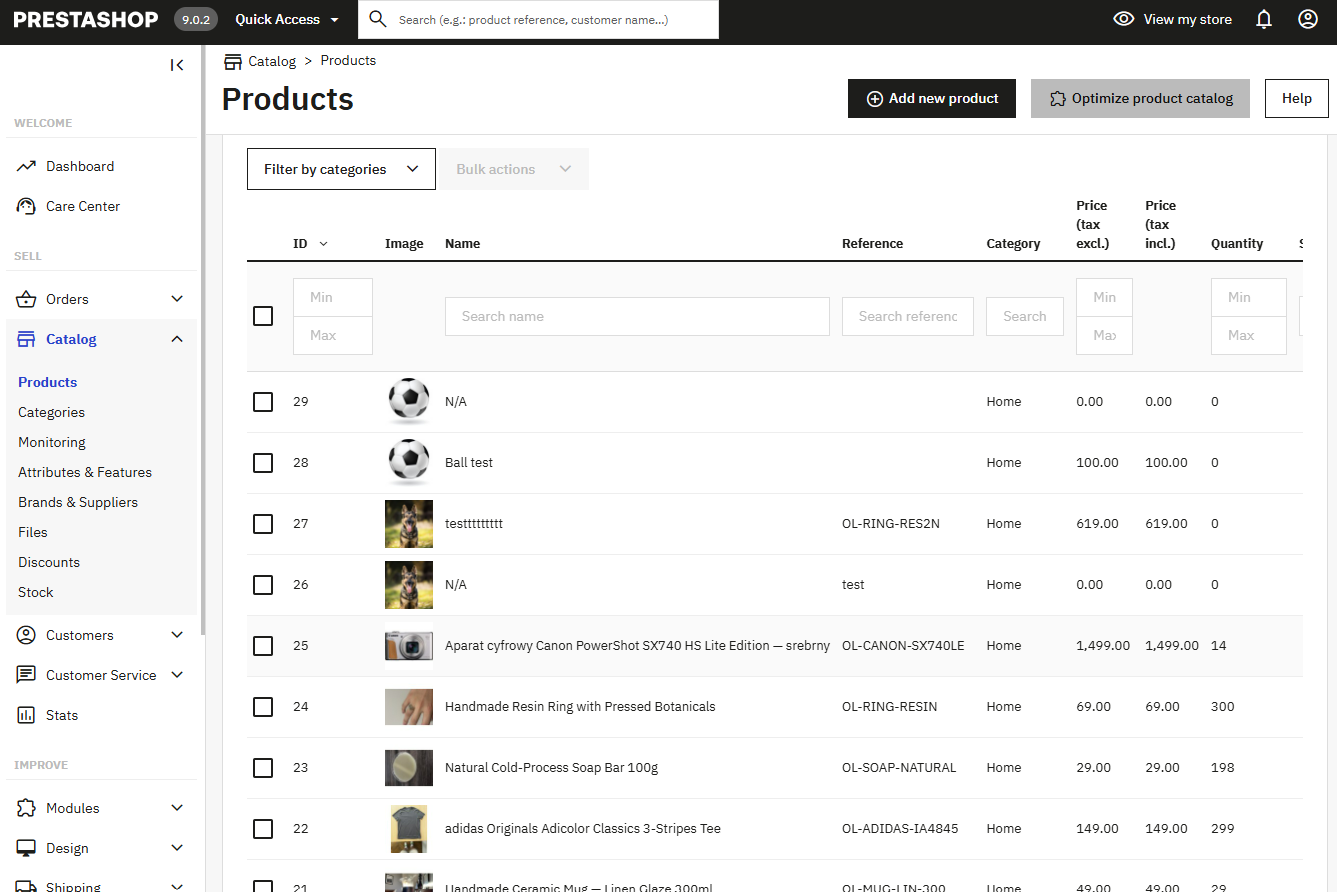
-
Rather than waiting for the next scheduled sync job, force it: on the OL connection detail page → Actions → Trigger sync → job type Sync all products → Trigger
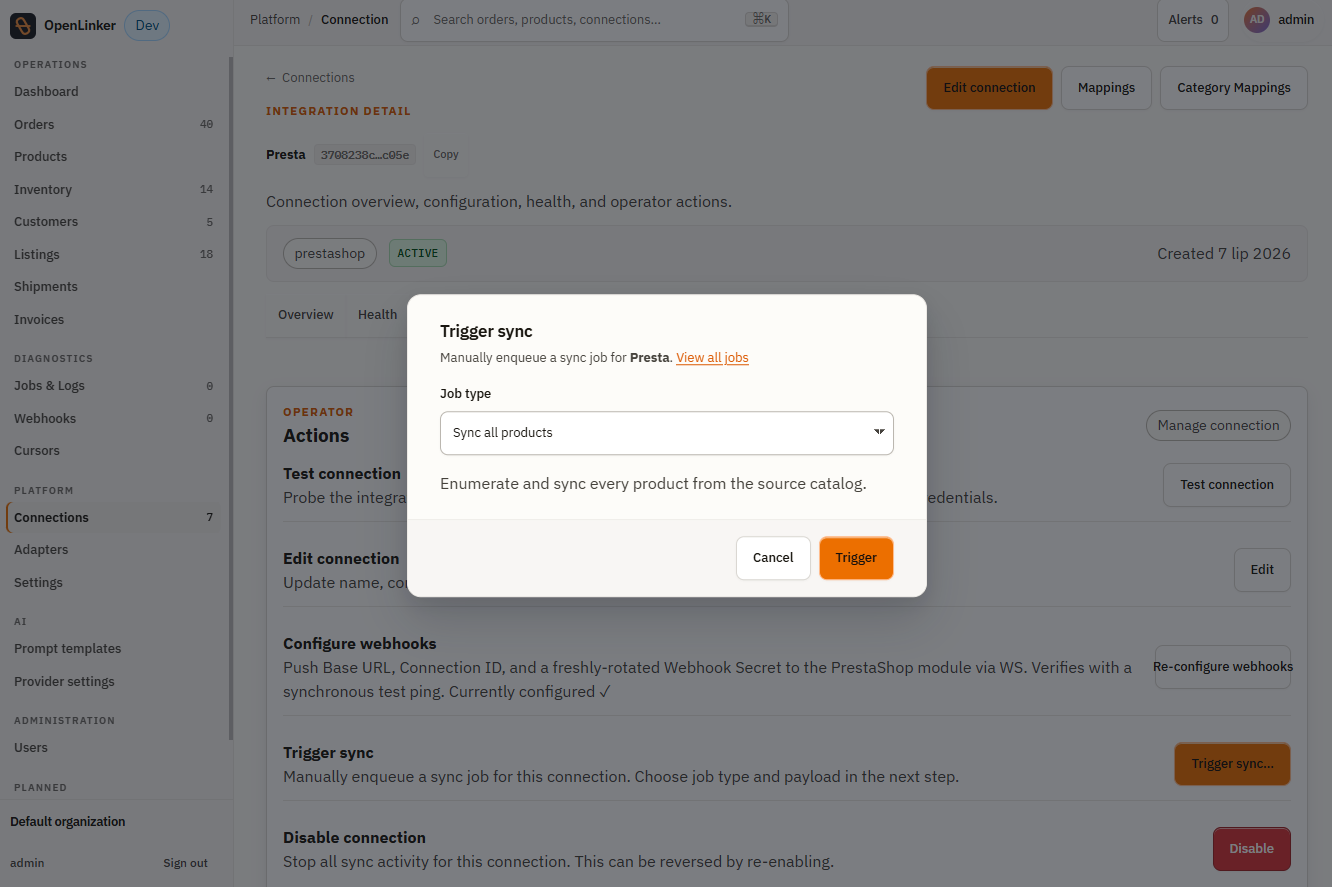
-
Once the job completes (check Jobs & Logs in the left nav), the product shows up in OL’s own Products list
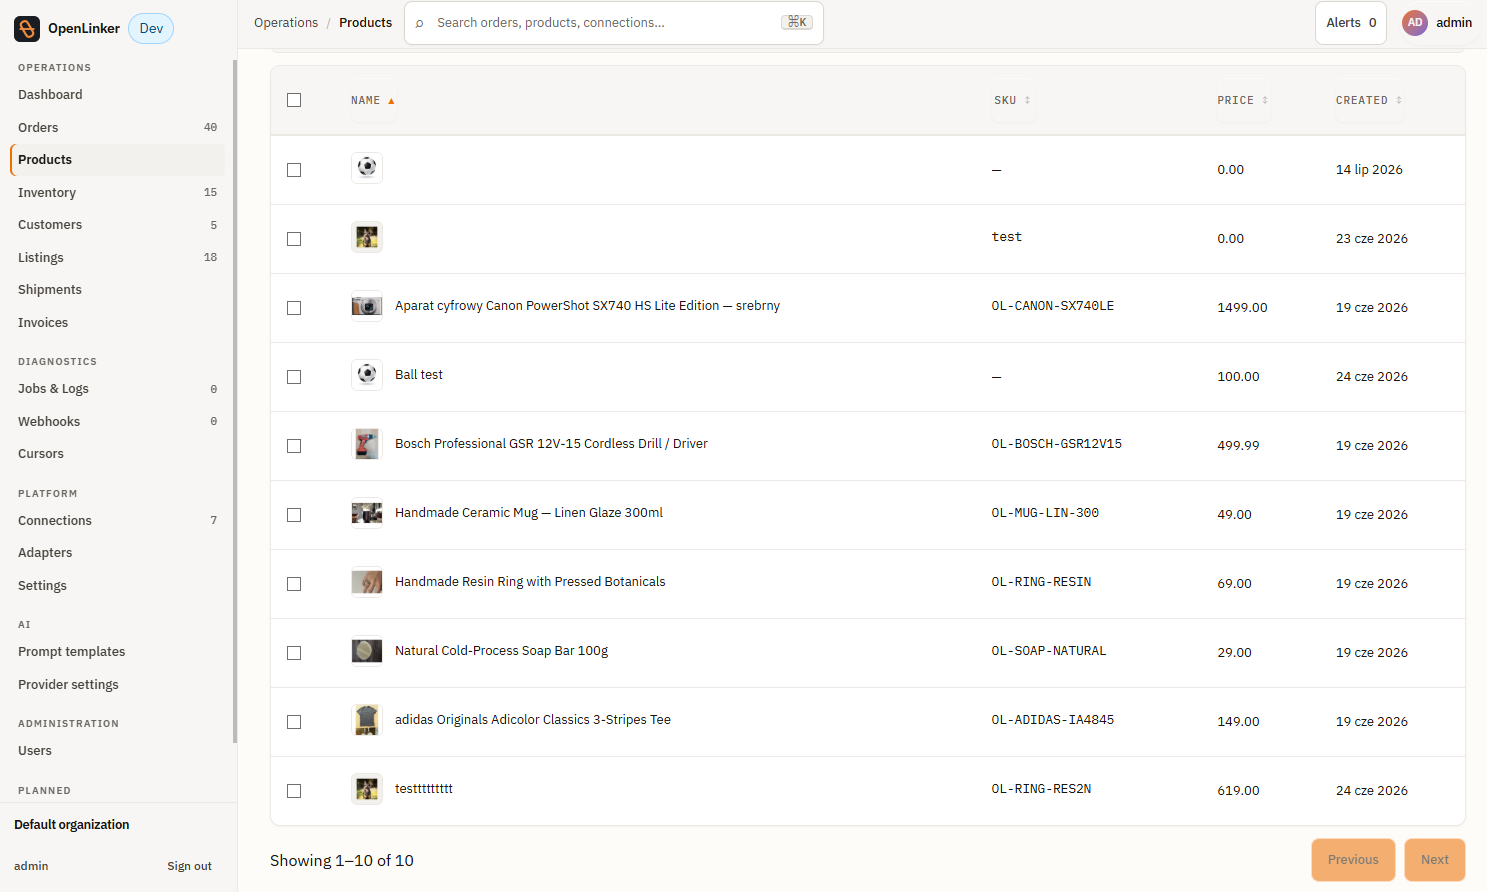
If the product doesn’t appear after the sync job succeeds, re-check that
ProductMaster is enabled on the connection (§3) and that the webservice key
still has View (GET) permission on the Products, Combinations,
and Stock resources (§1).
11. Troubleshooting
Section titled “11. Troubleshooting”| Symptom | Cause | Fix |
|---|---|---|
| ”Configure webhooks” fails | Webservice key is missing Modify (PUT) / Add (POST) permission on Configurations | Edit the key’s permissions in PS Admin → Advanced Parameters → Webservice and retry |
| Test connection fails, but the key looks right | Webservice is disabled, or the key lacks View (GET) on a resource OL needs (products, orders, customers, carriers, categories, currencies, …) | Re-check the permission grid — tick the View column header to grant read on everything |
| Orders fail with “no shipping methods available” | OpenLinker’s cart-build step for that order didn’t complete before order creation, so no shipping-cost sidecar row exists for the cart | Check the worker logs for the failed order’s marketplace.order.sync job; the OL Dynamic carrier fails closed rather than silently charging zero |
| Carrier picked is unexpected / wrong shipping charge on some orders | No explicit shipping-method mapping and no fallback carrier set, and the OL module isn’t installed | Install the OL Dynamic Carrier module (§5), or set an explicit fallback carrier (§2) |
| Order created without expected customer-group discounts/restrictions | guestCustomerGroupId unset — defaults to PrestaShop group 2 | Set Fallback carrier section’s sibling field guestCustomerGroupId in the connection’s advanced config to match your shop’s actual guest group |
| Module install fails with “This functionality has been disabled” | PrestaShop is still in demo mode, or a leftover /install folder exists | Disable demo mode and remove the /install directory, then retry |
| Multi-shop install: “Configure webhooks” pushes config to the wrong shop scope | PrestaShop ≥8.2 multi-store may reject the plain config-write body OL sends; explicit shop-scope targeting isn’t implemented yet | Known limitation for multi-store installs — configure the three module settings (Base URL, Connection ID, Webhook Secret) manually on the affected shop via the module’s own admin page instead |
| Orders not appearing in OL | OL_PRESTASHOP_POLL_SCHEDULER_ENABLED=false and webhooks aren’t configured | Set the scheduler flag to true, or complete §6 |
| Editing the OL Dynamic carrier in PS Admin seems to “lose” its ID | Expected PrestaShop behavior — editing a carrier duplicates the row and assigns a new id_carrier | No action needed; the module automatically detects this and stays in sync. Only relevant if you’re editing the underlying database directly. |