

Listings & Offers
Listings are the marketplace offers OpenLinker manages on your behalf. Each listing is linked to a product variant in your catalog and published to a marketplace (Allegro) via the configured connection. This section covers the listings view, the offer-creation wizard, and category mappings.
For Allegro-specific category parameter details, see the Allegro Setup Guide.
Listings list
Section titled “Listings list”Open Listings in the sidebar (under Operations).
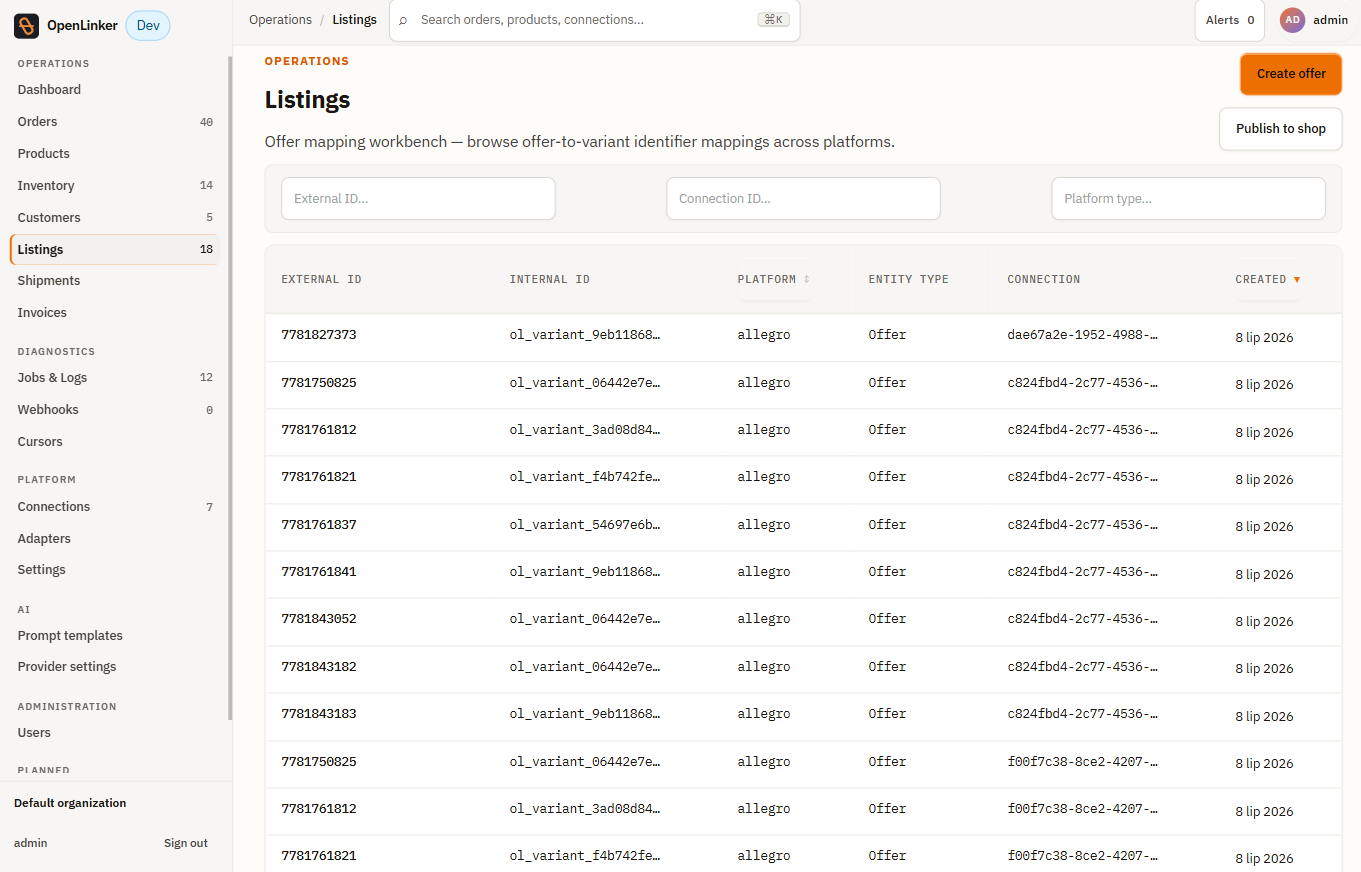
The Listings page is the offer mapping workbench — it shows offer-to-variant identifier mappings across platforms. Each row represents one offer on a marketplace. Columns include:
- External ID — the marketplace’s own offer identifier (e.g. Allegro offer ID)
- Internal ID — the corresponding OpenLinker variant identifier (
ol_variant_…) - Platform — the integration platform (e.g.
allegro) - Entity type — always
Offerfor listing mappings - Connection — the connection UUID this offer belongs to
- Created — when the mapping was recorded
Use the filters at the top (External ID, Connection ID, Platform type) to narrow the list to a specific offer or marketplace account.
Creating an offer
Section titled “Creating an offer”Click Create offer to open the connection picker dialog.
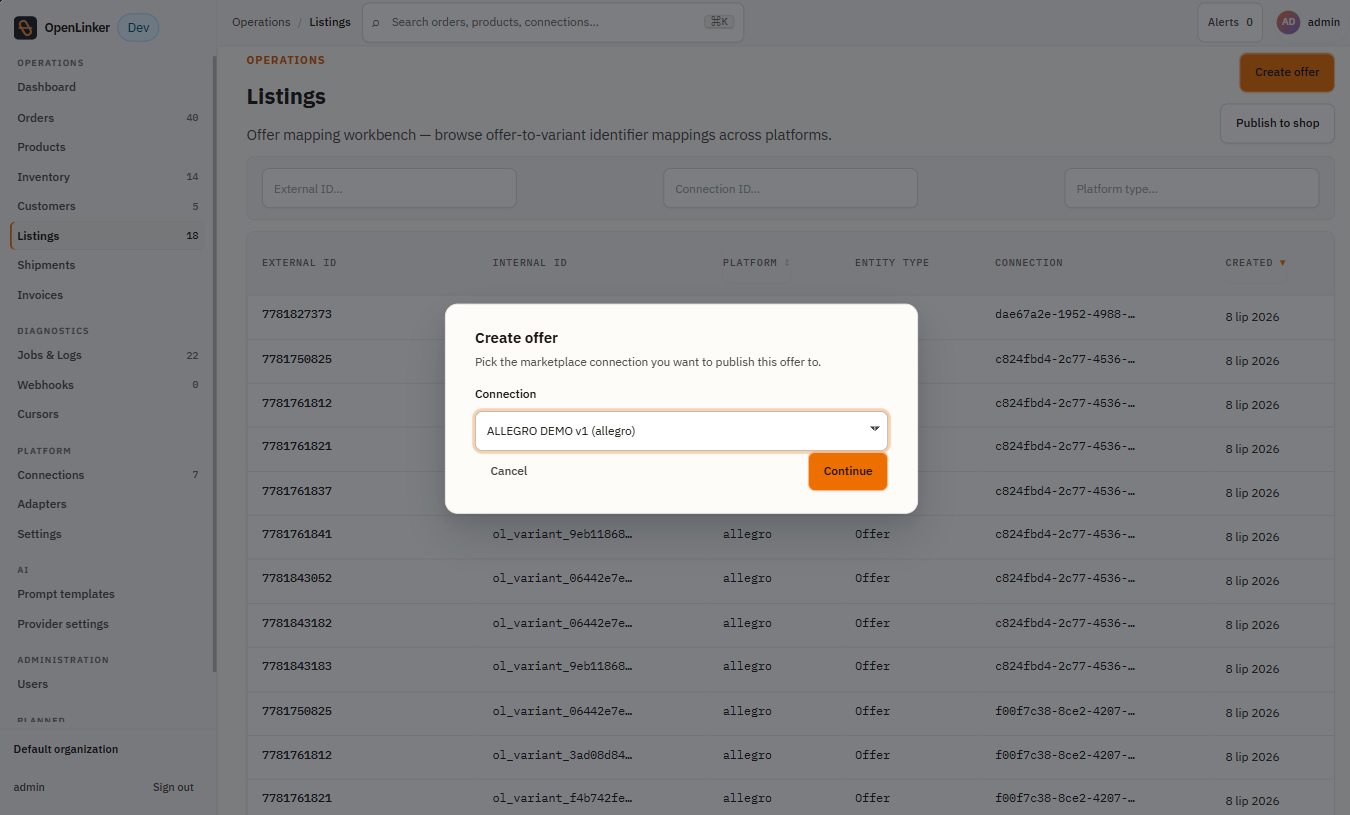
A small modal appears with a Connection dropdown listing your configured marketplace accounts. Select the account (e.g. Allegro (allegro)) and click Continue — the offer-creation wizard opens.
Step 1 — Variant
Section titled “Step 1 — Variant”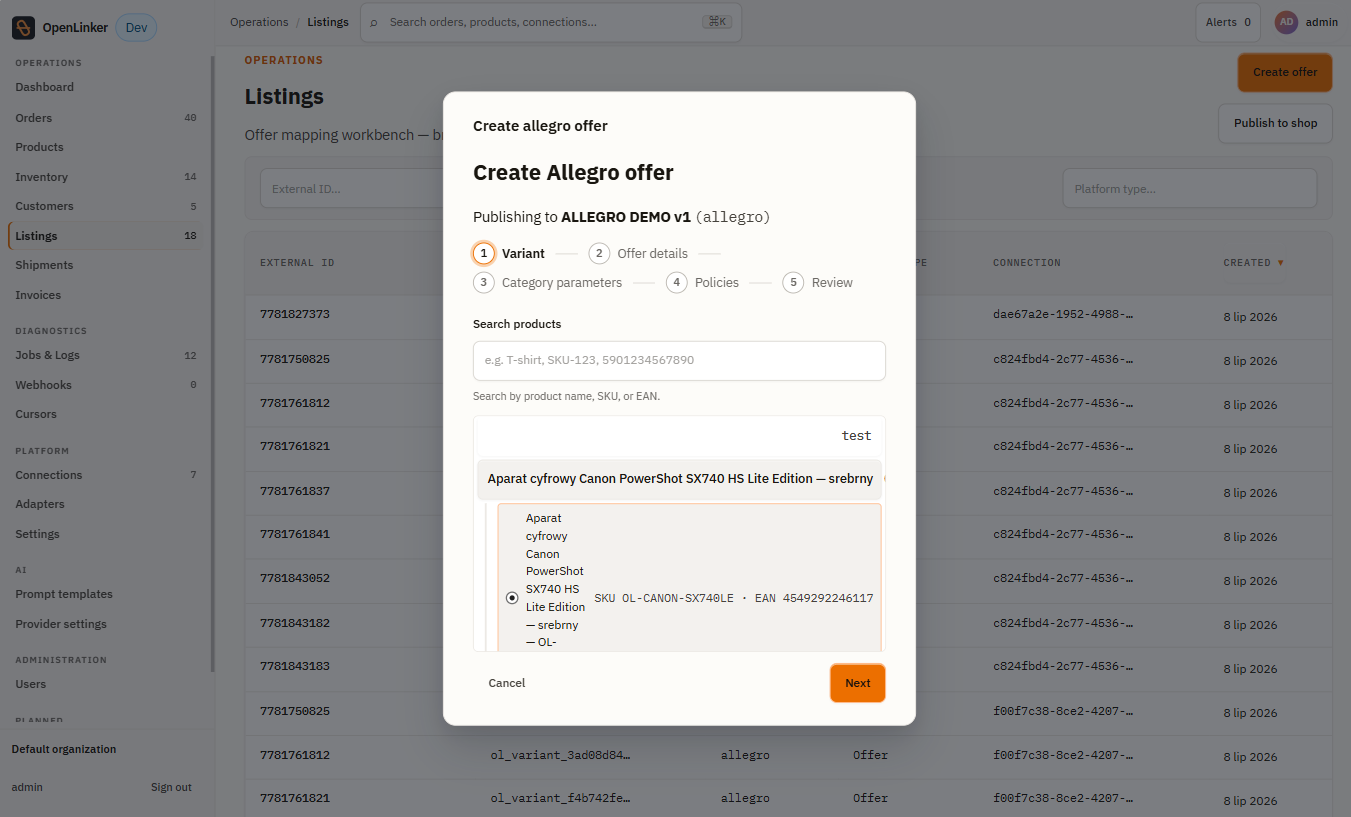
The wizard header shows the 5 steps: Variant → Offer details → Category parameters → Policies → Review. Use the search field to find a product by name, SKU, or EAN. Results show the product name and available variants — select the specific variant you want to list. For multi-variant products (e.g. a ring with multiple sizes), each variant becomes its own Allegro offer.
Step 2 — Offer details
Section titled “Step 2 — Offer details”Fill in the offer details for the selected variant:
- Title — the offer title as it will appear on the marketplace
- Description — offer description. Enable the AI description toggle to have OpenLinker draft a description using the configured AI provider (Anthropic or OpenAI). The draft can be edited before submission.
- Price — listing price
- Stock quantity — starting quantity (defaults to the current master inventory level for the selected variant)
Step 3 — Category parameters
Section titled “Step 3 — Category parameters”Select the Allegro category for the offer and fill in the required parameters:
- Category browser — drill down through the Allegro category tree. Use the breadcrumb to navigate back up.
- EAN barcode lookup — enter the product’s EAN/GTIN. OpenLinker searches the Allegro catalog and, if there’s a unique match, selects the correct category and pre-fills catalog parameters automatically.
- Offer parameters — attributes specific to this listing (e.g. condition)
- Product parameters — attributes that describe the product itself (brand, model, manufacturer code)
If you’ve already mapped your PrestaShop categories to Allegro categories (see Category Mappings below), the wizard may pre-select the category automatically.
Required parameters are marked with an asterisk. The wizard will not allow submission until all required parameters are filled.
Step 4 — Policies
Section titled “Step 4 — Policies”Select your saved seller policies (payment, delivery, return) from the dropdowns. These are fetched live from your Allegro account.
If the product category requires GPSR (General Product Safety Regulation) data, fill in the responsible producer details. This field appears only for categories where Allegro requires it.
Step 5 — Review & submit
Section titled “Step 5 — Review & submit”Review the complete offer before submitting:
- Selected category and variant
- All parameter values
- Offer description
- Starting stock quantity
- Seller policies
Click Create offer to submit. OpenLinker enqueues a marketplace.offer.create job. The offer appears in the Listings list with status activating while Allegro processes it, then transitions to active once live.
Bulk offer creation
Section titled “Bulk offer creation”From the Products list, check multiple product rows and click Create offers to open the wizard pre-seeded with all selected variants. For multi-variant products, OpenLinker expands each submitted product into one offer per variant — so selecting a T-shirt with sizes S, M, L creates three offers, each drawing stock from per-variant master inventory.
Allegro automatically groups the resulting per-variant offers into a single buyer-facing listing in the product catalog when the variants share the same GTIN-based catalog product.
Category Mappings
Section titled “Category Mappings”Category mappings connect your PrestaShop product categories to Allegro’s category tree. Without a mapping, the offer wizard cannot pre-select a category — you’ll need to browse the tree manually for each offer.
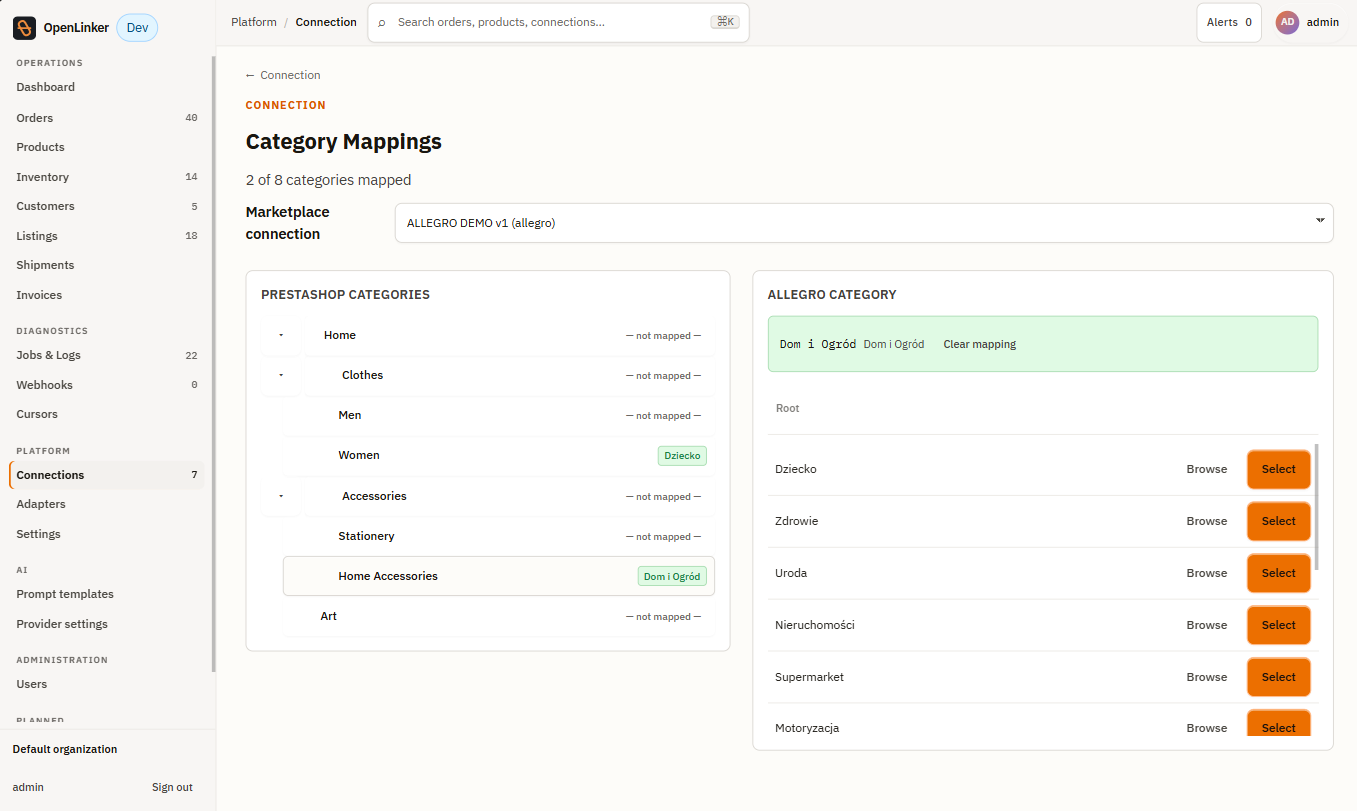
To open the Category Mappings page:
- Go to Connections (Platform group in the sidebar).
- Click your PrestaShop connection.
- Click Category Mappings in the connection’s action bar.
The page header shows how many categories are mapped (e.g. “8 of 8 categories mapped”). It has:
- Left panel — your PrestaShop category tree; each mapped category displays the mapped Allegro category name as a chip
- Right panel — the Allegro category browser, with a Marketplace connection selector at the top to choose which Allegro account’s tree to browse
Mapping a category
Section titled “Mapping a category”- Click a PrestaShop category in the left panel — it highlights and the right panel activates.
- Browse the Allegro category tree using Browse to drill into subcategories.
- When you find the right Allegro category, click Select — a preview bar appears showing your pick.
- Click Save mapping. The row updates to show the mapped Allegro category name.
Changing or removing a mapping
Section titled “Changing or removing a mapping”- To change: click the PS category again, pick a different Allegro category, click Select → Save mapping.
- To remove: click the PS category → click Clear mapping in the preview bar.
Repeat for each category you intend to list products in on Allegro.
What’s next
Section titled “What’s next”With offers live, orders will start arriving from the marketplace:
→ Orders — how to view and track ingested orders